“The HTML table sent in the email from Power Automate is just a mess, its format makes the SharePoint items I’m trying to show really hard to look at in a meaningful way.”
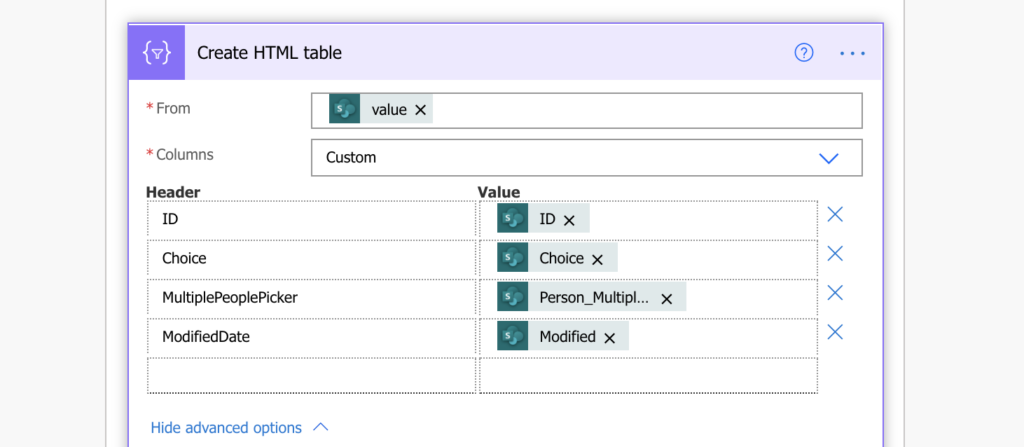
It’s easy to create an HTML table with SharePoint items in a nice, readable format with Power Automate. If you use the ‘Create HTML table’ action, you just input an array with the items into the action and it’ll turn it into an HTML table. Switching to ‘Custom columns’ option you can even define which columns from the SharePoint list should be included.
Once you have the table, you can add it to an email and send it to yourself or your colleagues. But here you’ll notice a small problem for some SharePoint columns, e.g. date with time or multiple choice columns. As you can see on the example below, you wouldn’t call the format of these columns “user friendly”.


To format the data in a more meaningful way, you’ll need a few expressions.
Format the date
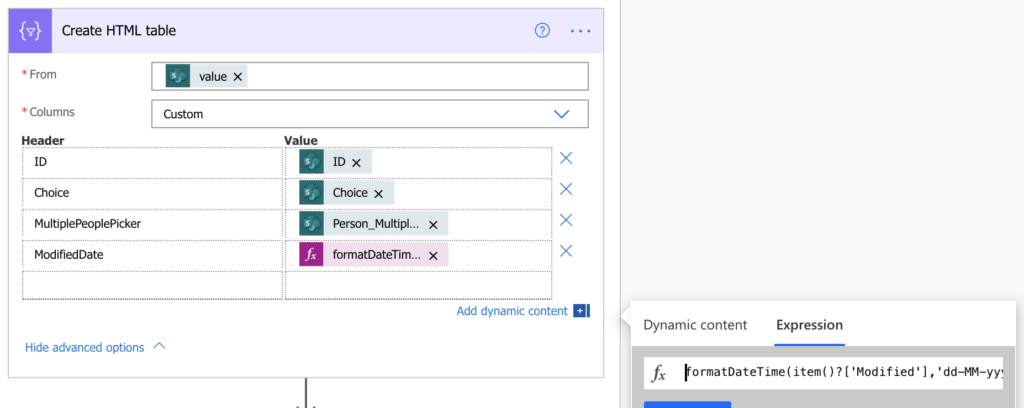
The date uses by default the ISO 8601 format, a useful international standard that’s not easily readable. To display the date in a different way you can use the formatDateTime(…) expression. For example, to display the ‘Modified’ date in ‘dd-MM-yyyy’ format.
formatDateTime(item()?['Modified'],'dd-MM-yyyy')

Note: ‘Modified’ is the internal name of the date column to process. If the date is not a mandatory field, you might need to exclude the empty dates from the formatDateTime(…) expression.
Format multiple choice columns
If it was a single choice / person column, you’d just select the right dynamic content, but it gets more tricky with multiple choice.
Multiple choice columns give you an array of objects: an array of users or selected choices. In other situations you could use the ‘Select’ action, but it’s not possible in combination with the ‘Create HTML action’. This action wants a direct input, you must do all the processing within a single expression.
And it’s the same expression you use when exporting multiple people picker into a .csv table:
e.g. to get comma delimited list of user email addresses from a column 'Person_MultiplePicker':
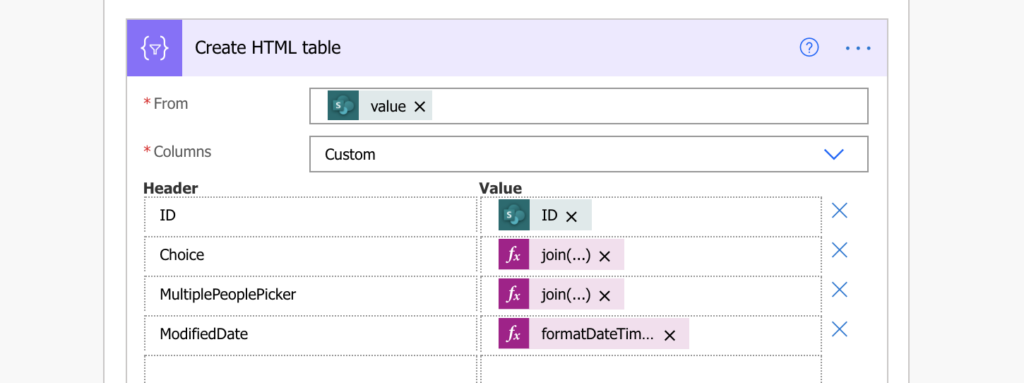
join(xpath(xml(json(concat('{"body":{"value":', item()?['Person_MultiplePicker'], '}}'))), '/body/value/Email/text()'), ', ')
or when exporting multiple choice columns into a .csv table:
e.g. to get comma delimited list of choices from a column
join(xpath(xml(json(concat('{"body":{"value":', item()?['Choice'], '}}'))), '/body/value/Value/text()'), ', ')
If you use an expression for all the “problematic” columns, you can create a nice, easily readable HTML table.


Summary
The ‘Create HTML table’ is a great action that can save you a lot of work. Without it you’d have to build an HTML table manually, you’d need a loop and build the table item by item (similar to the approval history solution). But the downside is that it’ll take the full column data.
If you don’t want to show the full data, you might need to preprocess it with the expressions above. Dates with the formatDateTime(…), multiple selection columns with the composed expression, numbers with formatNumber(…), and potentially also link to the SharePoint item.
Just make sure that you won’t be limited by the 100 items limit in ‘Get items’ action.
Awesome post! You saved me so much headache!
I knew there had to be a way to make this work, been trying for a day. Thank You providing a huge wave of relief that things can work as they should, though it could have maybe been easier by design haha.
I just want you to know how grateful I am with the solution you provided to pull out the emails from the multi select person column. I have been searching for a solution for more than a week now. Thank You!
Its an absolute dream to find your blog, this article helped me with exactly what I was looking for.
I do have a follow up question if you available. Adding this replace code – seemed to have removed the borders of my table so while having a link is exactly what I needed, it can be a bit hard to read the other columns.
Any ideas on how to add them back?
Thanks!