“I’ve got all the items in a single HTML table, but I’d like to include also clickable hyperlink to the items, is that doable with Power Automate?”
The Power Automate action ‘Create HTML table’ should allow you to display data in an ‘easy to read’ format. But as already shown on the multiple people picker or choice SharePoint columns, sometimes it’s not that easy. If you use the HTML table to send data to users, you might need to format them it a bit. And another value that needs formatting is the link to the related item / document. You probably don’t want to send the whole link, and this post will show you how to avoid it.

Note: All the examples below will use a SharePoint list as the data source.
Format the link with HTML tags
Since you’re building an HTML table, you should stick to that format and build the link in HTML format too.
<a href="Link">Text to display</a>Using Power Automate, such a string can be built with the concat(…) expression from the various pieces.
concat('<a href="', [Link], '">[Text]</a>')Replacing the placeholders with actual values, the expression might look like below.
concat('<a href="', item()?['{Link}'], '">Link to item</a>')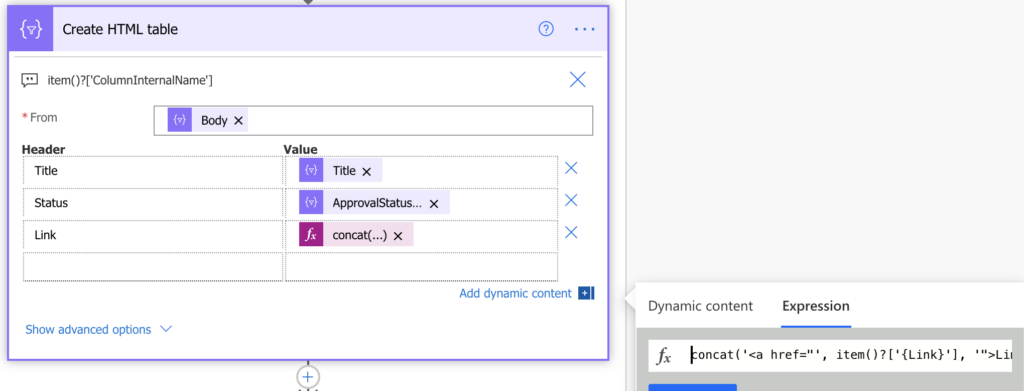
But this is only the first step of the solution. If you end here, you’ll make the link even uglier as you can see below. The action took the string as it is, without applying the HTML tags.
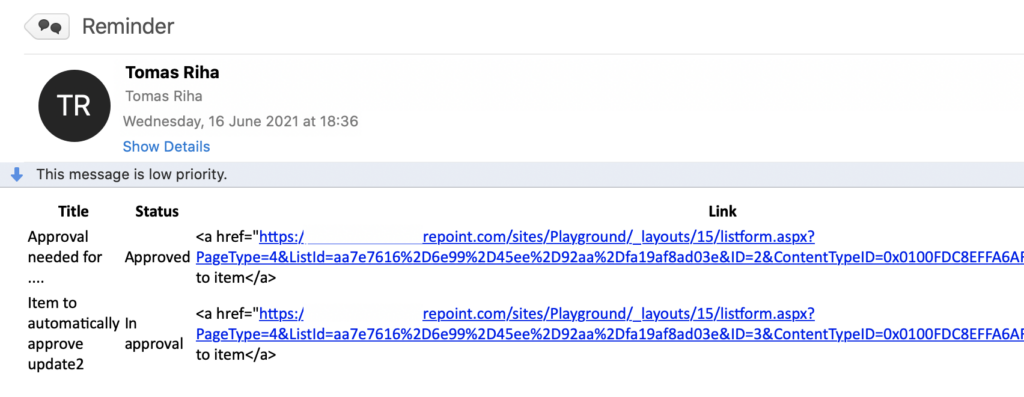
What happened is that the HTML table doesn’t want you to add another HTML tags as they could break the table. To stay safe it replaced the < with <, > with > and “ with ". It’s just another representation for these characters, but it’s enough for the table to ignore the additional HTML code with the hyperlink. That leads to the 2nd step, you must replace the characters back.
Return the <, > and ” characters
To hide the links and show only the text (with link in the background), you must get back the <, > and ” characters. That means using the replace(…) expression on the ‘Create HTML table’ output to replace the <, > and ".
1. replace(body('Create_HTML_table'),'<','<')
2. replace(body('Create_HTML_table'),'>','>')
3. replace(body('Create_HTML_table'),'"','"')
or all together in a single expression:
replace(replace(replace(body('Create_HTML_table'),'<','<'),'>','>'),'"','"')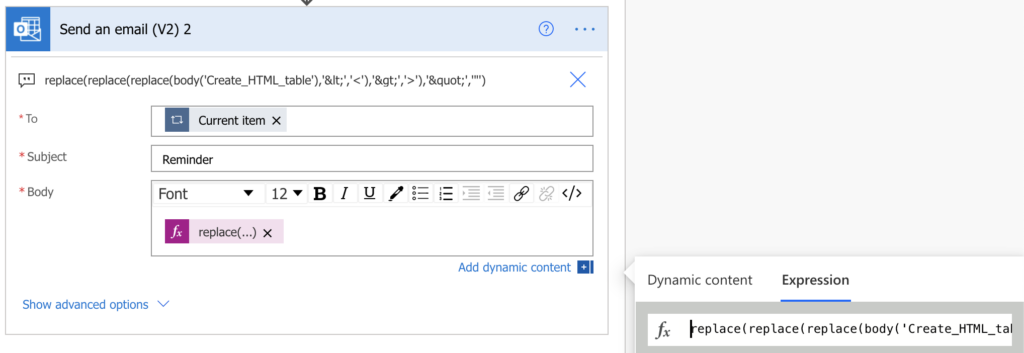
Use another dynamic content as the text
Now, when you know how to hide the link behind a text, you can adjust also the text itself. The easiest way is to have a static text for the link, but it’s not necessary. You can use another dynamic content as the text too, just add it to the concat(…) expression, e.g. the item title.
concat('<a href="', item()?['{Link}'], '">', item()?['Title'], '</a>')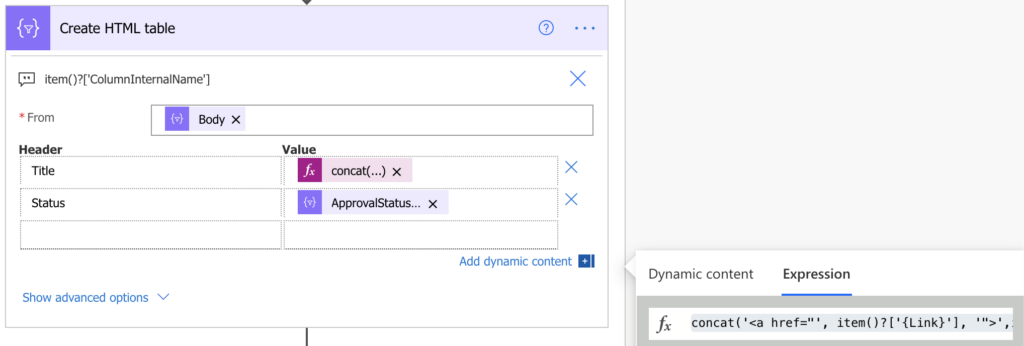
Summary
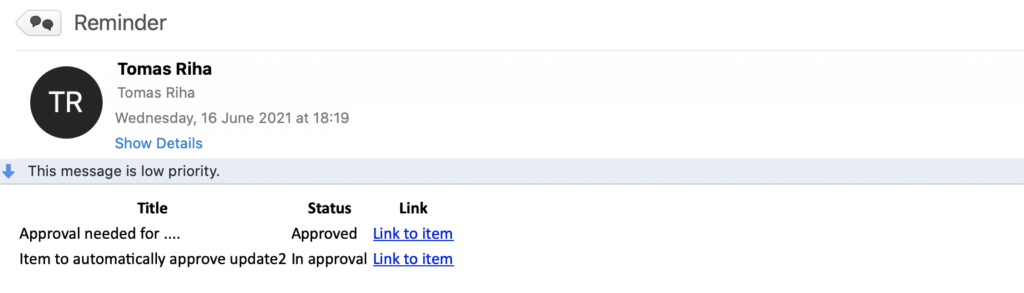
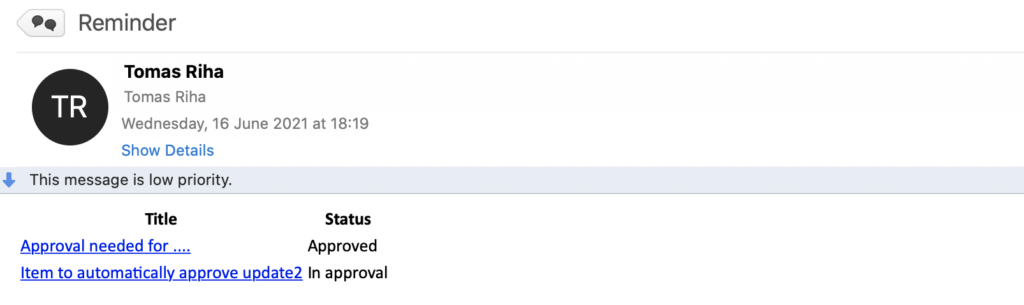
I’d say this post is an addition to the previous post on formatting the HTML table. When you use Power Automate to send reminders or reports with an HTML table, it makes sense to include also hyperlink. It’ll change a purely information email into an actionable email, and the recipients will save a lot of ‘search time’. Quick overview of the most important values and a link to see them all.
Excellent solution, thank you!
This is EXACTLY what I was looking for. Thank you!
This is great, I have a need to add multiple attachment links per item. How is that processed/ how would I process that?
Hello Tom,
you’d use the same approach, but you’d have more rows in the ‘Create HTML table’ action where you build the additional links in the same way with the concat(…) expression.
Thank you so much!
Not sure where you are saying we put the replace, replace commands in. If I do in the body of the email, I still get the long URL. And then where do you ever pull the output from as in the replace, replace command you gave, I see reference to create html table but nothing about the output.
Hello Oscar,
the long replace(…) expression should be in the email body, but for it to do anything you must use also the concat(…) in the ‘Create HTML table’ action that’ll prepare the string with the characters to be replaced.
Hi Tom, first of all congrats for the post.
Second thing: I did exactly what you said. An email is sent out with the Custom HTML table and the hyperlinks created the way you state, including the replace replace replaces, etc.
But once it arrives to my Inbox, be it Gmail or Yahoo, the links are simply not clickable . Or when clicking on them, nothing happens. No browser page gets opened with the link.
And this happens in Gmail , or Yahoo, and using them from either my Desktop Outlook or via browser.
Any idea?
Best,
Alex
Hello Alex,
the links are build using HTML coding so every client that supports HTML emails should handle them. I’m surprised that it doesn’t work in the clients, does it look like a valid HTML when you check the email code?
You are brilliant!
I just copy paste and got a perfect working solution.
Thank you very much for all the content you share.
Awesome blog! You saved me much hair
So appreciate your help! I googled when I got stuck, found this page, and had done everything you did already up until you said “But this is only the first step of the solution.” Thanks for helping me cross the finish line!!
Awesome! Just what I needed!
Thank you for posting this; it’s great.
Thanks for this, super helpful.
I was wondering how you would also apply a colour? For instance if you have a Priority column and want Critical items in red, High in Orange and Low in Green?
Thank you
Hello Donna,
it’s doable with a condition, take a look on this blog post where I change colours depending on the result of a calculation: https://tomriha.com/format-results-of-date-calculation-in-sharepoint-column/, in your case you can just check the value of the column, e.g.
“style”: {
“color”: “=if(@currentField == ‘xxx’, ‘#00FF00’, if(@currentField == ‘yyy’, ‘#FFA500’, ‘#ff0000’))”
}
Awesome! Just exactly what I needed.
Just found this and it’s a huge help! However, when I enter the replace(replace(replace line into the expression box, it says the expression is invalid. Any ideas?
Hello Dee OD,
no ideas as I don’t know what exactly did you enter in the expressions box.
Hi Tom! I´m amazed how clear you´ve made this post.
I´ve tested it with the function “Get Item” just to get one entry of data and it worked perfectly.
Now I´m struggling with the function “Get Items” when the output is multiple registers and multiple URLs.
How did you pass the data to the HTML is not clear.
I´ve searched through your blog, but couldn´t find a way to do it.
I´ve done it with this flow: “Get Items” > “Select” > “Initialize Variable” > “Create HTML Table” automatic columns > “Append to string variable” > “Teams Message in a chat”
But when i put the selected values as custom values for columns on the HTML Table, it makes it inside a “For each” and i cannot format the HTML as you teaches.
The hyperlink worked as expected and the automated email looks so much better now. Thanks for sharing this!
I do have question… how did you figure this out? Was it through trial and error or did you refer to some other document that pointed you in the right direction? I am curious to know because I would not have figured this out on my own.
I’m trying to create a link to go to an event on a calendar in Outlook within the HTML table of Power Automate workflow but can’t seem to figure out the right syntax for it. Any idea on how to do that would be appreciated.
Well done! Thank you for sharing this.
I also have a compose step to format the table using css. When inputting the replace formula in email body I getting the table added twice. one with raw html link and one with the link shortened properly.
Hello Nate,
if it’s twice in the email then you must use it twice in the flow, maybe it’s included also in the css ‘Compose’?
This is exactly the detailed explanation with example I was looking for. Thank you so much.
I appreciate this detailed solution.
I recently found another use case and could NOT make it work again and I was really banging my head against the wall. The difference was that I was using the ‘new’ designer in Power Automate. Switched back the ‘old’ one and it worked fine.