“I’d like to add some colours to an HTML table, can Power Automate use different colours based on the cell value?”
The basic HTML tables created by Power Automate are very simple. Just a combination of black and white, without any colours. If you want to change the design, you’ll have to add some styling by yourself as described in this article by Paul. But that’s formatting of the whole table where every cell will look the same. What if you want to add additional colours based on the cell value? For example, use the red colour for items with a due date more than 3 days ago?
Add a conditional HTML formatting
To change the format you’ll need two things – a condition to evaluate the value, and HTML code to change the colour if the condition is true.
Since you can’t preprocess the data for the HTML table, the condition must be done using the if(…) expression. Start by checking the value, e.g. if it’s more than 3 days ago.
if(Date < Today - 3, <ifTrue>, <ifFalse>)Extending the previous article on sending reminders, it might look as below. If you’re not sure what the condition should look like you can use the ‘Filter array’ action to build it.
if(less(item()?['Date'],addDays(utcNow(),-3)), <ifTrue>, <ifFalse>)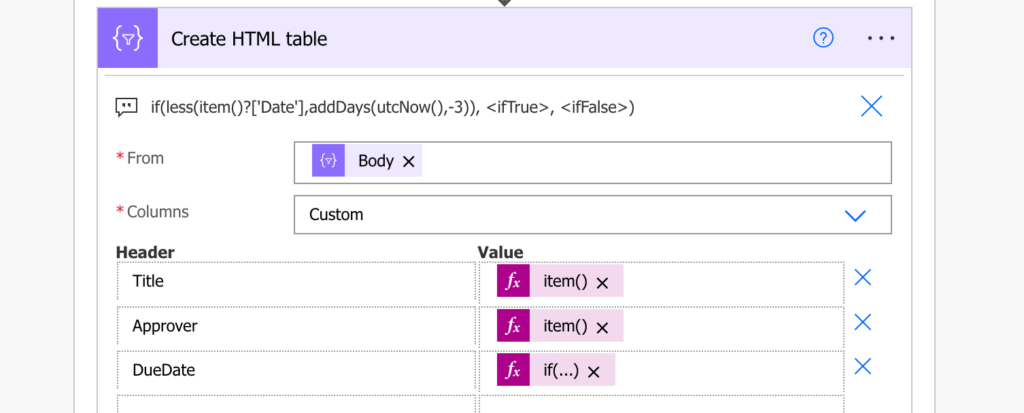
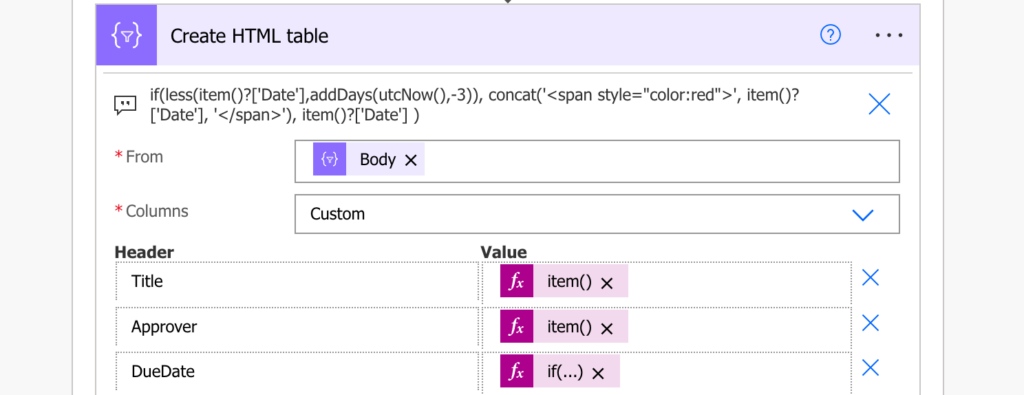
Now it’s time to add the formatting. It’ll be the same approach as when adding hyperlink to the HTML table, you must add the HTML code. Below is a piece of code that’ll display the ‘text to show in red’ in the red colour.
<span style="color:red">text to show in red</span>That’s the piece of code you must add in the <ifTrue> part of the condition. Use concat(…) to separate the fixed html tags from the dynamic value.
if(less(item()?['Date'],addDays(utcNow(),-3)),
   concat('<span style="color:red">', item()?['Date'], '</span>'),
   <ifFalse>
)
For the <ifFalse> outcome use the value as it is, there’s no need for any special formatting.
if(less(item()?['Date'],addDays(utcNow(),-3)),
   concat('<span style="color:red">', item()?['Date'], '</span>'),
   item()?['Date']
)
If you use such expression in the ‘Create HTML table’ action it’ll add all the necessary HTML tags to the email. But it’ll add them as a text, not as a code.
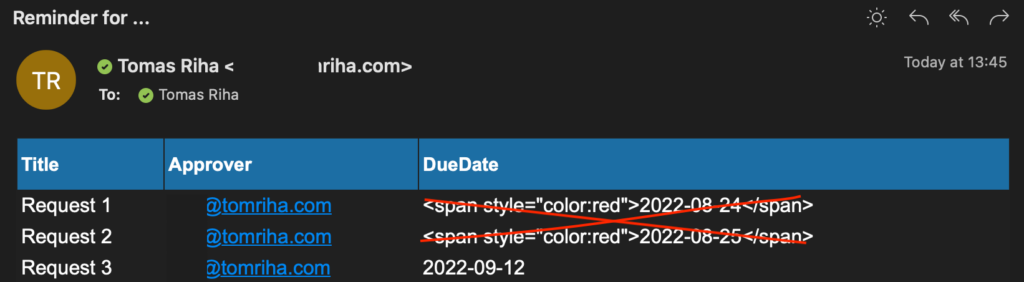
To convert them into a code you must replace some of the special characters as explained in the hyperlink article.
replace(replace(replace(body('Create_HTML_table'),'<','<'),'>','>'),'"','"')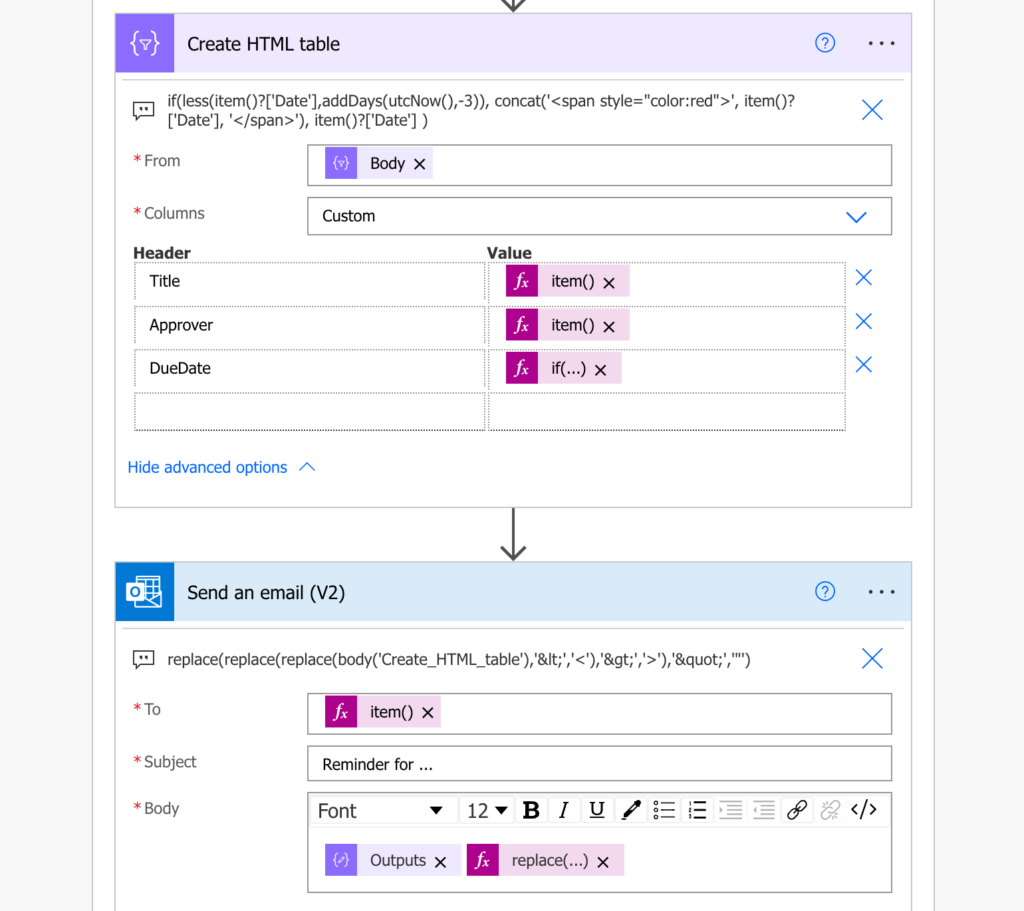
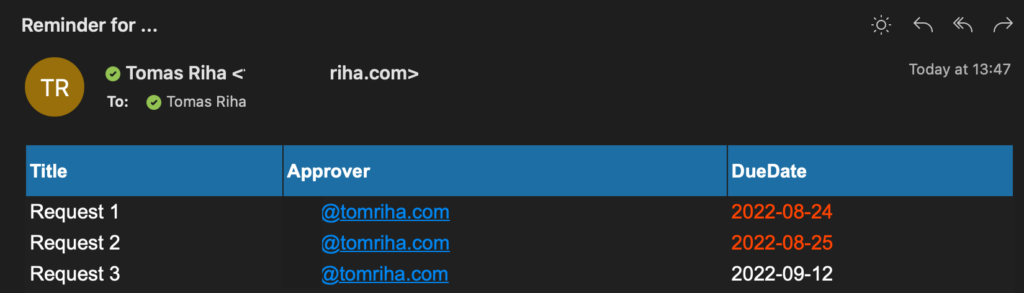
The result will be a nicely formatted table with a different colour based on the condition result.
Summary
When you create an HTML table in Power Automate, you don’t have to stick to the plain table, you can add also some colours. You can add a colour schema for the whole table, and you can also change colours based on the values.
Since you can’t do any preprocessing before creating the table, all the logic must be in the action itself. An if(…) condition to evaluate all the values, and a piece of html code to add to some of them. Turn it back from text into code using a few replace(…) expressions and you’ll get much more colourful tables.
And if one colour is not enough, you can use more of them!
Hi,
This is an awesome article. He helped me achieve what I was looking for. I could use some additional help though. My input to the Create HTML is based on items expiring in 45 Days. I would like my output to reflect:
items expiring in 30 Days = Orange
items expiring in 20 Days = Red
Everything else outside this date range = Green
I have the following expression working great but only for items expiring 30 days (orange). How do I include additional script in this expression to capture items expiring 20 days (red).
If (empty(item()?[‘EndDate’]), ”, if( lessOrEquals( item()?[‘EndDate’] , addDays(formatDateTime(utcNow(), ‘yyyy-MM-dd’), 30, ‘yyyy-MM-dd’)),
concat(”, item()?[‘EndDate’], ”),
concat(”, item()?[‘EndDate’])))
I really appreciate your help with this,
Thanks
Rob
Sorry that was no the full expression. This is the one i have working for me.
If (empty(item()?[‘EndDate’]), ”, if( lessOrEquals( item()?[‘EndDate’] , addDays(formatDateTime(utcNow(), ‘yyyy-MM-dd’), 30, ‘yyyy-MM-dd’)),
concat(”, item()?[‘EndDate’], ”),
concat(”, item()?[‘EndDate’])))
Hello Rob,
if there’re more options you’ll have to use multiple if(..) conditions inside each other starting from the most limiting one – if the first one fails, it’ll check the second one etc.
if(lessThan20, RED, if(lessThan30, ORANGE, GREEN))
Hi, thank you for this article! I’m new to Power Automate and I was hoping you can help me with a similar problem. I’m sending a list of upcoming tasks in a HTML table and would like to have conditional formatting on the background colour of the rows using the following rules:
if the DeadlineDate is within 5 days, orange
if the DeadlineDate is before or on today, red
Otherwise background colour is green
The deadline date is formatted as dd/MM/yyyy.
I’d be grateful for any support you can offer!
Hello Molly,
I never did that and I think it’ll be more complex than this solution. Since it’s the whole rows you’d have to go one level higher in the HTML code to format the table so it would have to be somewhere else than in the ‘Create HTML table’, probably some crazy expression somewhere later, although I can’t tell you what it’d look like.
Thanks for posting this article. I’m trying to do conditional styling, but my expression isn’t working. Could you help me with the expression please?
I posted my question on the Microsoft Power Automate Community forums, but the response I got isn’t what I’m looking for. This is my question: https://powerusers.microsoft.com/t5/Building-Flows/How-do-I-write-an-expression-to-add-conditional-formatting-to-a/m-p/2242825#M248864
The expression is in bold text.
The table is eventually going to be converted to just text, so that’s why I need the headers. Thank you!
Great article and very simple to implement. I will point it out that you have to do something similar even if you do not need a conditional formatting but instead formatting on a specific column or rows.
Great article Tom, I need highlight a row in a simple HTML table which has 2 columns if the value in the second column is greater than zero. Could you please advise. Thanks Pete 🙂