“I’d like to add some colours also to the HTML table header, not only the rows, is that doable in Power Automate?”
Following on the previous article on adding different colours to HTML table based on values, this article will explain how to set colours also in the header. If the cells can be colourful, why not do the same with the header?
Add HTML style in the Header column
Similarly to changing the row colours, you’ll have to add a piece of HTML code to the header. And since the headers are the same for the whole table, it’ll be much easier. Instead of entering just the column name use the code below to change the text colour, e.g. to make it blue.
<span style="color:blue">HEADER NAME</span>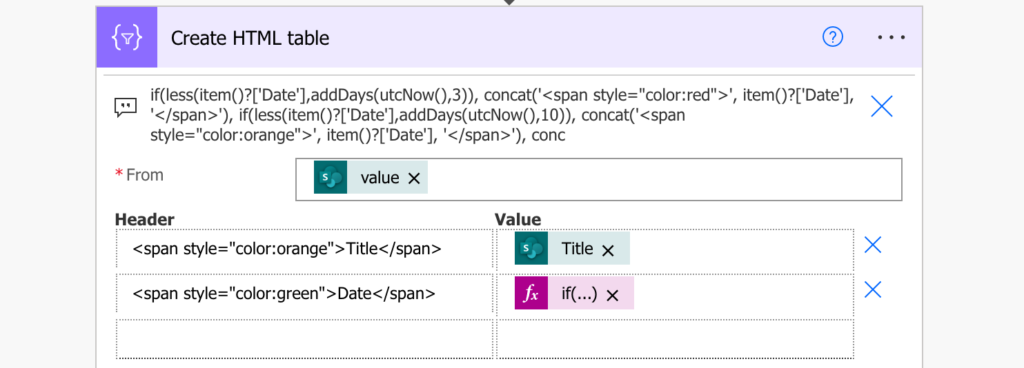
Note: the action probably won’t allow you to enter the space between ‘<span’ and ‘style’. You can overcome that if you prepare the header in a text editor and copy/paste it in the field.
Once you have the headers use the expression to correct the HTML tags and send the table in an email.
replace(replace(replace(body('Create_HTML_table'),'<','<'),'>','>'),'"','"')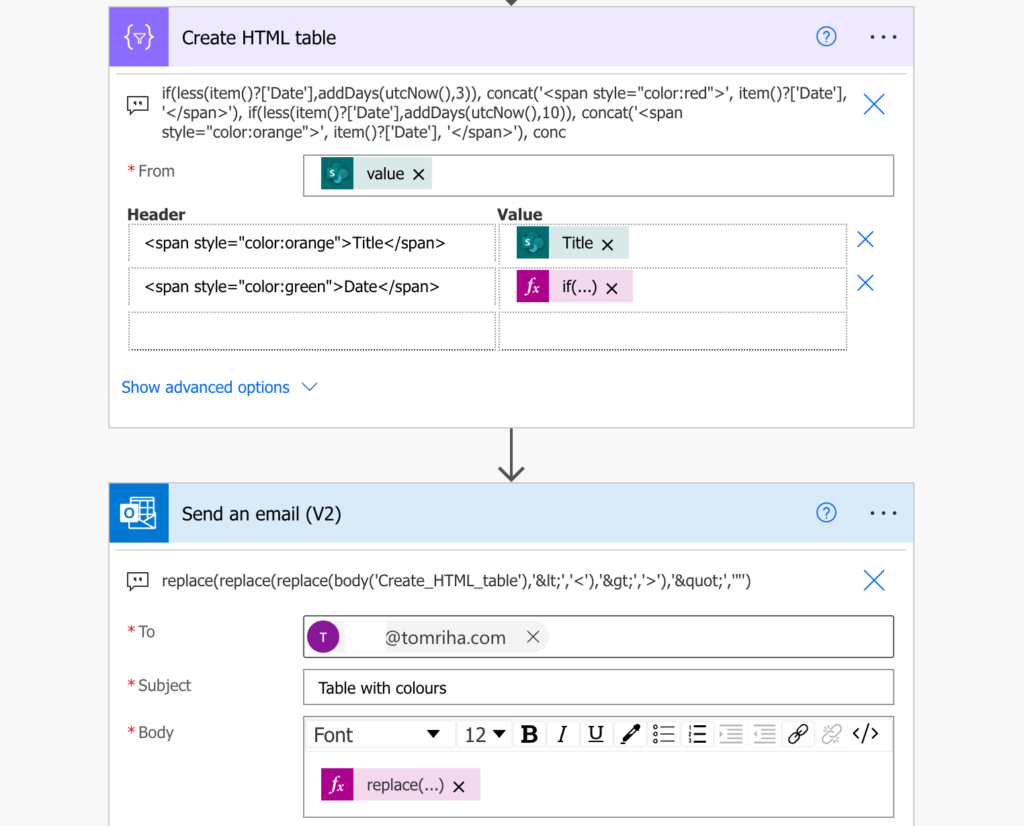
Summary
When you create HTML table in your Power Automate flow, the ‘HTML’ part is important – to add colours to the header or the rows you must add some HTML styles. It’s easier with the headers as the headers are always the same: add the code in the Header field, restore the HTML tags in the email, and send it.
Just keep in mind that the style is applied only on the values between > and <, and as such it’ll change only the text colours. If you’d like to format the whole table check Paul’s article with an explanation.