“I’m sending the approval history table in the notification emails, but can I somehow add it also in the Power Automate approval tasks?”
If you followed the older article on displaying approval history in a nice, easy to read way, you can send it in an email, display in a SharePoint list view, or in a Power App. But there’s one more place that would benefit from such a quick overview – the following approval tasks. When somebody receives a task created by the Approvals feature, he might be also interested in the previous approval steps. Who approved before him, and what was his comment?
Yet you can’t use the HTML table in the task as it uses a different programming language called markdown. How do you then add such table in the task? What should it look like?
Prepare the table together with the HTML one
While it might be tempting to convert the HTML table into a markdown one, it’d be a very complicated process. They’re just too different. That’s why you should store them separately – in a separate SharePoint column and in a separate Power Automate variable.
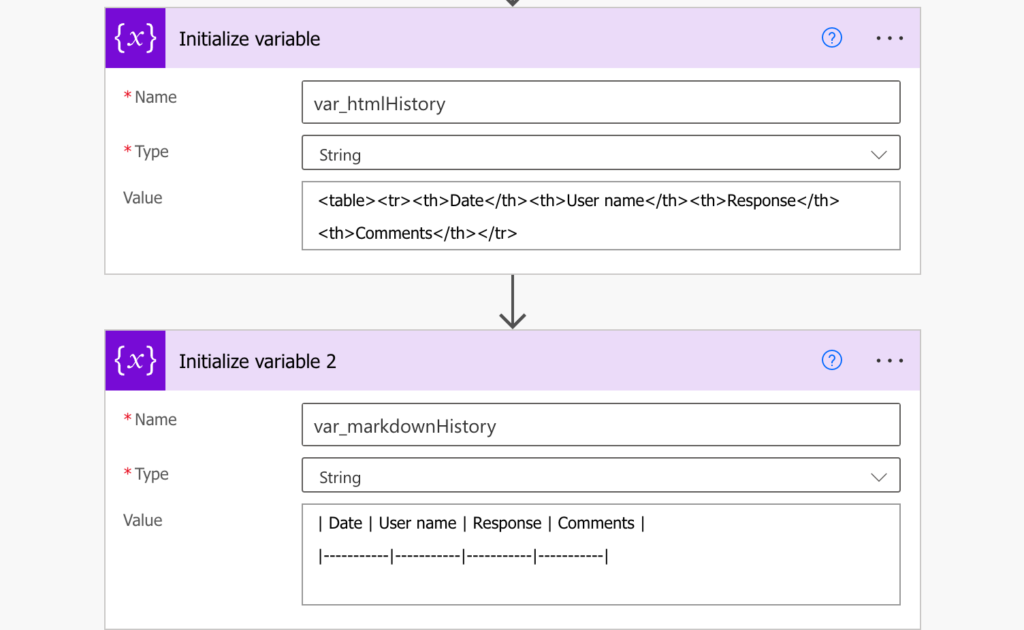
Instead of initialising just one variable for the approval history, initialise two – one for HTML table and another one for markdown table. Use the ‘Initialize variable’ actions to define the headers for both the tables. The markdown one expects the header below.
| Date | User name | Response | Comments |
|-----------|-----------|-----------|-----------|
Don’t forget to add a new line (press Enter) at the end of the markdown table!
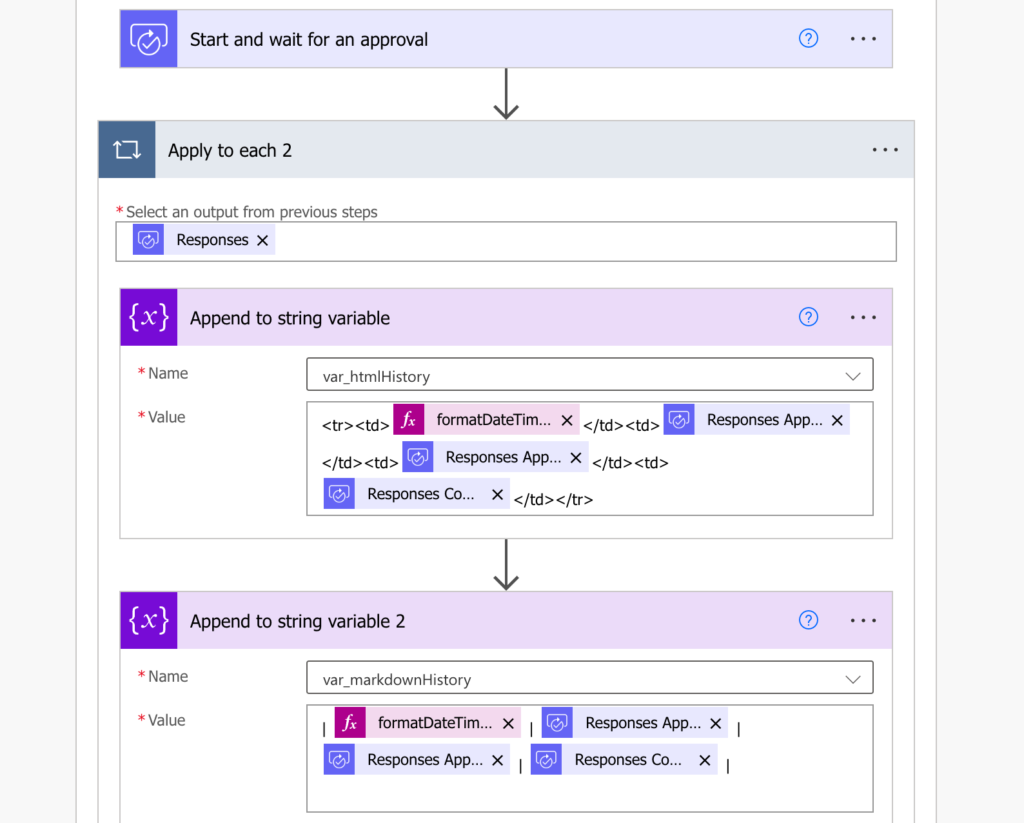
The rest of the process is the same as with the HTML table, you just have to do everything twice. After each approval task add the history not only to the HTML table, but also to the markdown table.
Markdown table lines look like this:
| <column1value> | <column2value> | <column3value> | <column4value> |In my example where the task response is evaluated inside ‘Apply to each 2’ it would be:
| @{formatDateTime(items('Apply_to_each_2')?['responseDate'], 'yyyy-MM-dd HH:mm')} | @{items('Apply_to_each_2')?['responder/displayName']} | @{items('Apply_to_each_2')?['approverResponse']} | @{items('Apply_to_each_2')?['comments']} |

Again, don’t forget to add a new line at the end of the markdown history! Just press Enter after the last | character.
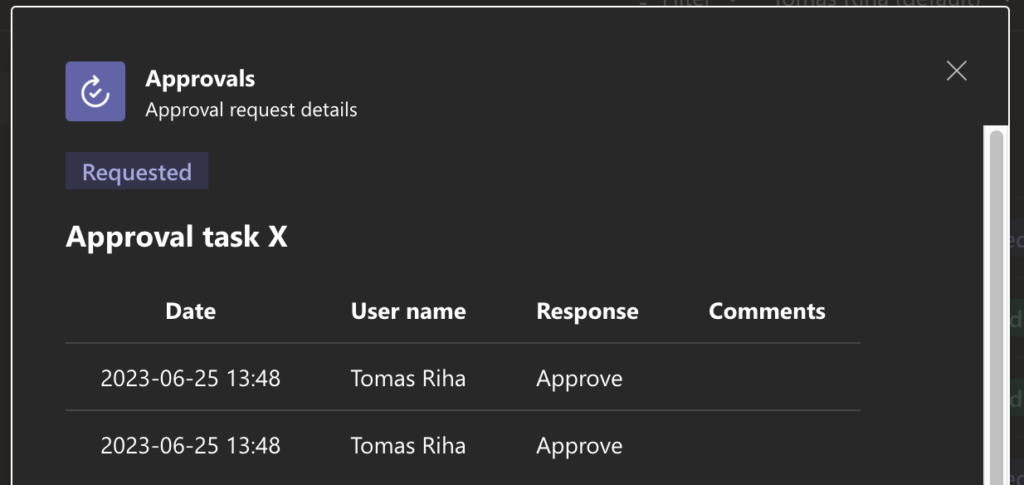
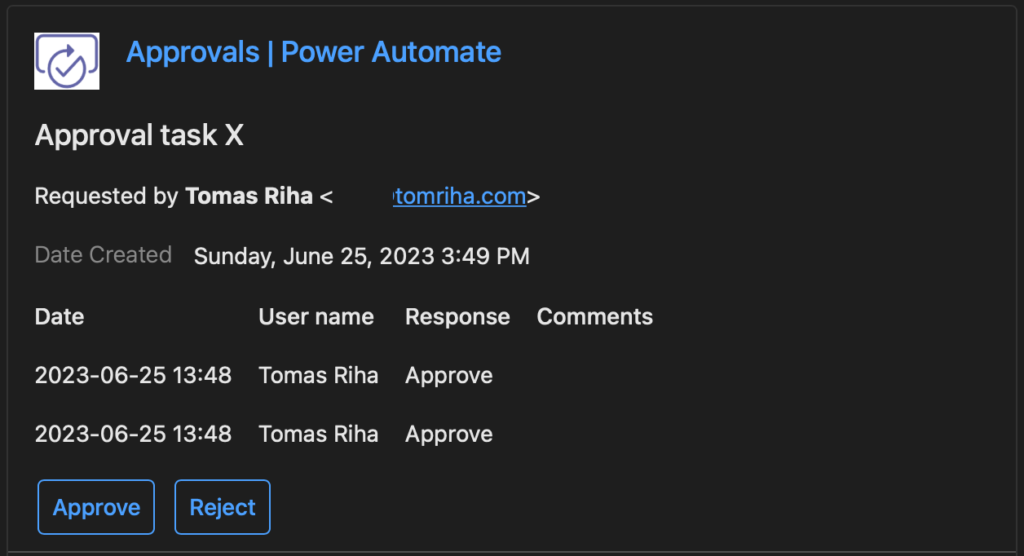
All that’s left is adding this history into the approval task Details and approvers will see it as part of the task…

… in Teams…

… or in an email.

Summary
You can show approvers the previous approval history directly in the tasks, you just need to extend your Power Automate flow a bit. Since the Approvals use different language than emails or SharePoint views, and the conversion would be very complicated, I’d recommend adding new variable. Another place where you’ll build the history in the format expected by the approval task which you can later use in the task Details.
“Again, don’t forget to add a new line at the end of the markdown history!” what is this(a new line) mean? thanks.
Hello Jerry,
that means pressing the ‘Enter’ button after you enter the last |.
Hey, This has been great so far but I a 5 separate manual approval workflows. I would like to insert this table/data in the approval request in another workflow. I’ve tried the html to text but the format is all wrong. Any direction would help. Thanks!
Hello Lauren,
if it’s separate flows you must store it somewhere outside of the flow, e.g. in a SP column. If you use a multiple lines of text set to ‘Plain text’ it should work.
Hi Tom,
I applied this method to my approvals. During the second process of approval under different Condition an error came up ‘ the result of the evaluation of ‘foreach’ expression ‘@item()?[‘body/responses’]’ is of type ‘Null’. The result must be a valid array.’
The Condition of second process happened when ‘Result /is not equal to /No’