“I’ve heard so much about the Power Automate Select action, but how I actually use it, what can I do with it?”
While Power Automate has many, many actions, some of them are more useful than others. A lot of the actions are related to a specific application and you use them only when interacting with that application. But there’s a group of actions called ‘Data operation’ that is useful in almost every flow, no matter what it does. As the name suggests, they’re used for data operations in the flow – selecting, filtering, composing…
One of the actions is ‘Select’, which I consider among the most powerful actions Power Automate offers. Why? What is it good for?
Basic use case: Select properties from an array
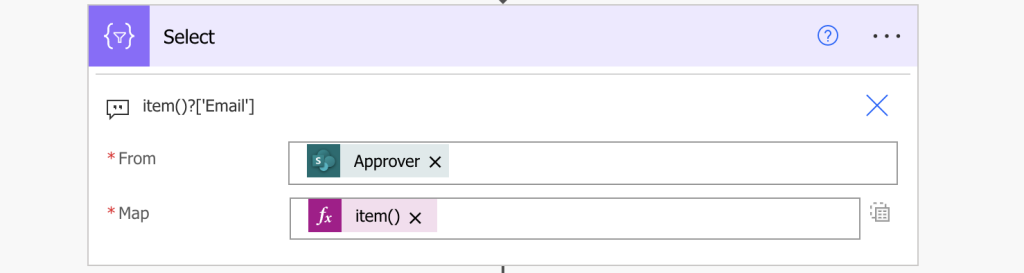
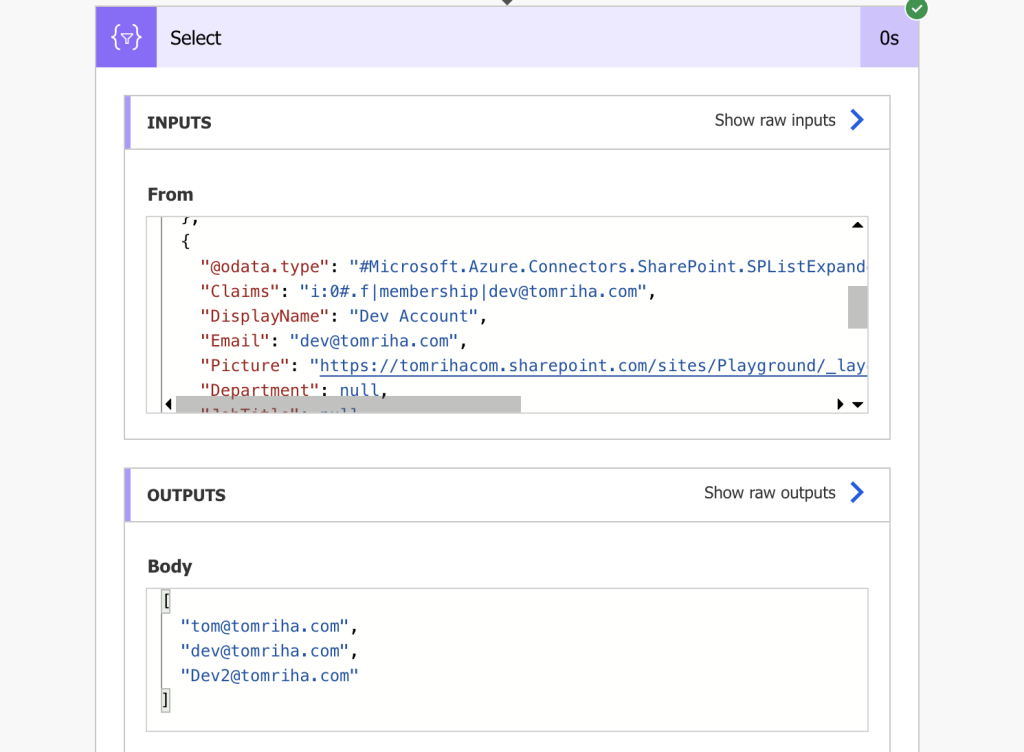
The basic use, as the action name suggests, is to select a specific property from an array. Put an array of JSON objects on the input of the action, and select what it should return.
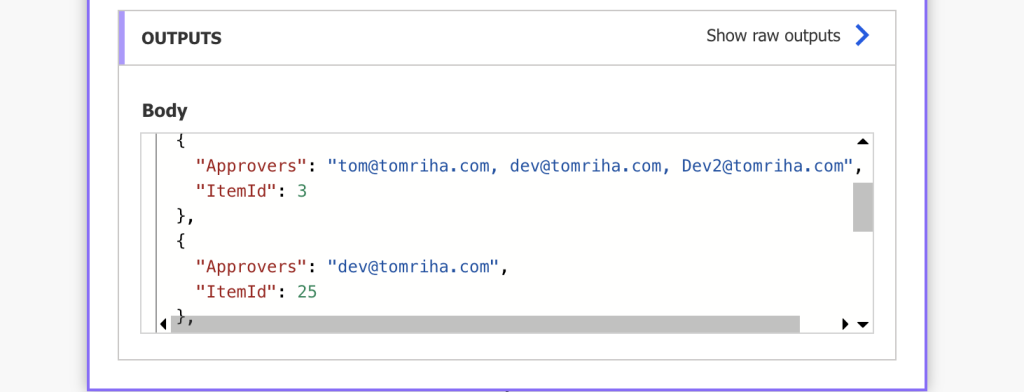
For example, do you want to send an email to users in a SharePoint multiple people picker field? Select only their email addresses. Or want to compare two lists / two arrays? Selecting their shared identifier is one of the first steps.
Is a simple array not enough? Use ‘Select’ to build an array of objects, e.g. to update multiple people picker.
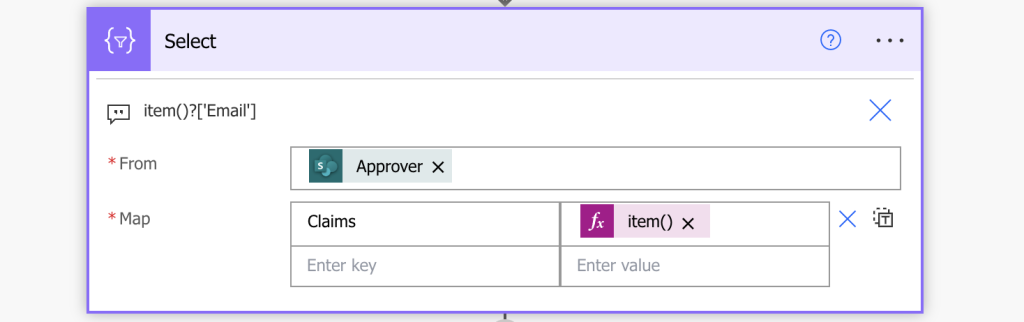
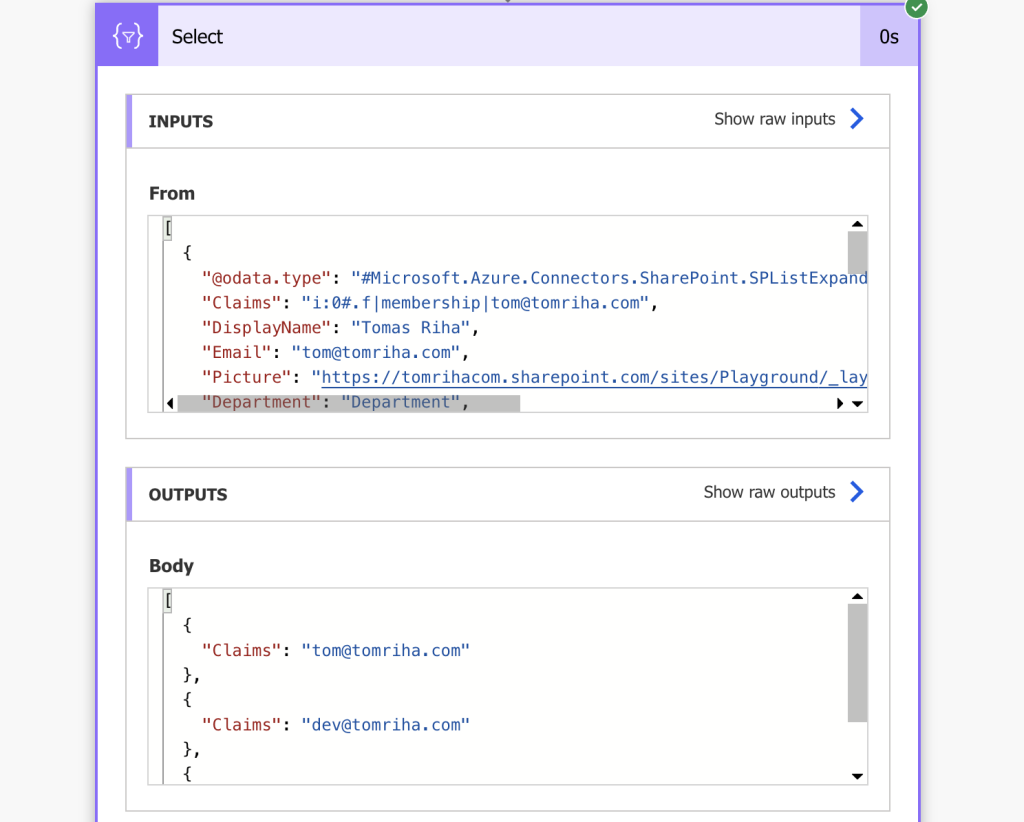
You can convert the data into any format the actions expect, just ask the actions what they want. No need for any variables, loops, or appends, just select it in a single step.
But what about the other, more creative use cases?
Add a prefix / suffix to the properties
Not only can you select specific values from an array, you can transform them too. In the examples above I’m just selecting one of the properties, but you can easily add a prefix / suffix to the outcome too.
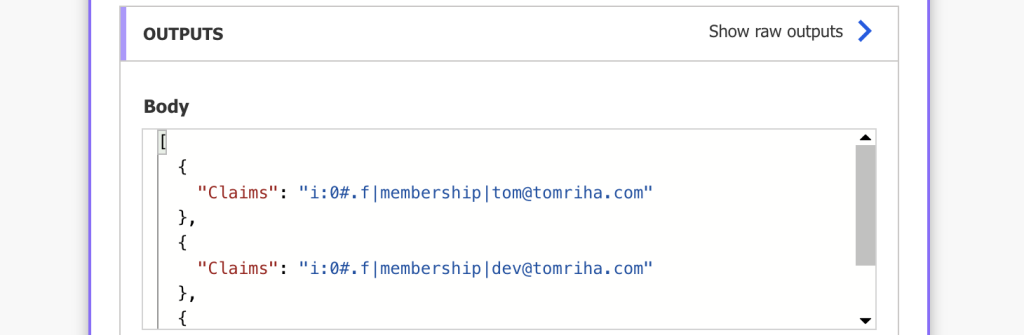
For example, if you need the user claims login and not just the email, you can add it to all the items at once. Instead of getting only the email, add the fixed part before it.

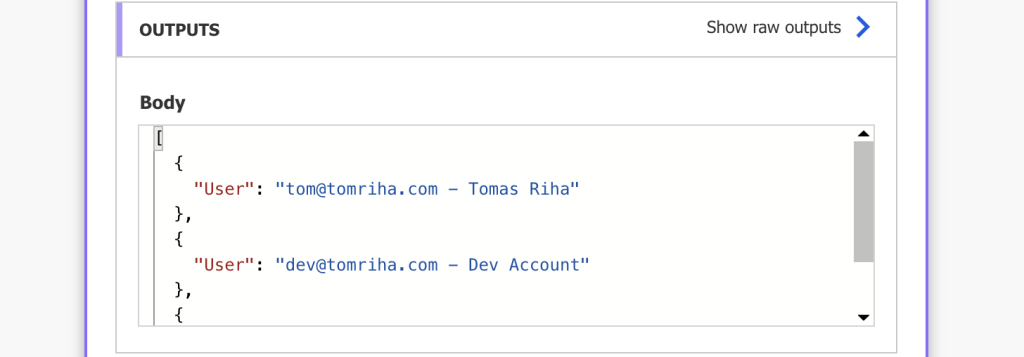
You can even combine multiple properties from the object together, e.g. email + display name. In such cases you’ll have to use the concat(…) expression though, e.g.
concat(item()?['Email'], ' - ', item()?['DisplayName'])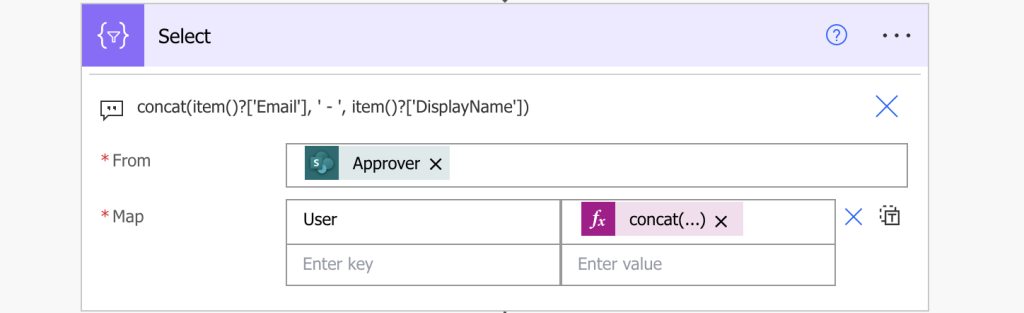
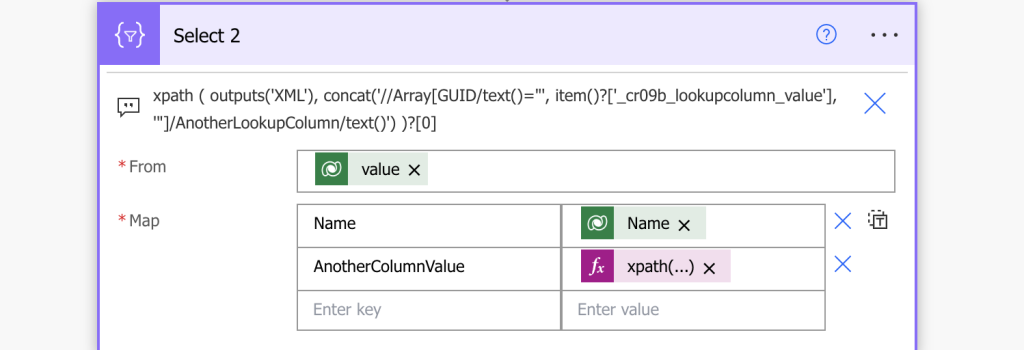
Apply additional expressions on the properties
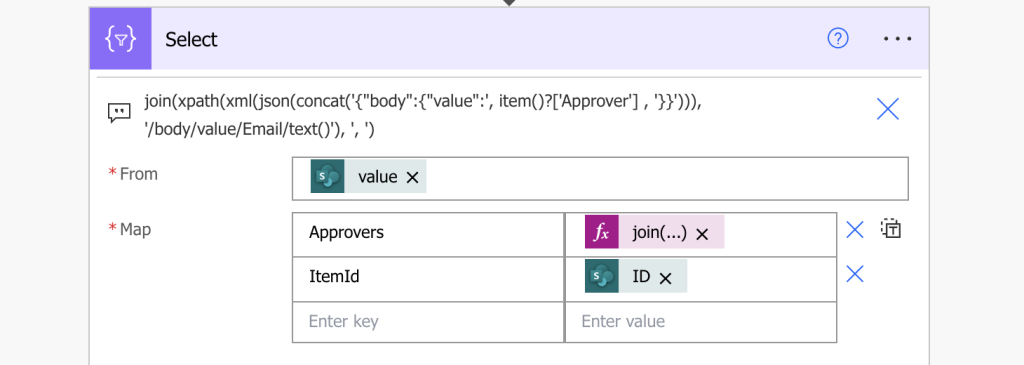
The previous example leads us to another use case – not only can you select the properties, you can apply additional expressions on the properties too. The action allows you to wrap them into another set of expressions to do even more complex operations. For example, extract specific value from a multiple selection column, let it be multiple choice or multiple people picker. Or add an if(…) condition to process the property differently based on its value – especially useful when working with dates.
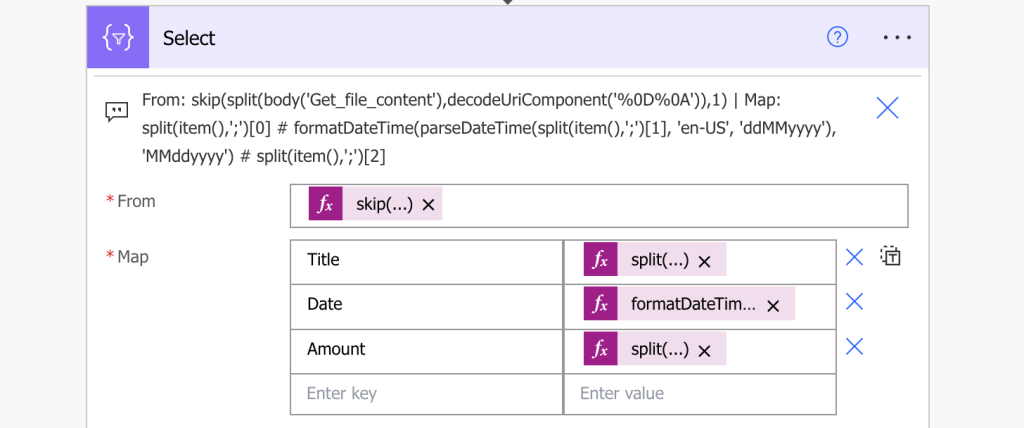
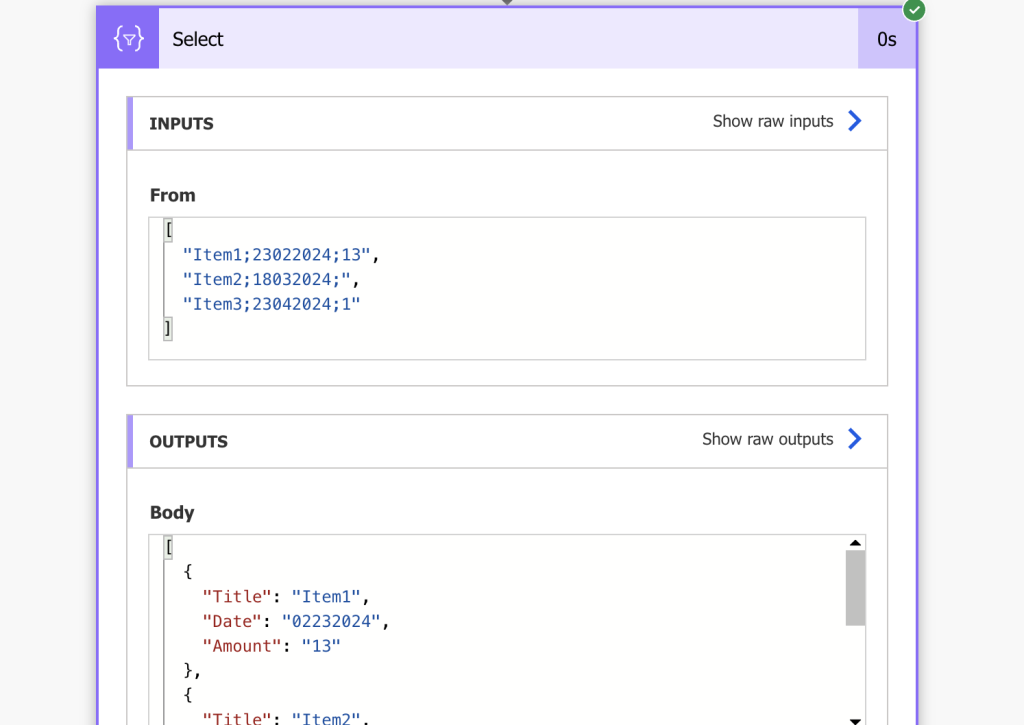
Use it to parse .csv files…
It’s also the action you can use to parse data from a CSV file. Split it by the new line to create the input array and Select all the properties by the column position.
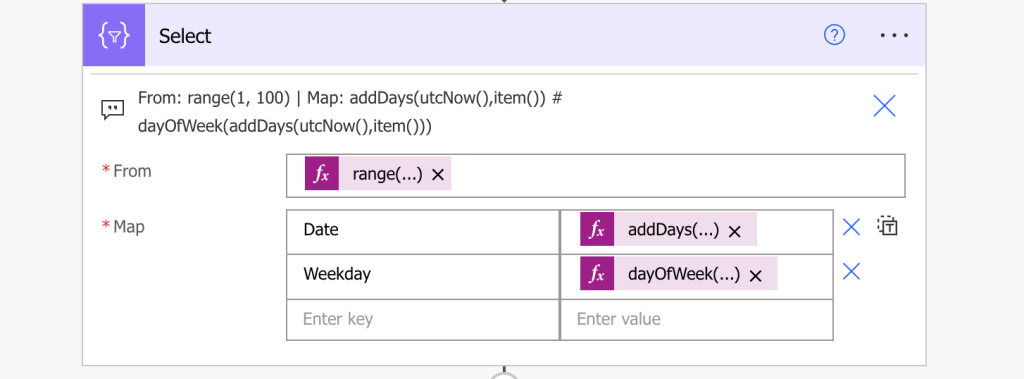
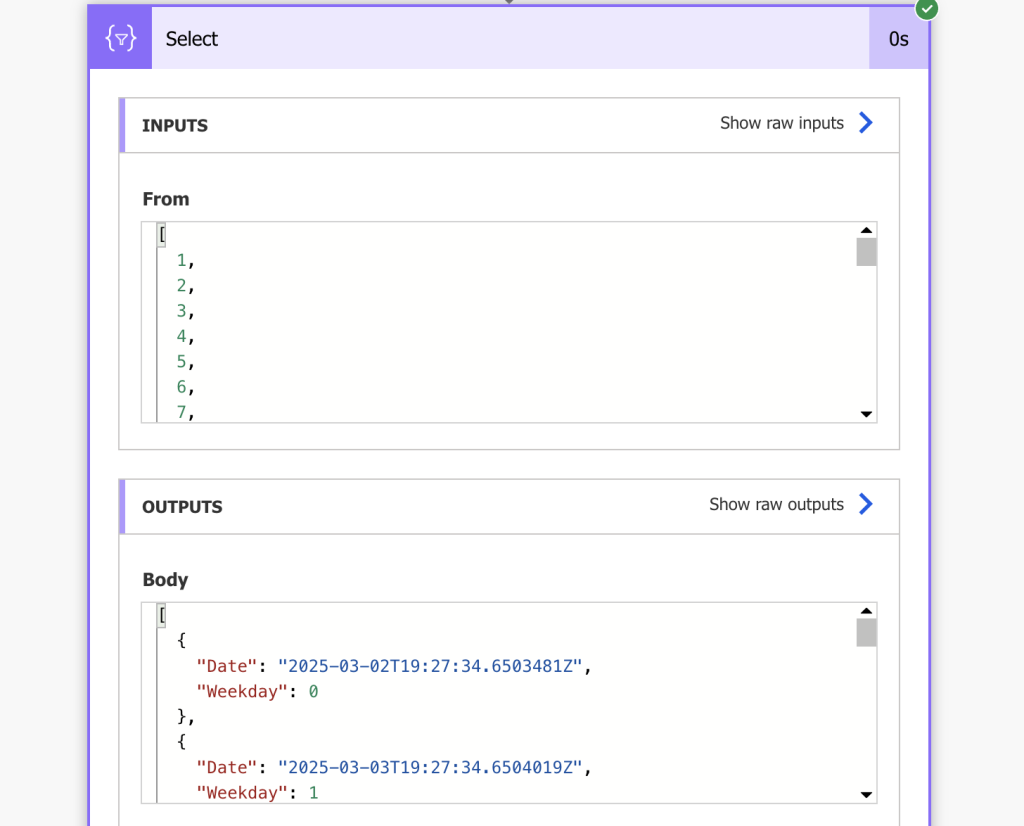
…generate custom data…
Another use case could be to generate data. As it’ll take any array on the input and do “something” for each items in the array, you can use it to create data sequences. That’s useful for example when calculating working days.
…or merge multiple arrays
and it’s also the action used to merge arrays by a shared value.
Summary
As you can see in this article, you can do a lot with the Power Automate Select action. You input an array, let it be a simple array or an array of objects, and tell the action what it should return for / from each of them.
You can select specific properties, you can build custom objects, add prefix/suffix to the data, apply expression on properties in each of the items, or combine multiple arrays. Some of those are very complex operations that can be simplified using ‘Select’, a single action, single API call that can do so much work in no time.
i need to retrieve a list of email addresses from a list
i then want to use that data and create a dropdown in an adaptive card.
having some issues with the variable stage and getting the data stored correctly. would love some help if possible
Hi Tom, I’m not sure if this works anymore. I can’t figure out how to just make an array of values as it is requiring it to be in a JSON format.
Hello Joe,
I’m not aware of any change in the Select action, all the examples should still work.