“I don’t need to process all the items, only the relevant ones, what options are for filtering in Power Automate flows?”
Every time you build a flow, you should consider also the efficiency of the flow. While the resources it consumes for a single run might be not that important for you as Microsoft is running the servers, the flow run duration will be. And it often takes only a small change to make a big difference, to reduce the flow run significantly – from minutes to seconds, from hours to minutes.
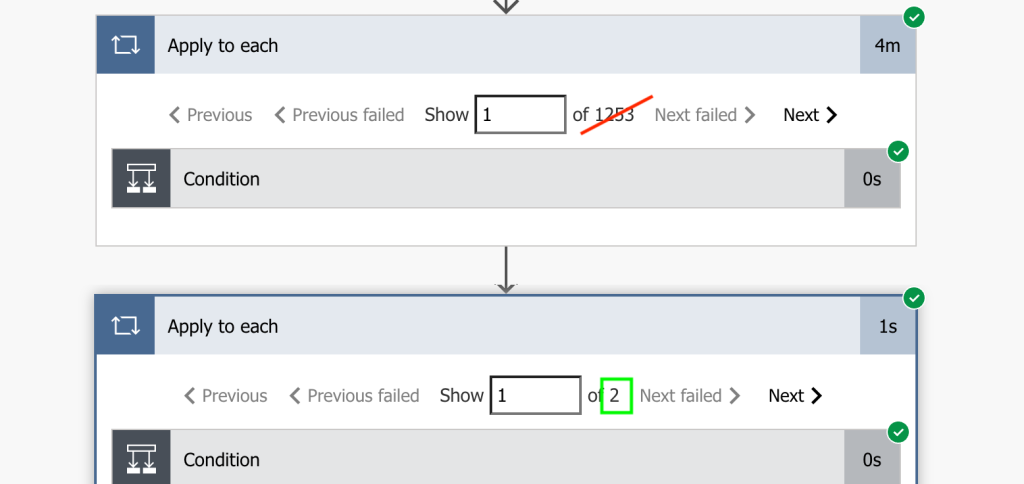
In many cases it’s caused by a loop, an ‘Apply to each’ that’s doing a lot of unnecessary work, processing too many items. Sometimes it’s not even needed and you can use ‘Select’ action instead, but if it is, does it really have to process all the items? Is there maybe a way to reduce them, to process only the relevant ones by using some filter?
Filtering before the flow even starts
The first filter to consider is the flow trigger condition. Does the flow even have to run? Is there a specific condition that must be true for the flow to trigger?
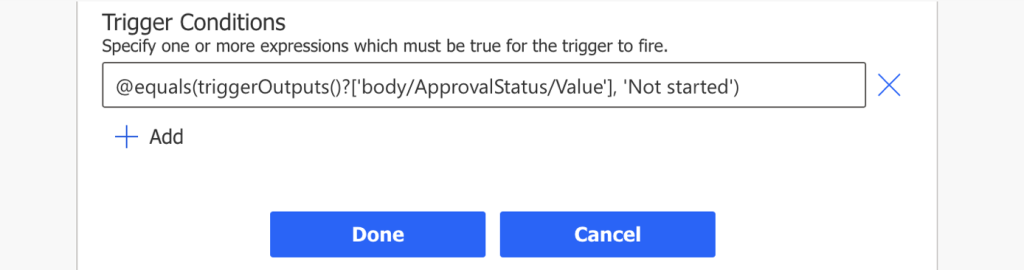
In you go in the settings of the trigger action (3 dots -> Settings), you’ll see the Trigger Conditions sections. With this condition you can decide that the flow should run only if some column has a specific value, run the flow on the first working day, trigger if specific SP column changed, and much more.
Since it’s at the beginning of the flow, you can’t reference any dynamic content, but that’s not a problem – the ‘Filter array’ action can help you with the condition.
Filtering with the OData Filter Query
The filtering option you’ll probably encounter the most is the OData query. It’s a field you’ll see in the ‘Get…’ SharePoint actions, Dataverse ‘List rows’ action, and many more.
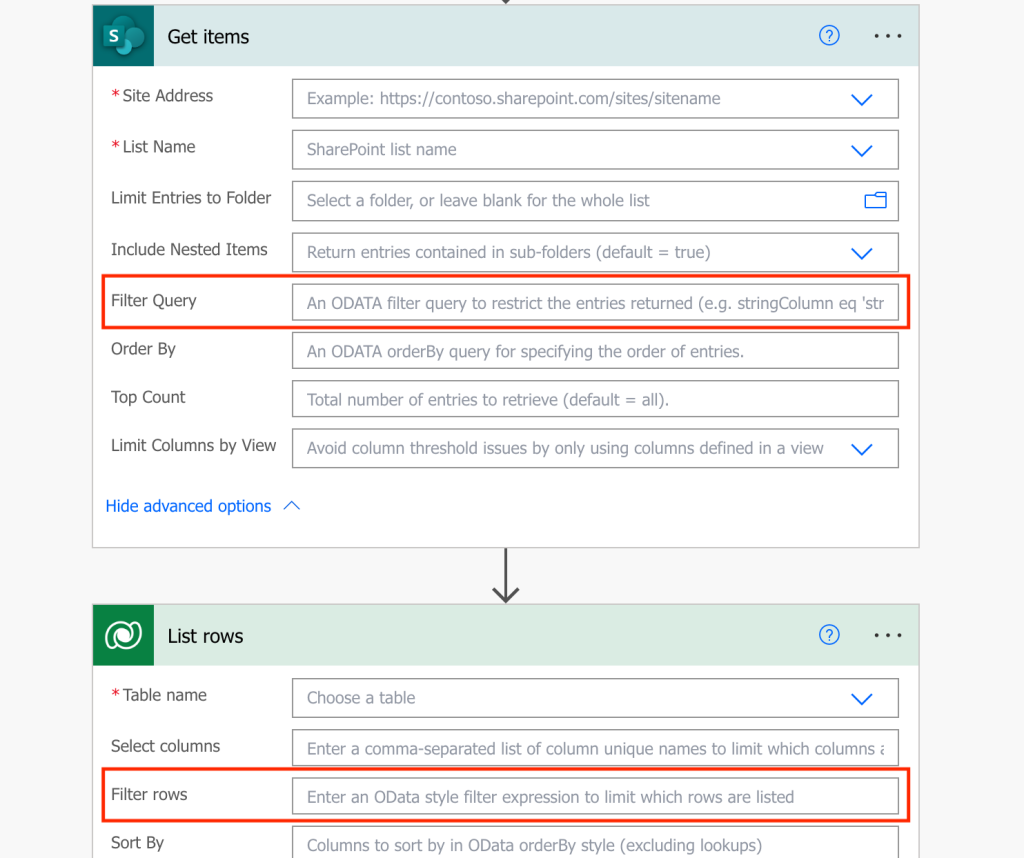
This filter applies directly on the datasource, before you even get the data into your flow. You tell it what items / rows it should return, and it’ll ignore all the others. From a list of thousands of items it can return just one, the one that fits your filter.
The syntax of this filter is as below:
<column> <operator> '<value>'<column>
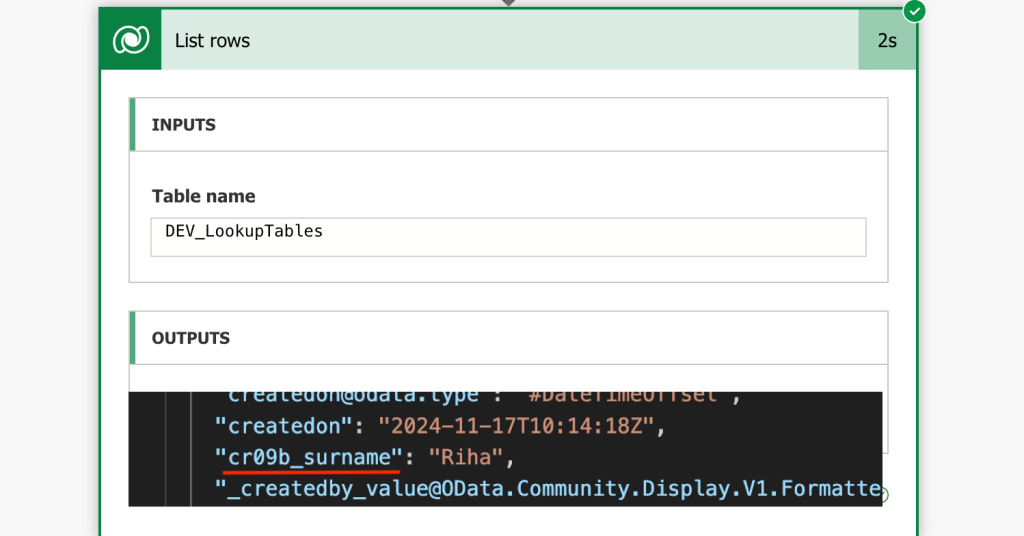
If you’re filtering SharePoint lists or libraries, the <column> is always the column internal name. For Dataverse tables it’s the logical name (the lower case one). A simple way to get the column name is to get/list a few rows without filtering and finding the corresponding value in the JSON output.
There’re a few exceptions though when filtering over SharePoint columns that contain objects – lookup and people picker.
IMPORTANT: you must always type in the column name, you can’t use an expression here!
<operator>
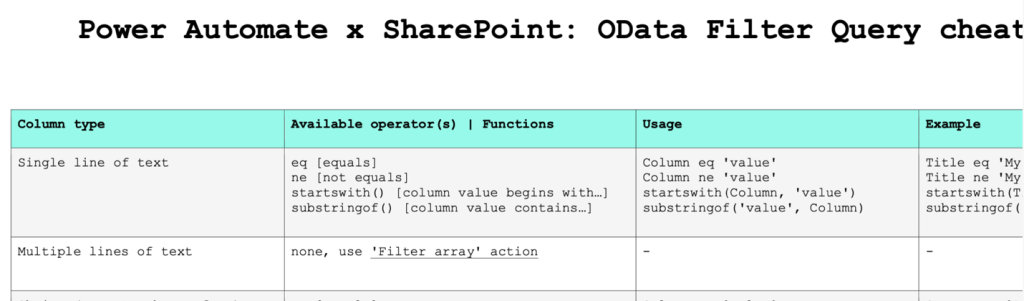
OData query supports many of the standard operators as for example equals, not equals, less than, etc. You can find the list in one of the previous articles.
IMPORTANT: not all operators can be used on all column types, especially when filtering over SharePoint – that’s why I created a cheat sheet for my subscribers to cover the differences.
‘<value>’
The last part of the OData query is the value. What value should be in this column to return the item / row? It’s important to remember that the value must be always in quotes (unless it’s a number). You can use an expression or a fixed value in this part of the filter, but you can’t compare two columns from the datasource in this filter.
IMPORTANT: a special note for the date columns that require the date/time in the ‘yyyy-MM-dd’ format!
Put it all together and you’ve got an OData query filter, e.g.
cr09b_surname eq 'Riha'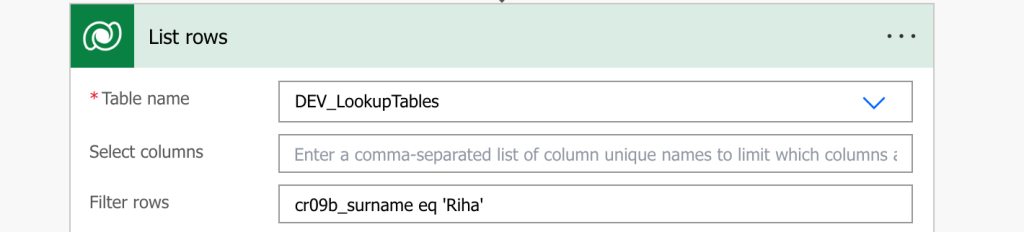
Using multiple filters
If you need a more complex filter, one that’ll look for data in multiple columns, you can stack them together by adding the AND or OR logical operators between the filters.

Filtering with the ‘Filter array’ action
If the OData query is not sufficient, or if it’s not available, you can use the ‘Filter array’ action. To use this action you must collect all the data first, which makes the flow a bit slower, on the other hand it has a friendlier interface.
It’s in the ‘Data operations’ group and it’s input is an array. It can be your custom array or output of any of the Get / List actions Power Automate offers.
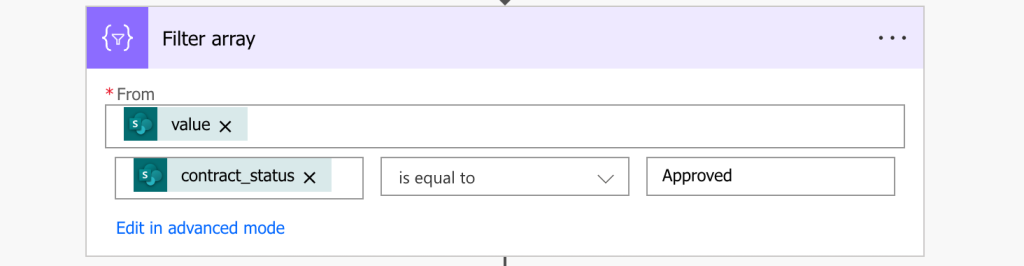
Enter the array into ‘From’, select the column it should search in, operator, and the value. That’s it, a few clicks and it’s filtered. This action will allow you to compare two columns in the array and you can even apply expressions on the values. It can do also some fancy operations like comparing two arrays.
IMPORTANT: don’t forget to reference the output of this ‘Filter array’ action later in the flow, do not use the original array anymore!
There’s a small downside though. If the input array doesn’t have a fixed structure (e.g. SP lists), the action won’t provide the dynamic content for the filtered items.
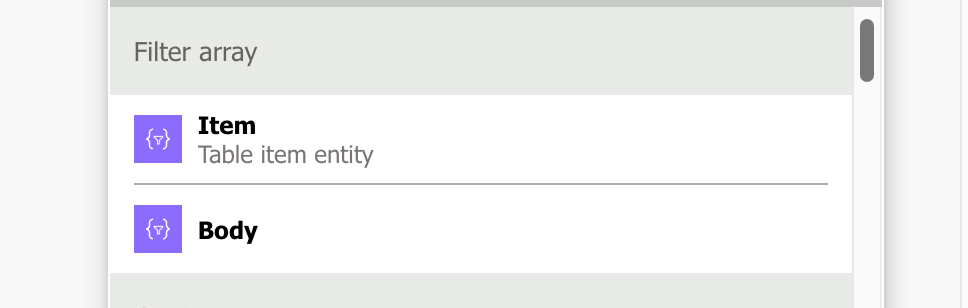
In such cases you have two options – one is to add the ‘Parse JSON’ action to parse the output. The other is to use expressions to pick the values directly from the output JSON.
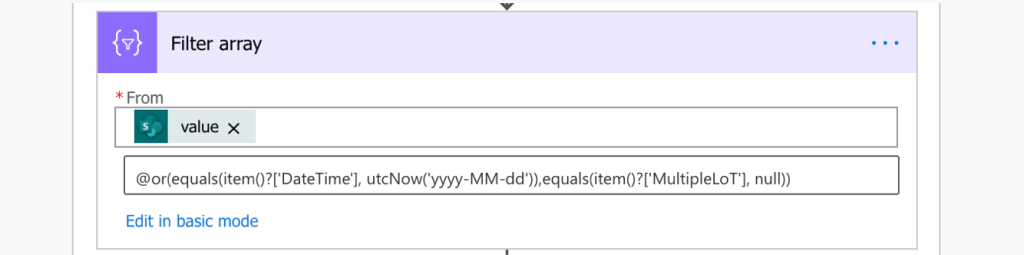
Using multiple filters
Similarly to OData query, also here you can use multiple filters. Switch to the advanced mode and use the Power Automate expressions language to combine all the filters together.
Filtering in HTTP requests
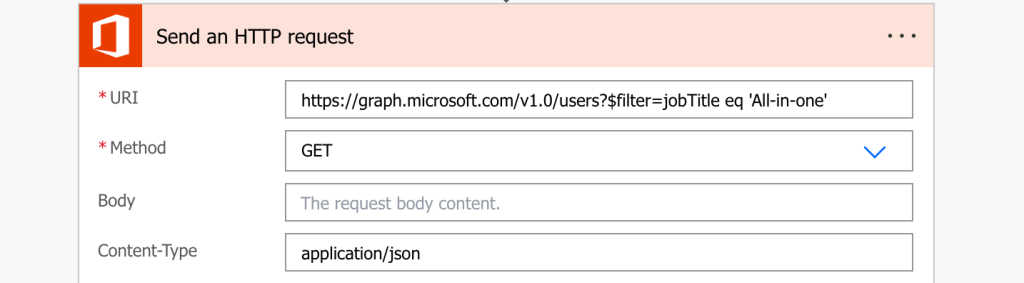
The last filtering option for this article is via HTTP requests. In the situations where the existing Power Automate actions are not enough, you can extend your flows with HTTP requests. You can send them to get information from SharePoint, users, mailboxes, or from Graph API in general.
Most of those requests are based on OData query, meaning if you can build the query in the actions, you can add it also to the HTTP requests. Just add the ?$filter=<OData query> to the endpoint and see if it works (there’re some cases where it won’t but they’re rare).
Summary
As you can see, there’re a few options for filtering in Power Automate flows. You can do it directly in some get/list actions and if not, there’s still the ‘Filter array’. In both cases you’ll get rid of the data that’s not needed for the current flow run, that doesn’t have to be evaluated, and process only the relevant entries. A single filter that can completely change the performance of your flows.