“I’d like a single template with everything, Planner tasks, checklists, and buckets, what would such Power Automate flow look like?”
Some time ago I wrote articles on importing tasks into Planner using a Power Automate flow. There’s an article on importing tasks from Excel, import of checklist items from a SharePoint list, and an article on importing tasks into various plans/buckets. But there’s one more solution that wasn’t described. It’s a combination of all the solutions – one configuration list with everything. Tasks, checklist items, buckets, and plans, all in a single SharePoint list. What would such solution look like?
Extend the configuration list
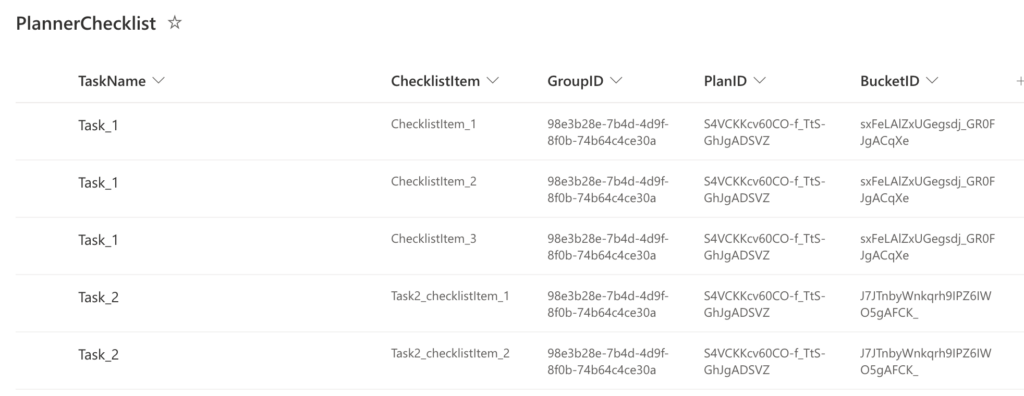
Start from the checklist configuration list as created in the previous article and extend it by the additional columns – GroupID, PlanID, and BucketID. Since these columns define the location of the task, it should be the same for each separate task. Fill them out as described in the original article. The final list might look as below – checklist items are unique while the other columns keep the same information for given task.
This example will create 2 tasks in the same plan and group, but in different buckets.
Get the new information in the flow
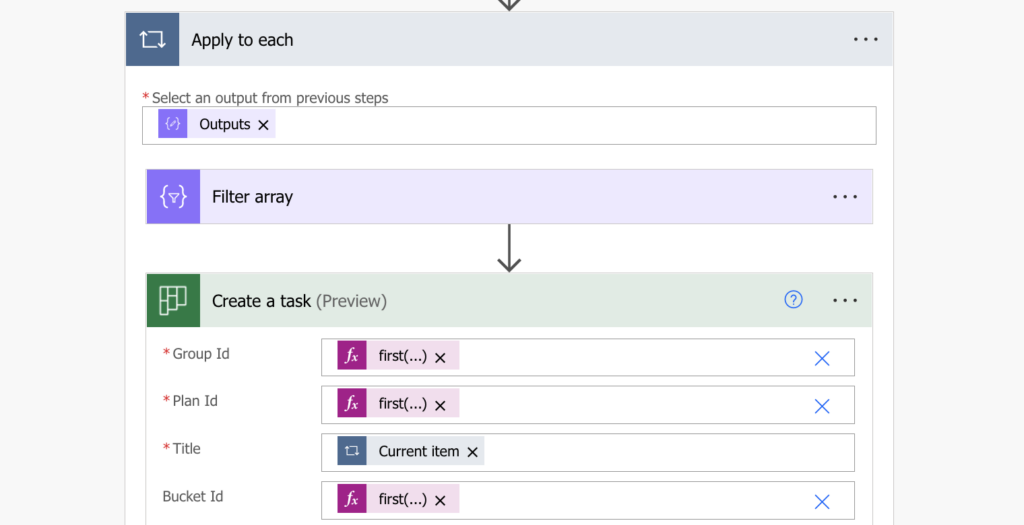
Follow the original flow until you get to the “Create the unique tasks” section. There’re two actions whose order must be changed – the ‘Create a task’ and ‘Filter array’. Originally you used only the TaskName so it was ok to create the task right away. But now you need also the other information – GroupID, PlanID, and BucketID, and for those you’ll need the whole item – provided as the output of the ‘Filter array’.

Take only the first checklist item
The ‘Filter array’ will return an array with all the checklist items for given task. If the currently processed task is the ‘Task_1’, it’ll give you all the rows below.
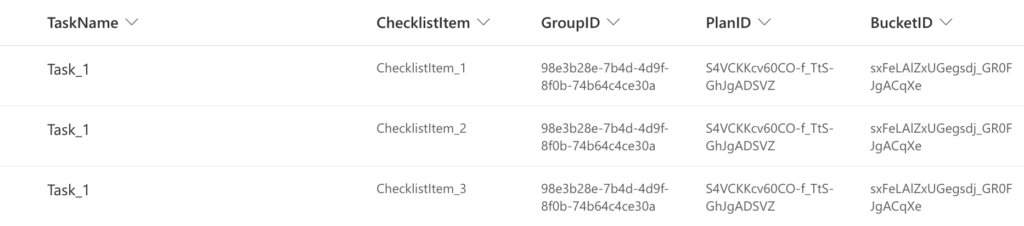
That’s 3 times the TaskName, GroupID, PlanID, and BucketID. But you want it only once, you want to create only 1 task for all the checklist items. Use the first(…) expression on the ‘Filter array’ output to take only the first of the rows.
first(body('Filter_array'))Now, when you’ve got the first row, you can access the values from all the columns. Prepare the expressions to extract them from the JSON.
first(body('Filter_array'))?['GroupID']
first(body('Filter_array'))?['PlanID']
first(body('Filter_array'))?['BucketID']
Note: you must use the columns internal name.
Take these expressions and use them in the Planner ‘Create a task’ action.
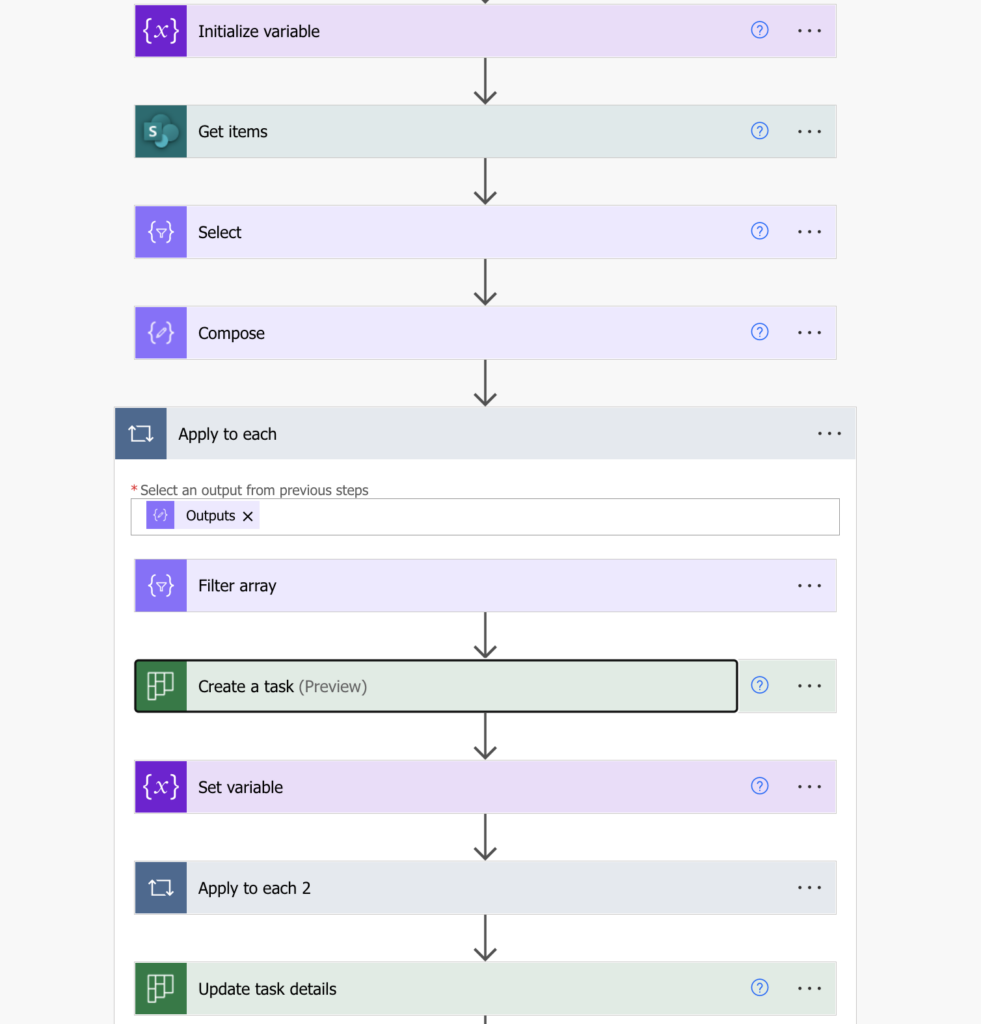
From that point you can continue with the flow as it was before.
Summary
It’s possible to use Power Automate to import all the Planner tasks, checklists, and buckets from a single configuration list. But since most of the information will be repeated, you must be careful about how you use it. The task itself should be created only once, that’s why you filter the unique task title and select only the first item to get the GroupID, PlanID, and BucketID.
Thank you for creating this – it has been a lifesaver for me! Everything is working beautifully, but I need to add one more piece. I have a column in the spreadsheet (I’m using Excel) for the department responsible for the task, and would like to assign labels based on that column.
In other flows, I have used an expression like this to assign labels:
if(contains(item()?[‘Department’], ‘Marketing’), True, False)
Is it possible to somehow nest an if expression with the ‘first’ expression to assign the correct labels?
first(body(‘Filter_array’))?[‘Department’]
Thanks so much!
Jeanne
Hello Jeanne,
yes, you can combine expressions inside each other (https://tomriha.com/how-to-combine-expressions-in-your-power-automate-flows/):
if(contains(first(body(‘Filter_array’))?[‘Department’], ‘Marketing’), True, False)