“Is there a way to create a Power Automate flow that would send an email only when a task in a specific Planner bucket is completed, and ignore the rest?“
The Planner trigger ‘When a task is completed’ doesn’t give you too many options. You can select the ‘Group Id’, the ‘Plan Id’, and that’s it. There’re no additional options for further filtering among the tasks, all the completed tasks will trigger the flow. Power Automate doesn’t care if the completed task was from one or another Planner bucket. But that doesn’t mean that you can’t build such functionality by yourself.
Get the bucket name
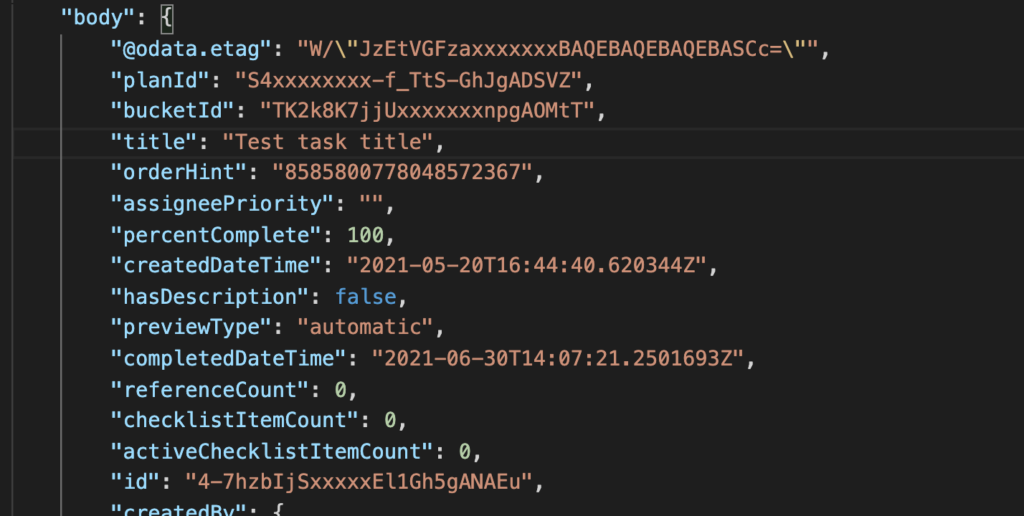
When you check the output of the ‘When a task is completed’ trigger, you’ll notice that the bucket is provided as an id. If you knew the id of the bucket, you could use the ‘bucketId’ value directly. But in this chapter we’ll turn the ‘id’ into bucket ‘name’ that’s easier to work with.
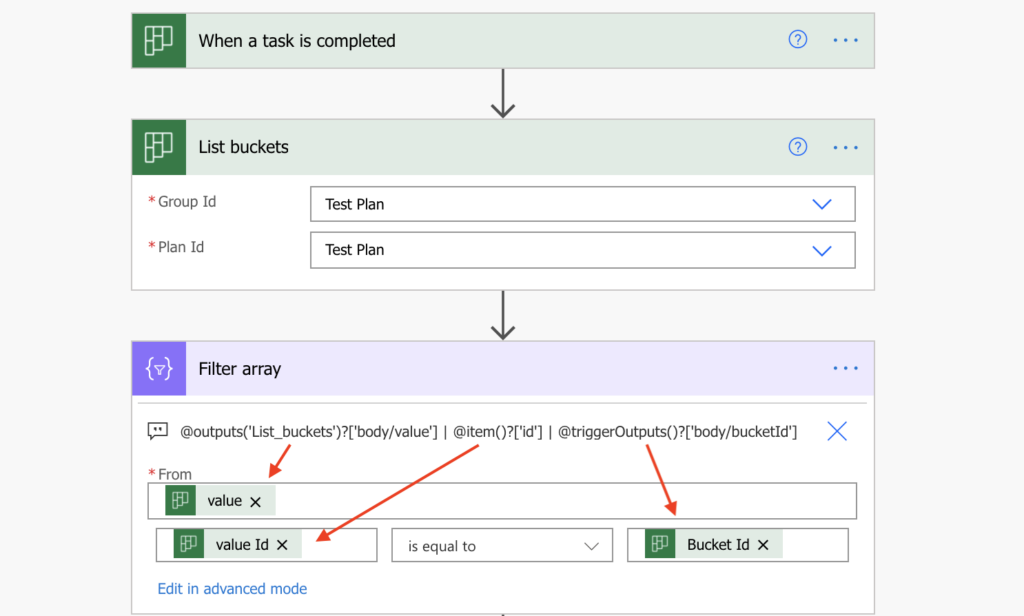
The first step to get the bucket name is to ‘List all buckets’ in the plan. As with the trigger, you can’t filter the buckets directly, you must take all of them and filter them later. Take the output from ‘List all buckets’ and filter the bucket whose ‘id’ is equal to the ‘bucketId’ with the ‘Filter array’ action.
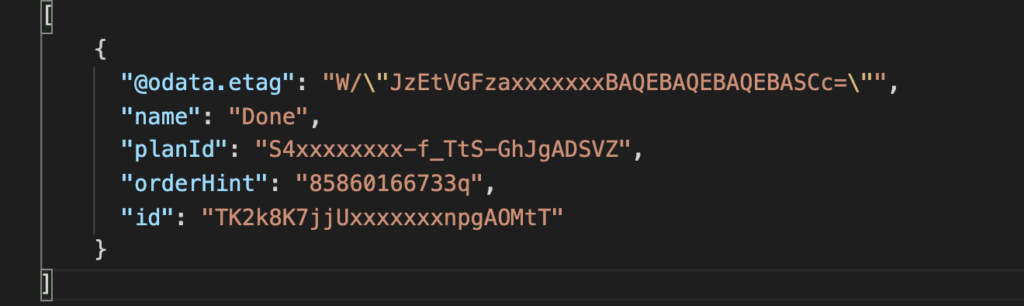
The sole output from the ‘Filter array’ action will be the corresponding bucket, whose ‘name’ you can use.
You can use it in a ‘Condition’ (email only for a specific bucket), or in a ‘Switch’ (different email for various buckets), it’s up to you. You’ve got the bucket name and you can easily use it in the flow.
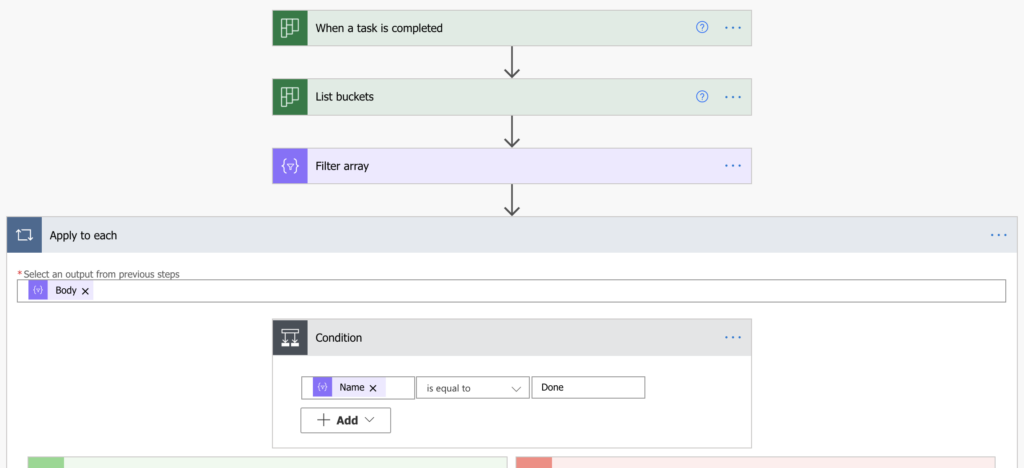
Note: don’t worry about the ‘Apply to each’, the output from ‘Filter array’ will be always only 1 bucket.
Use trigger condition with bucketId
The second, more advanced option is to use a trigger condition. If you want to process completed tasks only from a single bucket, you don’t have to trigger the flow for each task and search for the bucket name. You can use a trigger condition instead and trigger the flow only for tasks from that bucket. But you’ll need to know the ‘bucketId’ for that.
As already shown in the post on importing tasks in various buckets, you can get it from the ‘List buckets’ action. List all buckets, search for the desired one in that actions output, and take its id. Use it in a trigger condition that will trigger the flow only if the completed action bucketId is the same, e.g.
@equals(triggerOutputs()?['body/bucketId'], 'J7JTnbyxxxxxIPZ6IWO5gAFCK_')Summary
You’ve got (at least) two options how to recognise the bucket of a completed Planner task with Power Automate. The first option is better if you’d like to somehow process tasks from more/all buckets. With each run it’ll check the bucket of the task and act accordingly. It doesn’t matter that it’ll trigger with each completed task as you process them anyway.
The second option is better if you’re interested only in a specific bucket. You don’t need to trigger the flow for each completed task, but only for some of them. It’s a bit more complicated as you must get the bucketId and create the trigger condition, but it’ll save a few actions in the flow, not to mention a few flow runs.
Hi, maybe you can guide me with my flow. In my flow: when a form is submitted, when an approval was approved, create a planner task in 3 buckets. For all this results I have an evidence in a sharepoint list. That means one row in a sharepoint list is for one submitted form, in 3 of all sharepoint list columns I stored the planner tasks Ids from the buckets. The bucket columns are named by bucket names. Now I would like: When a task is completed, to have the completition date for each task in corresponding bucket column. How can I do that, please? I need to find the completed task Id in 3 bucket columns and overwrite it with the completition date or even I maybe should add 3 additional columns for each buckets and here I would like to have the completition date, completed by and progress status. But I can not find out how to do that
Hello Erika,
that’s a bit too complicated for a comment, but it’s doable using the 3 columns – use ‘Get items’ with combined Filter Query over all the 3 columns (https://tomriha.com/how-to-combine-multiple-filters-in-get-items-filter-query-power-automate/), a ‘Condition’ to check which one of them is the one that contains the ID, and update it.