“I need only the user name from the Person or Group SharePoint column that Power Automate just exported into a csv table, not the full user data.”
When you export SharePoint list to a .csv, most of the columns will be exported as expected. But some of them won’t, for example the Person or Group column with multiple selection enabled. It works fine if you allow only a single user/group, then you can select which user property you want to export. But with multiple selection it’s not possible. You’ll get a similar string as shown below:
[{""@odata.type"":""#Microsoft.Azure.Connectors.SharePoint.SPListExpandedUser"",""Claims"":""i:0#.f|membership|user@company.com"",""DisplayName"":""Name Surname"",""Email"":""user@company.com"",...}, {""@odata.type"":""#Microsoft.Azure.Connectors.SharePoint.SPListExpandedUser""...}]So, how do you get only a specific property for all users in the field, e.g. email or display name?
Build an expression
As you can’t preprocess the data before the ‘Create CSV table’ action, you must use a single (not simple) expression that will do it all. Expression, that will take the whole array with multiple users and their properties, and return just selected property per user.
Start by adding the dynamic content into the ‘Create CSV table’ action. Then copy/paste it into a text editor. That’s the dynamic content with the whole array with all the users and their properties. For multiple Person or Group column called ‘SendTo’ it’ll look as below:
@item()?['SendTo']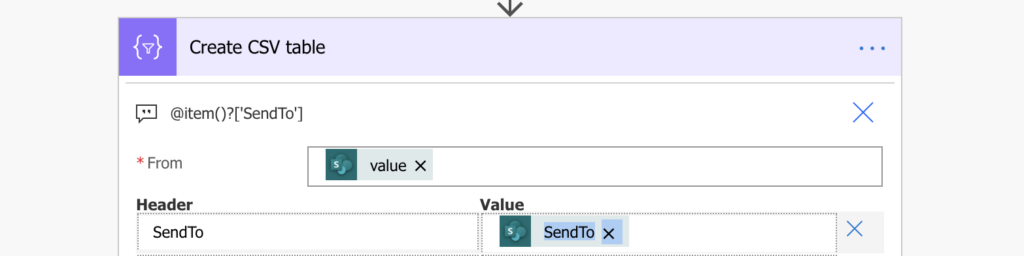
And remove the @ at the beginning, it’s not needed.
item()?['SendTo']But it’s not possible to parse a specific property from the array directly. First, you need an expression that’s able to do that. Among the expressions in Power Automate is an expression xpath(…) that can be used, if you pass it the right parameters.
xpath(…) expression
Xpath(…) expression expects two parameters, first of them is an xml, the second is a path to the value in that xml. As a result you’ll get an array with the values on the defined path. As you don’t have an xml at this time, you must create one with the xml(…) expression.
xpath(xml(...), '[xmlPath]')xml(…) expression
Xml(…) expression will convert a string in xml format to an actual xml. But the array with users is not an xml as Power Automate formats the data in JSON. Luckily, xml(…) expression can covert also JSON into xml, if you provide a valid JSON.
xpath(xml(json(...)), '[xmlPath]')json(…) expression
That’s the next step, build a valid JSON with the users array inside. If you check a JSON produced by Power Automate, e.g. by the ‘Get items’ action, it has format as on the screenshot below.
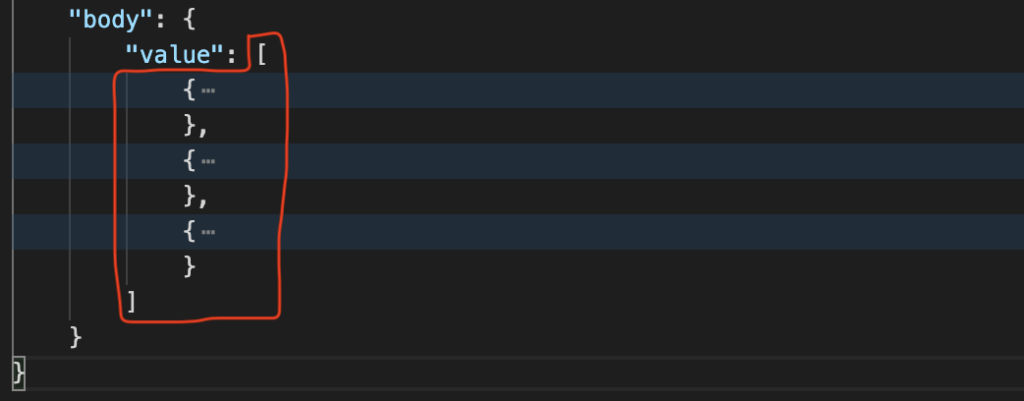
The part after “value”: has the same format as Power Automate gives you for the multiple Person or Group column (or any other array). And that’s also what you can place there.
[{""@odata.type"":""#Microsoft.Azure.Connectors.SharePoint.SPListExpandedUser""...}, {""@odata.type"":""#Microsoft.Azure.Connectors.SharePoint.SPListExpandedUser""...}]Build the JSON by enclosing the user data in the “body” and “value” elements using the concat(…) expression.
xpath(xml(json(concat('{"body":{"value":', item()?['SendTo'], '}}'))), '[xmlPath]')

Note:
item()?['SendTo'] is the dynamic content representing the Person or Group column. You copy/pasted it into a text editor at the beginning.
The result of the json(concat(…)) expression will be a JSON similar to the one below.
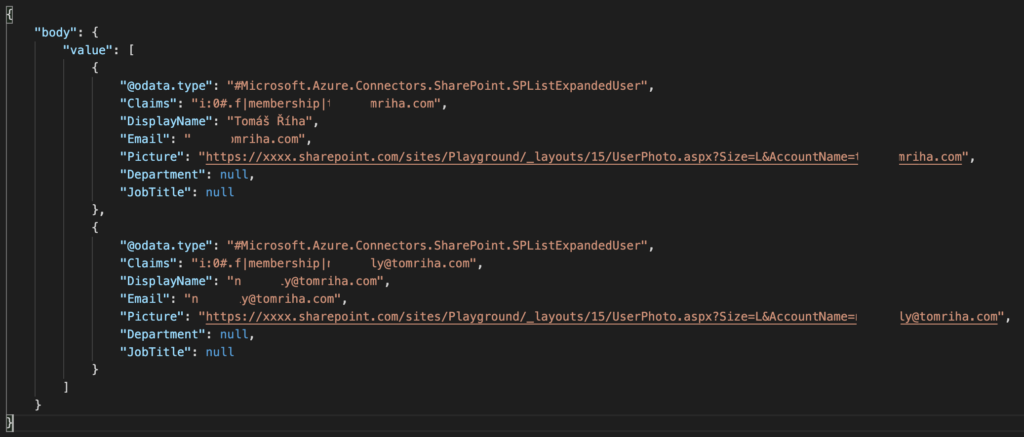
back to xpath(…) expression
Now you’ve got the JSON to convert to the xml to use in the xpath expression. The last part is to define the [xmlPath] parameter: the elements path to the value you want. Below is an example of an xml created by the xml(json(concat(…) expressions.
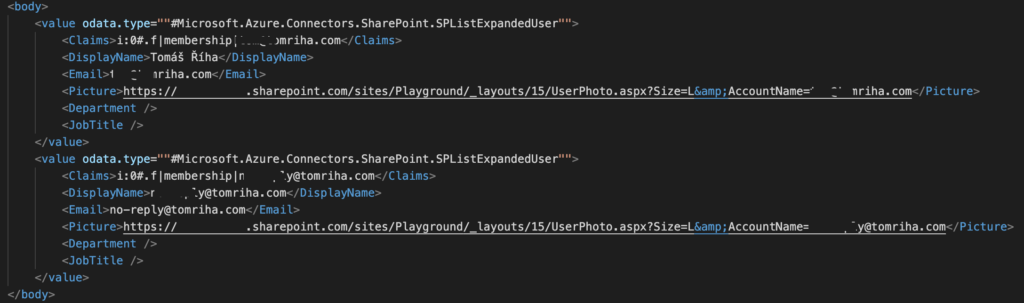
To get the email value, you go in the “body” element, then the “value” element, and the “Email” element. Once you’re in the Email element, you want to display its value as a text using a text() function.
body/value/Email/text()At this moment you can put the whole expression together. This expression will return only email addresses of all users stored in the ‘SendTo’ column.
xpath(xml(json(concat('{"body":{"value":', item()?['SendTo'] , '}}'))), '/body/value/Email/text()')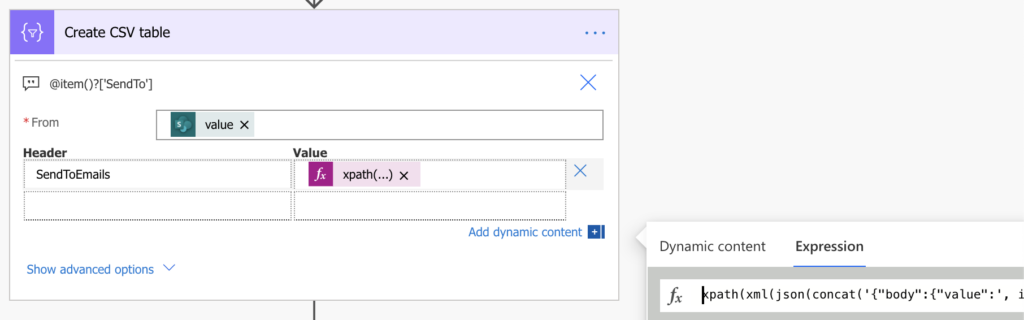
join(…) expression
As mentioned in the comments by Roo, you might want to format the result as a string instead of an array. The simplest way is to use join(…) expression. Use the whole xpath(…) expression above as the first parameter and a separator, e.g. ‘, ‘ (comma + space) as the second parameter.
join(xpath(xml(json(concat('{"body":{"value":', item()?['SendTo'] , '}}'))), '/body/value/Email/text()'), ', ')The result
At the end, the data provided by the expression will be just the email addresses separated by a comma.
user@company.com, user2@company.comSummary
If you use only simple column types, exporting SharePoint lists into CSV table is a simple task with the ‘Create CSV table’ action. But if you add a multiple choice column, it gets more interesting.
In this article you could learn how to get email addresses of multiple users, but it’s not limited only to emails. By changing the [xmlPath] you can take a different value, e.g. display name or department.
It’s also not limited to a Person or Group column. You can follow the same process to access any other column with multiple options, e.g. choice column.
And if you’re interested to learn more about the use of xml and xpath in Power Automate, you can check also the Microsoft article on this topic.
This is the way. Got it down to just the DisplayName of the claims, now just need to get rid of [“”] surrounding it. [“Mister Fiddlesticks”]
Hello Roo,
to turn the result array into a more user friendly string you must remove/replace the array formatting
["and","and"]using the expressions below:string(xpath(...)): the string(…) expression will convert the array into a string, the necessary input for replace(…) expressionreplace(string(xpath(...)),'["',''): replace the array opening characters [” with (nothing) in the stringreplace(replace(string(xpath(...)),'["',''),'","',', '): replace the separator between values “,” with , (comma and space)replace(replace(replace(string(xpath(...)),'["',''),'","',', '),'"]',''): replace the array closing characters “] with (nothing)If I take the full expression from the article it would look like this:
replace(replace(replace(string(xpath(xml(json(concat('{"body":{"value":', item()?['SendTo'] , '}}'))), '/body/value/Email/text()')),'["',''),'","',', '),'"]','')Thank you for this. Took me a few tries, but I got it!
Used a join to fix it. Seems to be working with blanks as well. Keep in mind I’m using DisplayName instead of Email.
join(xpath(xml(json(concat(‘{“body”:{“value”:’, item()?[‘SendTo’] , ‘}}’))), ‘/body/value/DisplayName/text()’),’, ‘)
That looks like a much better solution than the one I proposed, thank you for sharing.
Okay yah I will put that in my toolbox too. Thanks
Great! Just the solution I was looking for.
Hi I am creating excel file using power automate, here the flow working fine but the problem is in my list have people picker field so i am getting all the data but i need only name. can anyone help this issue.
the data is like this :{“Claims”:”i:0#.f|membership|bhaaaavna.fafanchan@taann.com”,”Department”:”nav”,”DisplayName”:”navin”,”Email”:”bhaaaavna.fafanchan@taann.com”,”JobTitle”:null,”Picture”:”https://taanworkplace.sharepoint.com/sites/ExpenseClaims/_layouts/15/UserPhoto.aspx?Size=L&AccountName=bhaaaavna.fafanchan@taann.com”}
Hello Naveen, dynamic content.
looking on the data you shared it doesn’t contain [ ], which makes me think that you don’t need the solution described in this article, the solution applies to multiple people picker fields. For single selection field just select the
This is great. Thank you
Thank you so much!! Struggling with this until I found your post.
Thanks! it helps a lot.
Great solution, thank you. Worked like a charm
Thank’s Tom, exactly what i was looking for
Tom, you are a LIFESAVER. I have been trying for MONTHS to figure out how to combine both multi choice select fields and multi select person fields and finally got the solutions from these two articles.
I have one step further that I’m wondering you can help with.
I have a multi-select person field that is named ‘AnalystAssigned’. Instead of combining display fields, I need to use each analyst’s ‘Given Name’ and ‘Surname’ property from their user profile.
I currently do this by appending the Given and Surname to a string variable, but I want to be able to have a scenario where when I have more than one analyst, the Given Name Surname combinations are separated by ‘and’ — if I just put ‘and’ at the end of my string variable, it adds the ‘and’ even if there is only one analyst assigned so we have to manually delete that.
I’ve tried mapping a ‘Select’ and ‘Join’ inside an apply to each that pulls from the ‘AnalystAssigned’ main field, but can’t extract the results. Where am I going wrong?
Again, thank you so much for all your articles. You have got me across the finish line countless times!!!
Hello Fred,
I’d expect that the ‘Given Name’ + ‘Surname’ = the ‘DisplayName’ property. You should be able to get their names with a small adjustment in the xpath(…) expression from the article.
join(xpath(xml(json(concat('{"body":{"value":', item()?['AnalystAssigned'] , '}}'))), '/body/value/DisplayName/text()'), ' and ')Thanks, Tom. Unfortunately, my enterprise’s display names also include an abbreviation for our offices (so mine spits out LastName, Fred, HQ). When I want to have it just kick out Fred LastName and if you and I were both in the people picker it would kick
Fred LastName and Tom Riha
Been struggling with this since my users don’t take the extra 10 seconds to make the outputs more grammatically correct and so we send something out that says
POCs: Fred LastName Tom Riha
instead of
POCs: Fred LastName and Tom Riha
Hello Fred,
right now the only idea I have is to use replace(…) on the output to replace all the offices with ”, but I’m not sure if that’s doable depending how many offices you have. I can’t think of any simple solution that I could describe here.
Any idea how to make the headers in the excel bold when exporting from sharepoint list to ecel?
Hello Ramisa,
not with this approach as it’s creating a .csv file – text file, no formatting.
AMAZING!
This approach keeps the number of Power Automate steps to a minimum while resulting in unimaginable speed improvements when compared to using an Apply to Each step with other steps such as Append to String: 5 seconds versus 3 minutes!
I’m also using this approach for multiple choice and lookup columns.
THANK YOU!
Wait there’s a way to convert JSON to array I believe. Using this site here:
https://www.journeyteam.com/post/do-i-need-the-parse-json-action-in-power-automate#:~:text=The%20Parse%20JSON%20action%20in%20Power%20Automate%20is%20a%20powerful,dynamic%20content%20for%20your%20flow.
ForAll( ParseJSON( JsonString ).array, Value( ThisRecord ) )
ForAll( ParseJSON( JsonString ).array, { id: Value(ThisRecord.id), name: Text(ThisRecord.name) })
I will test today and see but if anyone is able to figure it out before me let us know!
I’m trying to do the same for my multiple choice column called department (‘field_23’ when i copy pasted it) but its to working
I have earlier for my multiple person column and it worked perfectly
any help?
join(xpath(xml(json(concat(‘{“body”:{“value”:’, item()?[‘field_23’] , ‘}}’))), ‘/body/value/text()’), ‘, ‘)
Try This:
join(xpath(xml(json(concat(‘{“root”:{“choices”:’, item()?[‘field_23’] , ‘}}’))), ‘/root/choices/Value/text()’),’ , ‘)
Hi
What’s the proper syntax for using this right after a SharePoint Get item (I want to get a single SharePoint item)? I see that this can be used in a create csv function (and I have used it there before) but i’m wanting to get the email addresses out of a SharePoint column and then format it to go into the “To:” line in an email.
Cheers
Hello Daniel,
if you have just one SP item you don’t need this complex expression, you can just ‘Select’ the email addresses from the people picker field and join(…) them by semicolon: https://tomriha.com/how-to-select-specific-values-from-an-array-in-power-automate/
THANK YOU, I spent the whole day yesterday trying to figure out how to do exactly this and finally found your article today, I’m bookmarking this site for future issues.