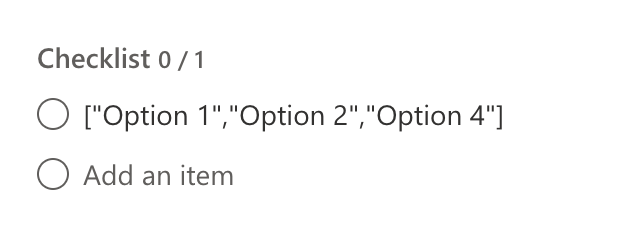
“I’d like to convert the multiple choice response from MS Forms into a Planner task checklist, is that possible with Power Automate?”
Working with the Forms in Power Automate is always challenging. The reason is that Forms gives you all the responses as a string. It doesn’t matter if it’s a number, date, or an array with choices, everything is a string. And if you use it as it is, Power Automate will process it as a single text value.
Unless you want to create a single checklist item with all the selected choices in the title, you must convert it.
Turn the string into an array
The first step is to convert the array-looking string into an actual array. It’s the only way how you can later loop through all the choices and create multiple checklist items.
As already described in the previous article, the fastest way is to use the json(…) expression.
json(<FormsMultipleChoiceQuestion>)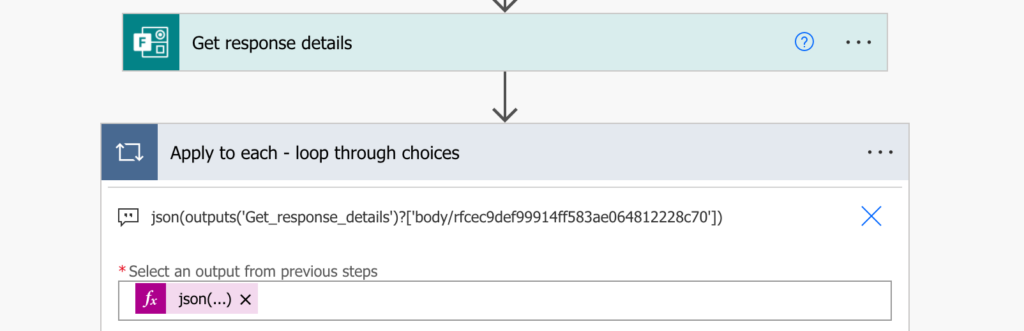
You can even use it directly as an input of an ‘Apply to each’ action where you’ll process the choices one by one.
Build the checklist items array
But to add the checklist items you’ll need a more complex array than just the choices. A new array variable to fill in the loop.
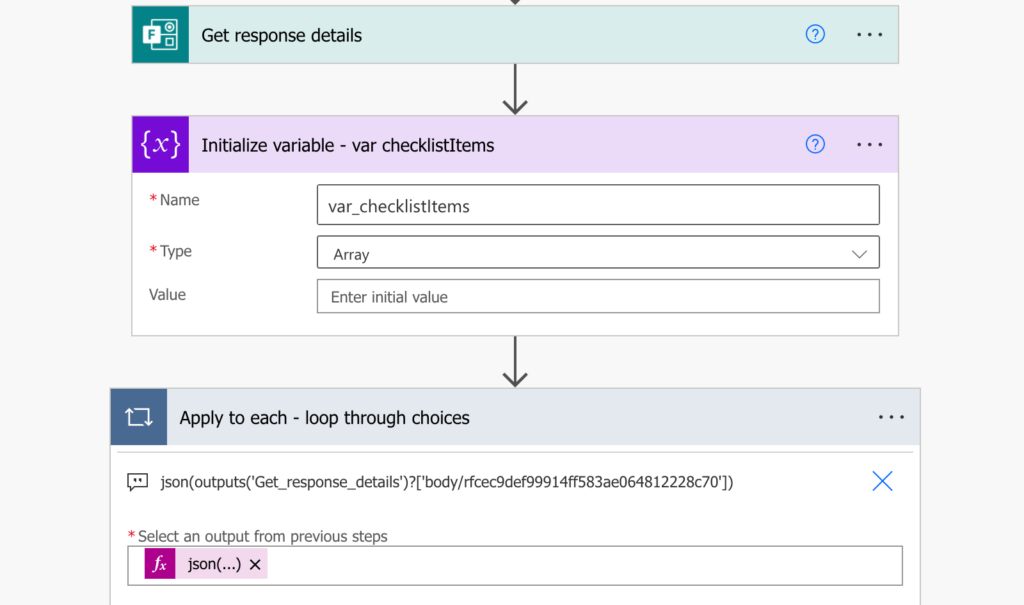
The array must have a specific format that you have to follow, and which you can get using a dummy checklist item.
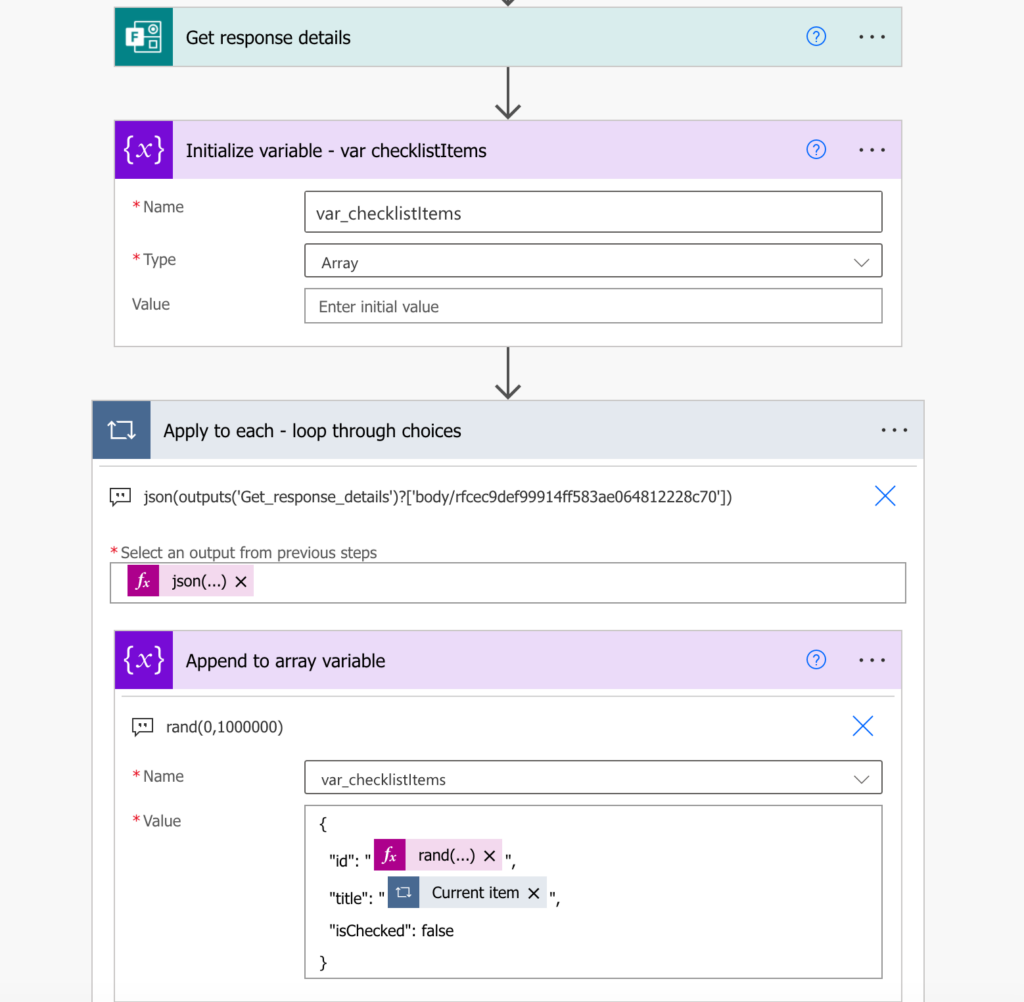
{
    "id": "<checklist item ID>",
    "title": "<checklist item title>",
    "isChecked": false
}
At this moment you have the title (the current loop item) and the isChecked information (that’ll be always false). But you’re missing the id. The id must be unique so you can’t use some fixed number and there’s no source for id’s as when using a SharePoint list. You’ll have to create a random id for each of the checklist items. That’s a job for the rand(…) expressions.
rand(<lowestNumber>, <highestNumber>)The rand(…) expression will give you a random number between the two numbers used as parameters. For example, the expression below will give you a random number between 0 and 1,000,000.
rand(0,1000000)Now, with all the pieces of information, you can add ‘Append to array variable’ in the loop and build the array with checklist items.
All that’s left is to update the Planner task with the checklist items.
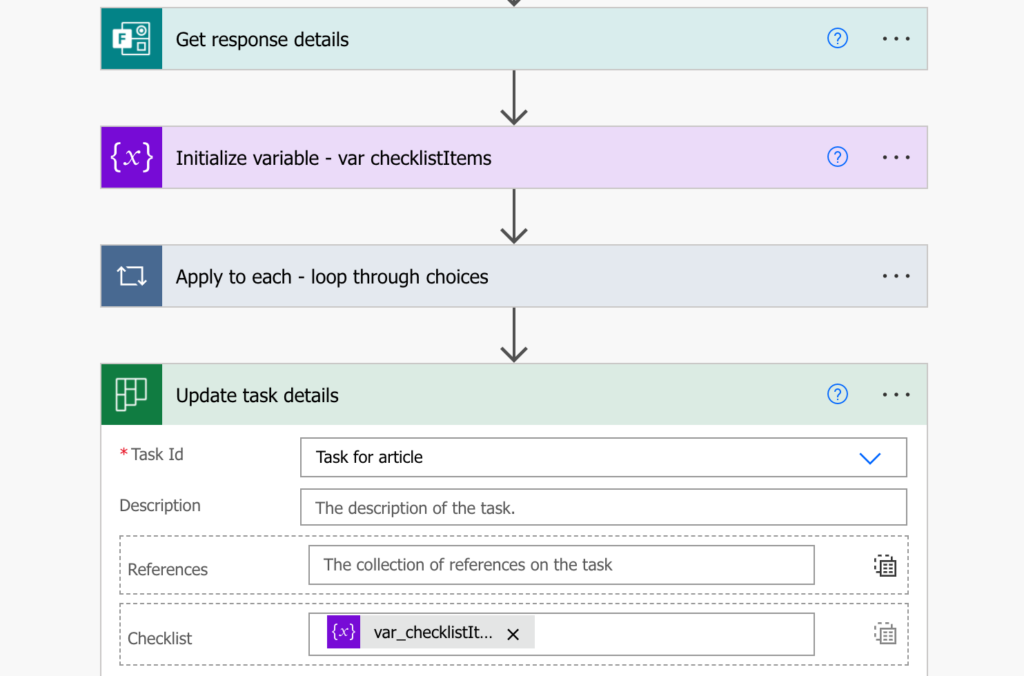
Summary
Converting Forms multiple choice question into Planner task checklist with Power Automate takes a few steps. Firstly, you must convert the responses from string into an array. Once you have the array you can loop through all the choices, and with the help of the rand(…) expression create an array in the right format. After the loop, after all the checklist items are ready, update them to the Planner task.
I was just working on this problem this week (converting a stringified array from Forms back into an array), and your idea of using json() is far cleaner than the mess of nested string expressions I had put together!
I’ll give you a tip in exchange: to generate your checklist id, you can just use guid() instead of rand(). No parameters required.
Hello Ben,
thank you for the tip, I didn’t know that you can use guid() as the id, I thought it has to be a number.
Hi Tom
I’m using SP list as my team’s main task list to create new tasks in Planner.
In this main task list, I am using 2 lookup columns. One column is a lookup for the team’s Planner (PlanID & GroupID) where the task will be assigned. The 2nd lookup is for selecting the checklist items. Each of these fields have multiple selections turned on.
I am able to run the flow for each new list item to create a new task for the appropriate team. However, I’m struggling with getting the choices from the multiple-selected checklist items into the task. I’m hoping you can provide some guidance for my use case. Thank you!