“I’d like to manage Teams private channels from a single place, can I build a Power Automate flow that’ll add a new member to such channel?”
Most of the time when you deal with members of a Teams channel, you work with members of an Office 365 group. It you add a user to the group, they’ll have access to the team and all the channels. If you remove the user, he’ll lose it. But what about private channels that are not connected to any group? How do you add a new member to a private channel when Power Automate doesn’t give you any dedicated action?
Important note: the solution uses generic HTTP request that’s part of the premium Power Automate license!
Register an application in Azure
Since there’s no dedicated action, and the existing HTTP actions don’t have the necessary permissions, you’ll have to register an application in Azure that’ll provide them.
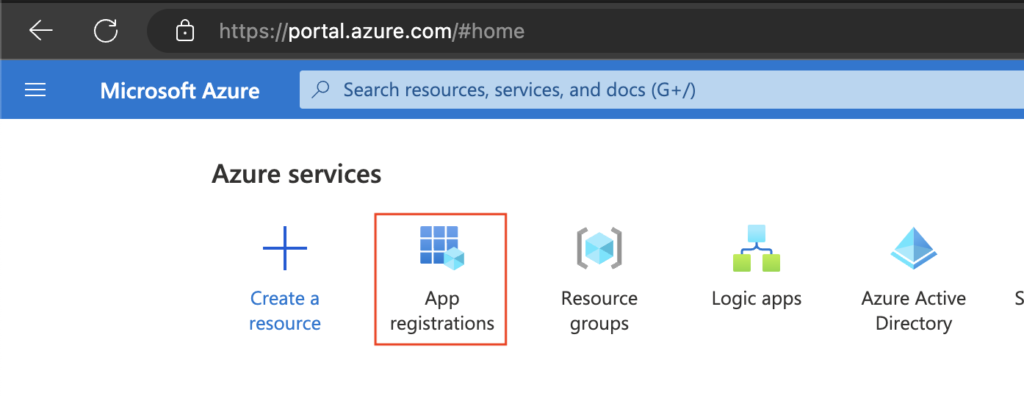
Go to the Azure portal and register a new application.

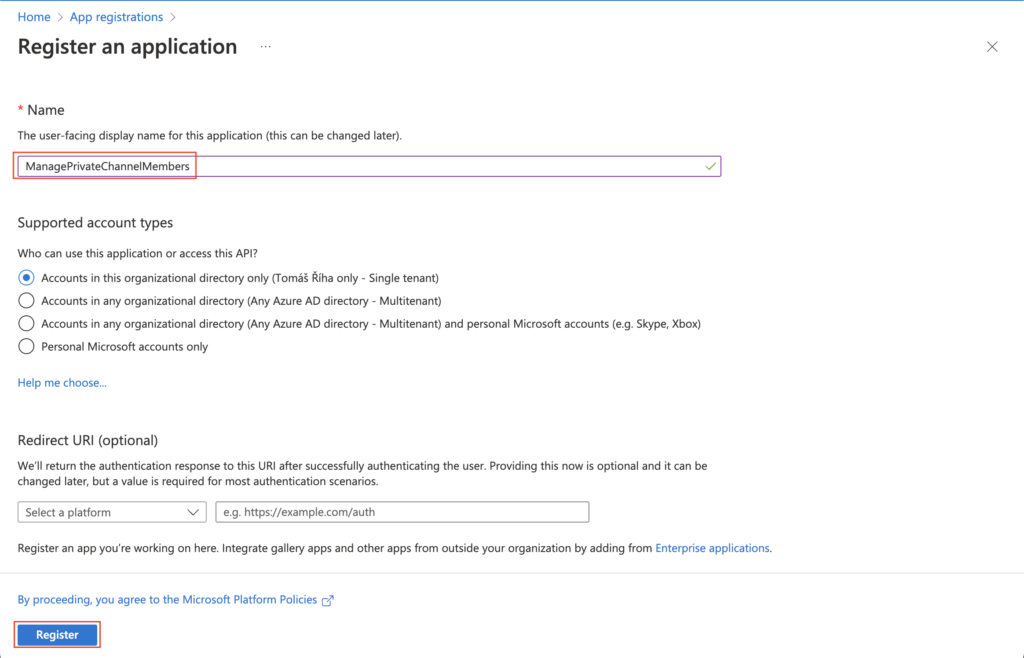
Let’s call it for example “ManagePrivateChannelMembers” and click the ‘Register’ button to create it.
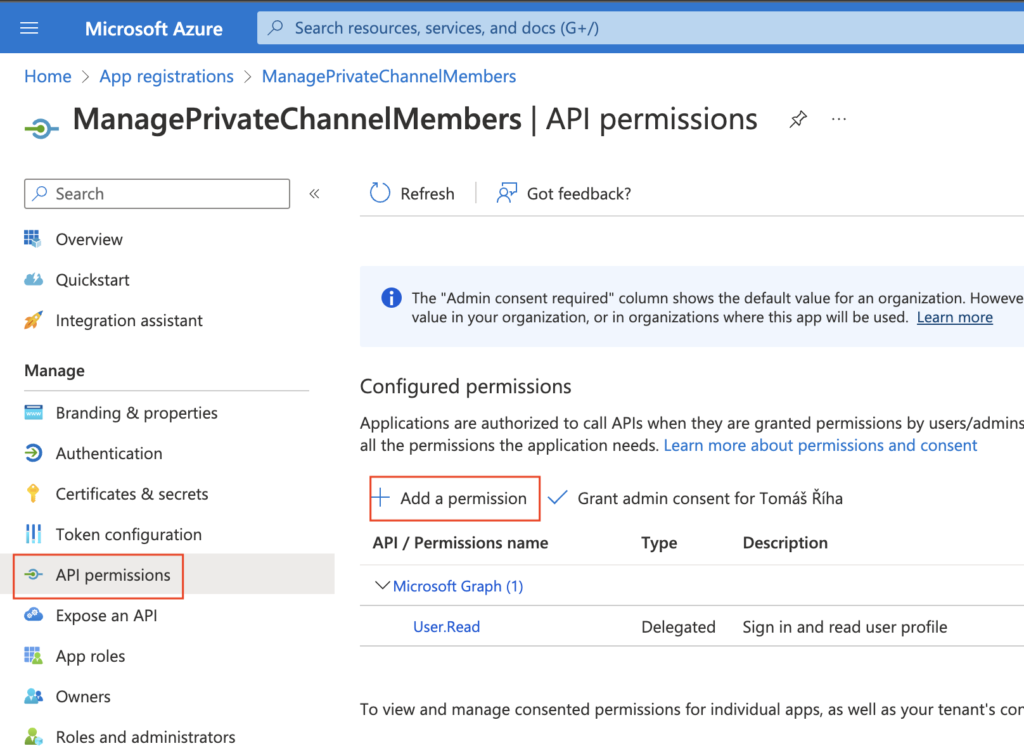
Once created, go to ‘API permissions’ and ‘Add a permission’. This is the step where you define what you’ll be able to do when using this application for authentication.
The permissions you need to manage members of private Teams channels are Microsoft Graph -> Delegated permissions -> ChannelMember.ReadWrite.All. Check the checkbox and add the permissions.
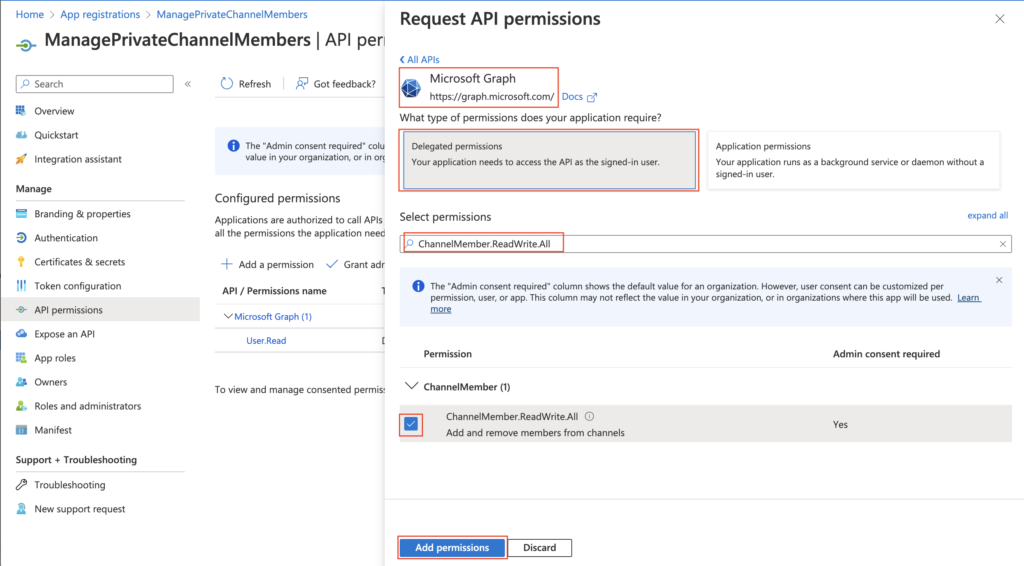
Grant the admin consent to allow use of the permission level in the flow.

Now the application knows that it can use this permission level. Go to the ‘Certificates & secrets’ next to get the “password” to the application.
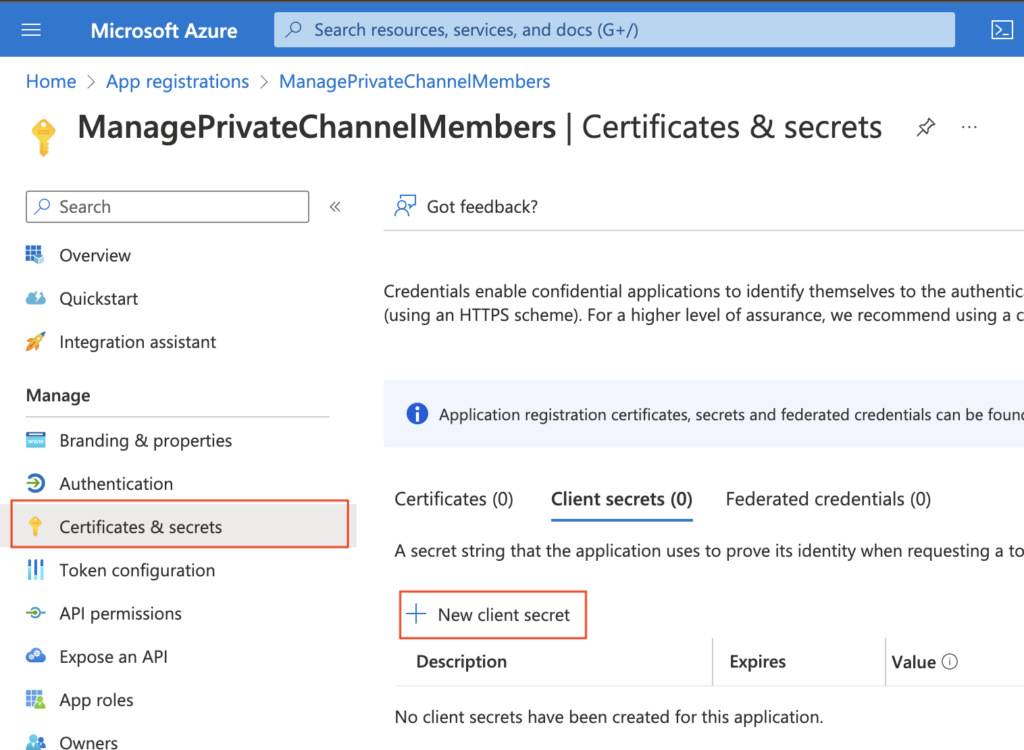
Add some description (not that important) and create the secret. Make sure to copy the Value somewhere safe, it’ll be accessible only right after the creation.

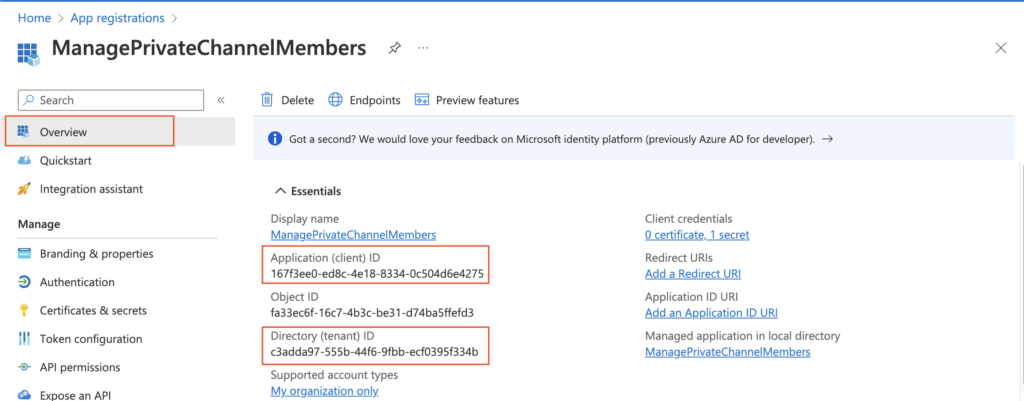
Additionally to the secret you’ll need also the ‘Application (client) ID’ and ‘Directory (tenant) ID’. Take also these two values and store them with the secret, you’ll need them all later in the flow.
The application is ready, now you can move on to building the flow.
Prepare the flow
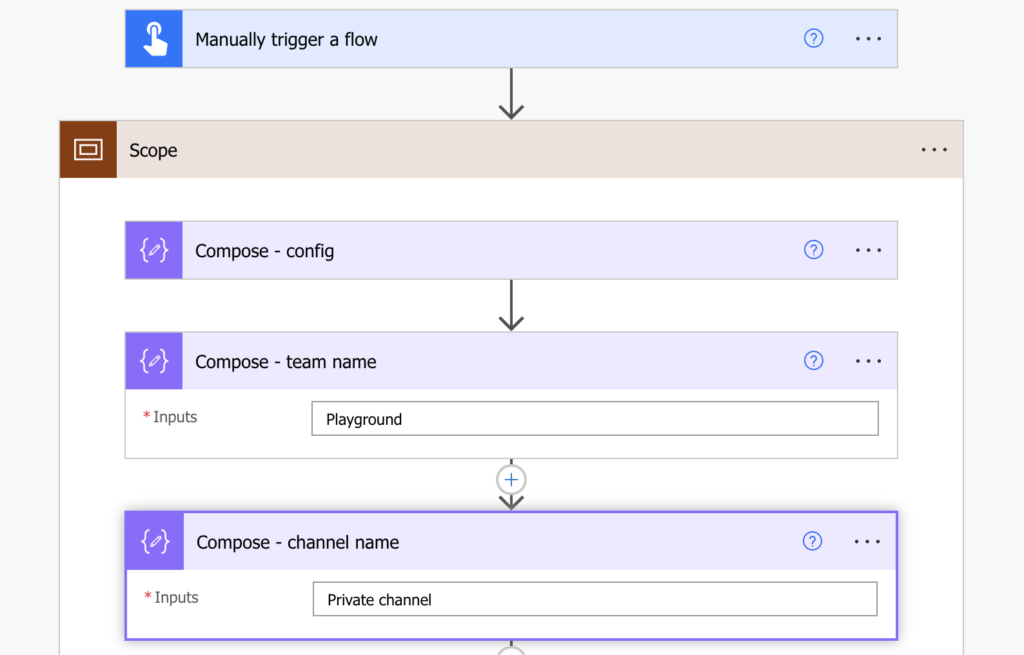
Use the trigger of your choice, in my case it’s a manually started flow. In the first step add a ‘Compose’ action and store all the configuration from the application you just registered – tenantId, applicationId, applicationSecret, plus userName of the user running the flow, and his password.
Use a JSON object format to make it easy to reference the values later.
{
  "tenantId": "xx",
  "applicationId": "xx",
  "applicationSecret": "xx",
  "userName": "xx",
  "userPassword": "xx"
}
Since you’re adding user to a Teams channel, you’ll need the Team name and the Channel name…
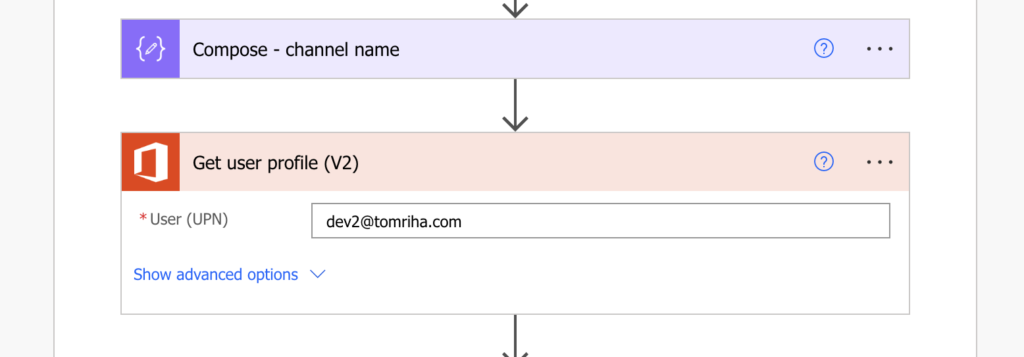
…and the ID of the user you’re trying to add.
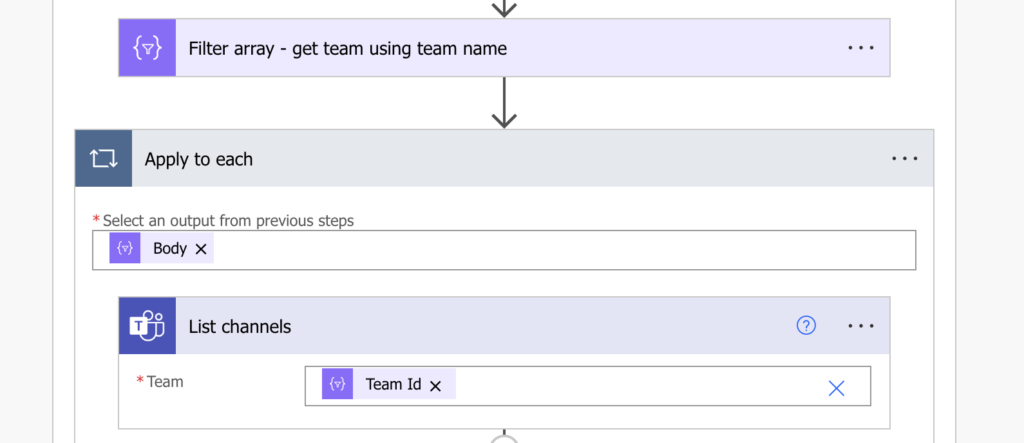
List all Teams and filter only the one with the desired name.

Since there should be only 1 Team with the name, you don’t care about the ‘Apply to each’ added while listing all the team channels.
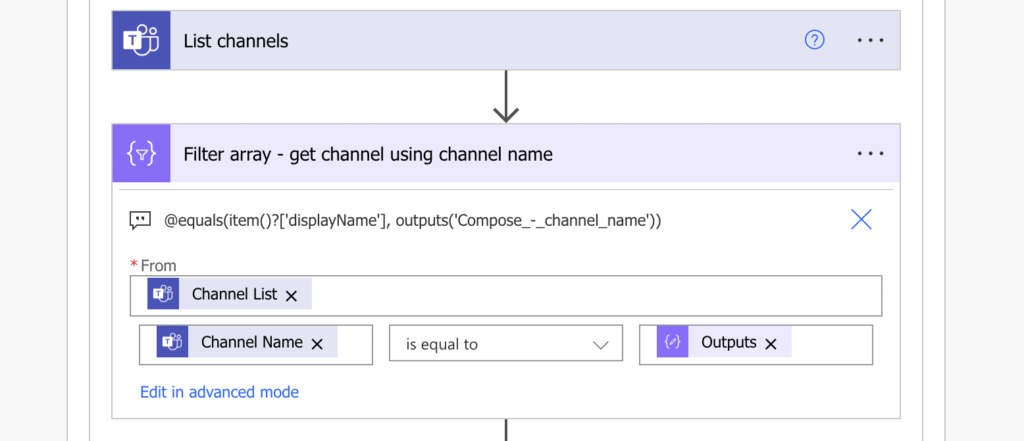
Again, filter only the channel that you’re interested in to get its ID.
Once you have the ID of the Team, ID of the private channel, and the registered application, you can do the actual addition.
Send the HTTP requests
Firstly, you must authenticate to the application you created with an HTTP request. This first request will give you an access token, a validation that you’re allowed to use the registered application.
Method: POST

Uri:
https://login.microsoftonline.com/<tenantId>/oauth2/token

Headers:
{
  "Content-Type": "application/x-www-form-urlencoded"
}

Body:
grant_type=password&resource=https://graph.microsoft.com&client_id=<applicationId>&username=<userEmail>&password=<userPassword>&client_secret=<applicationSecret>
Note: everything inside <…> is a placeholder, it must be replaced including the < and >.
In the example code below I’m using the configuration in the ‘Compose – config’ action created at the beginning.
Method: POST

Uri:
https://login.microsoftonline.com/@{outputs('Compose_-_config')?['tenantId']}/oauth2/token

Headers:
{
  "Content-Type": "application/x-www-form-urlencoded"
}

Body:
grant_type=password&resource=https://graph.microsoft.com&client_id=@{outputs('Compose_-_config')?['applicationId']}&username=@{outputs('Compose_-_config')?['userName']}&password=@{outputs('Compose_-_config')?['userPassword']}&client_secret=@{outputs('Compose_-_config')?['applicationSecret']}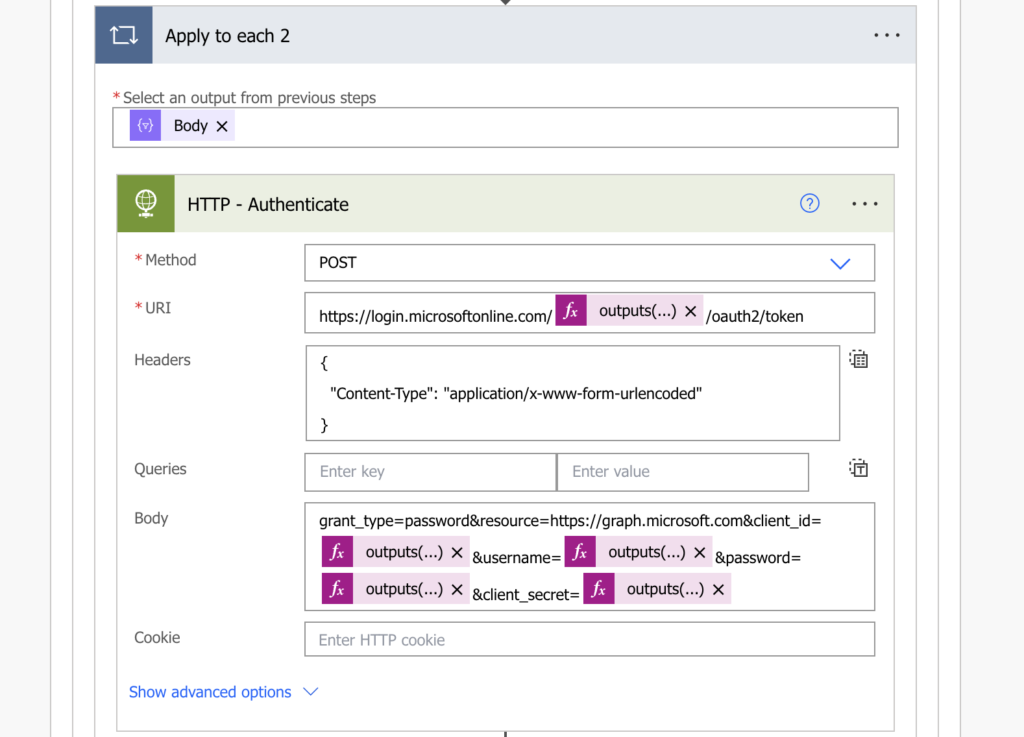
Using the access token you can finally add the new member to the private channel with another HTTP request.
Method: POST

Uri:
https://graph.microsoft.com/v1.0/teams/<teamId>/channels/<channelId>/members

Headers:
{
  "Content-Type": "application/json",
  "Authorization": "Bearer <authenticationToken>"
}

Body:
{
  "@odata.type": "#microsoft.graph.aadUserConversationMember",
  "roles": [
    "<userRole>"
  ],
  "user@odata.bind": "https://graph.microsoft.com/v1.0/users('<userId>')"
}
Note: everything inside <…> is a placeholder, it must be replaced including the < and >.
Replacing all the placeholders with the dynamic contents from the flow it might look like this:
Method: POST

Uri:
https://graph.microsoft.com/v1.0/teams/@{items('Apply_to_each')?['id']}/channels/@{items('Apply_to_each_2')?['id']}/members

Headers:
{
  "Content-Type": "application/json",
  "Authorization": "Bearer @{body('HTTP_-_Authenticate')?['access_token']}"
}

Body:
{
  "@odata.type": "#microsoft.graph.aadUserConversationMember",
  "roles": [
    "member"
  ],
  "user@odata.bind": "https://graph.microsoft.com/v1.0/users('@{outputs('Get_user_profile_(V2)')?['body/id']}')"
}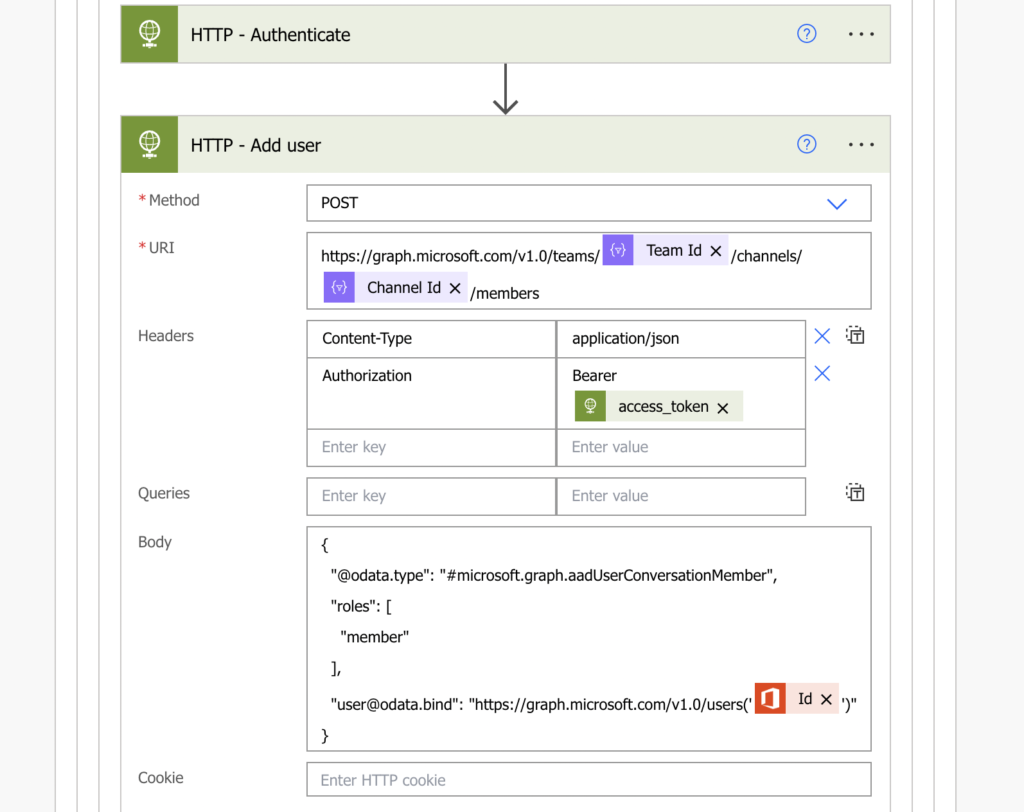
Note: you can use the values member, owner, or guest for the user role.
And that’s it, you just added a new member/owner/guest to a Teams private channel. Just don’t forget that you should add the user also to the related Office 365 group to give him access to the team itself.
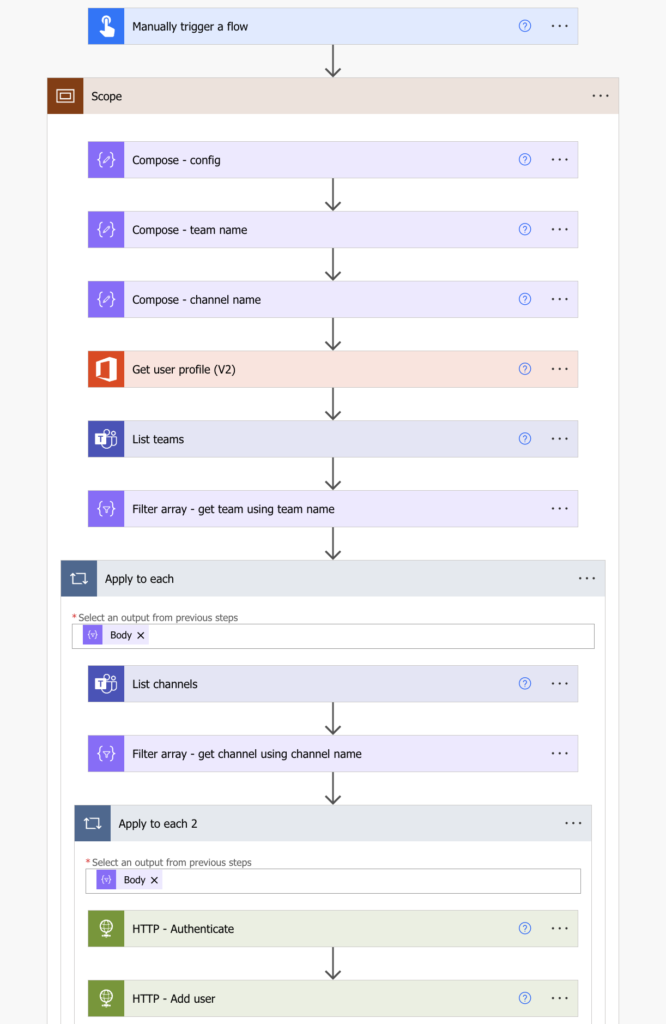
The whole flow diagram
Summary
This post turned out to be much more complicated than I originally expected. On the other side it’s packed with new information…
Registering an Azure application is something you might need to do from time to time, not only to add member to a Teams private channel, but for a lot of the more complicated stuff in Power Automate. Once you learn how to register them and how to authenticate towards them, your possibilities will move to a different level with the Graph API.
Does authenticating with just a name and password work if your organization uses MFA or 2FA?