“The HTML table created by Power Automate seems a bit dull, is there some way to add background colour to the row(s)?”
In the past I wrote a few articles on making the HTML tables a bit more colourful – adding colours to the header, display some values in a different colour, or how to use more than one colour. But all of the solutions affected only the specific value, only the data in a column. What about adding colours to the whole row? Not only changing the text colour in one column, but to add background to the whole row?
The difference between formatting a row and a column
When we formatted only the value colour, the formatting was added in the ‘Create HTML action’. Instead of choosing the value directly there was an expression that added the required HTML tags. As a result the table cell with the value contained the code for the new colour.
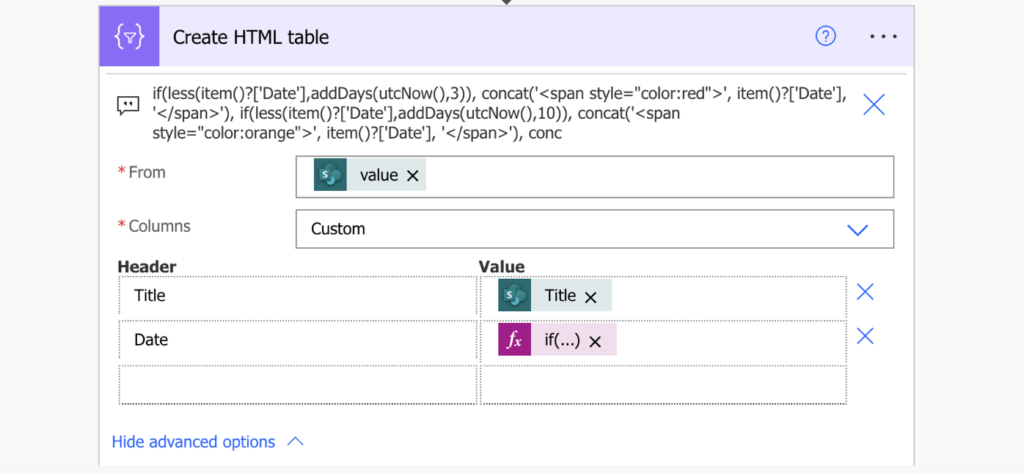
Formatting a whole row is a bit more complicated as you must add the colour to all the values/cells.
While you might be tempted to just apply the same formatting formula on all the values, it’s not the right approach. Background colour applied on the values won’t fill the whole table cell. It’ll be only as long as the value it’s applied on as you can see below.

The formatting must be added to the whole row, not only the value.
How to add background to the whole row then?
Since you want to add colour to the whole row, you must add the styling to the row HTML tag. In short, each row begins with <tr> and ends with </tr>. In long, you can check this article to learn more about the HTML table code.
Split the table into rows
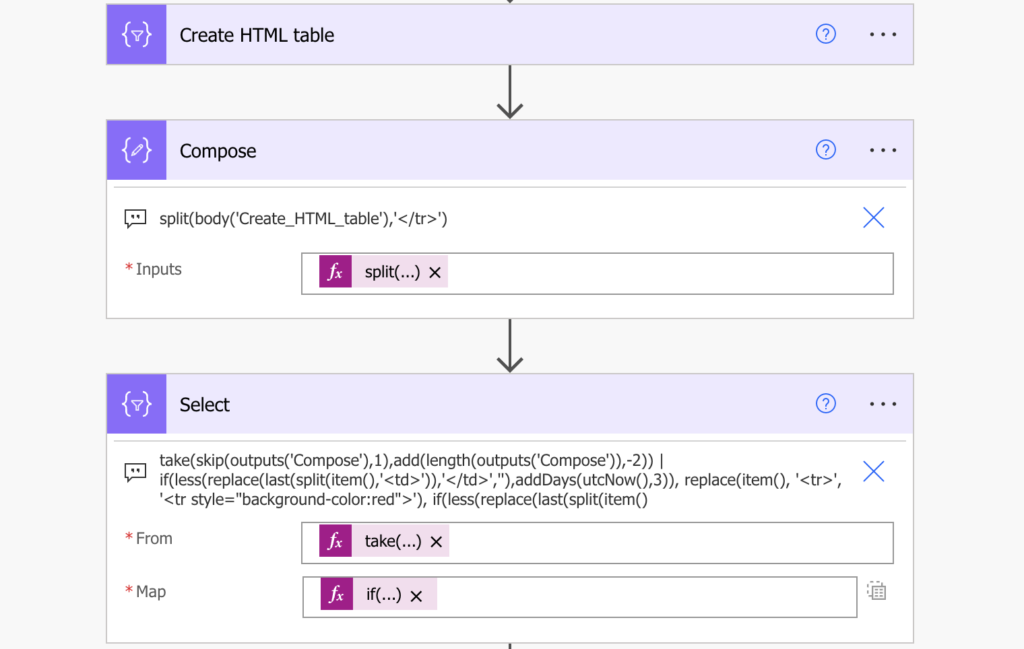
With this knowledge, the first step is to split(…) the table into separate rows using the row ending tag ‘</tr>’.
split(body('Create_HTML_table'),'</tr>')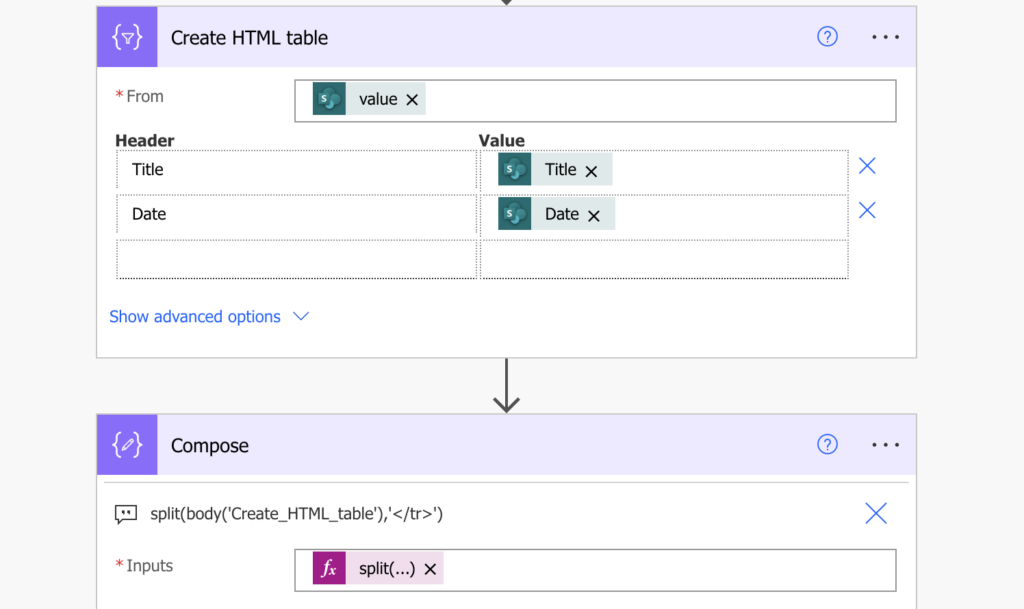

With each row a separate item in an array, you can add the ‘Select’ action where you apply the formatting condition. Since you don’t want to format the header row, skip(…) the first item remove it. Remove also the last item with take(…) as that’s the table closing – no data in there.
take(skip(outputs('Compose'),1),add(length(outputs('Compose')),-2))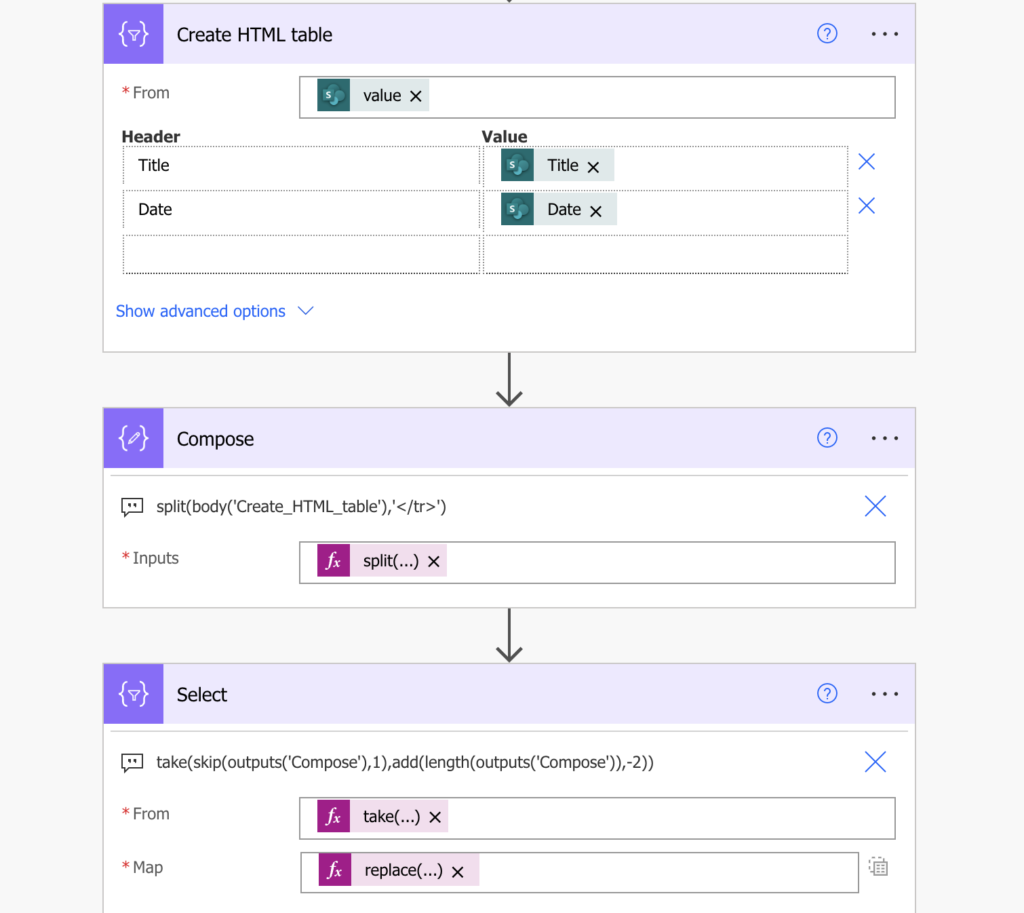

And here comes the most complicated part of the solution – find the value for a condition.
Extract values for the condition
Since you know in which column the value is, you can extract it with another bunch of split(…) expressions. The data in HTML table is always inside <td> and </td> tags, and in this example the date is the last column.
Split(…) the row by the <td> tag and select the last(…) item. To make the processing as fast as possible let’s do it all in the ‘Select’ action by building a complex expression and referencing each row with the expression item().
IMPORTANT NOTE: it seems you can’t use indexes in the ‘Select’ action to pick a specific piece of the item, that’s the reason why the date is the last column – the last(…) expression works. If you want to base the condition on a column in a different position, you’ll need an array variable and a loop with ‘Append to array variable’ using the expression with [index] instead of last(…).
last(split(item(),'<td>'))Remove also the closing </td> to get only the value.
replace(last(split(item(),'<td>')),'</td>','')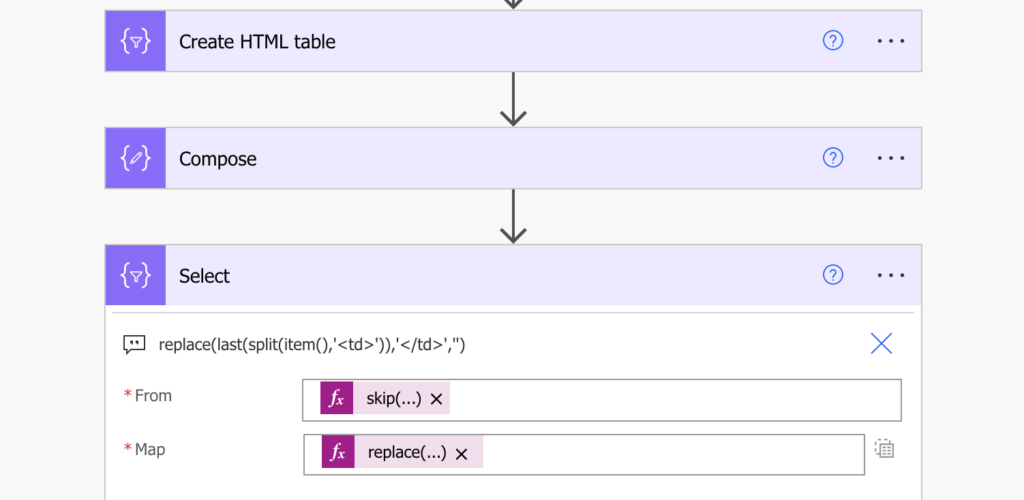
Build the condition and add the background colour
Now, with the extracted value, you can start building the condition.
if(Date < Today + 3, <rowInRed>, <otherColour>)
if(Date < Today + 10, <rowInOrange>, <otherColour>)
if(Date >= Today + 10, <rowInGreen>, <no colour>)
Applying the extract value expression in the expression from the previous article:
if(less(replace(last(split(item(),'<td>')),'</td>',''),addDays(utcNow(),3)),
   <rowInRed>,
if(less(replace(last(split(item(),'<td>')),'</td>',''),addDays(utcNow(),10)),
      <rowInOrange>,
      <rowInGreen>
   )
)
Such condition will check the date and compare it with today’s date, yet it’s still missing the row formatting. As already mentioned, each rows starts with the <tr> tag. That’s the tag that must be extended by adding a style with the colour – or replaced.
Since we’re still in the ‘Select’ action, the whole row is referenced as item(). Replacing the <tr> tag with an extended one could then look as below.
replace(item(), '<tr>', '<tr style="background-color:red">')Adding this to the expression with the conditions:
if(less(replace(last(split(item(),'<td>')),'</td>',''),addDays(utcNow(),3)),
   replace(item(), '<tr>', '<tr style="background-color:red">'),
if(less(replace(last(split(item(),'<td>')),'</td>',''),addDays(utcNow(),10)),
      replace(item(), '<tr>', '<tr style="background-color:orange">'),
      replace(item(), '<tr>', '<tr style="background-color:green">')
   )
)

Add back the first and last row (table header and table closing)
Once you add the styling to each of the rows, join(…) them back into a string using the </tr> tag you used to split them…
join(body('Select'),'</tr>')…and add the header and the table closing parts you removed with the take(…) and split(…).
concat(first(outputs('Compose')), '</tr>' ,join(body('Select'),'</tr>'), '</tr>', last(outputs('Compose')))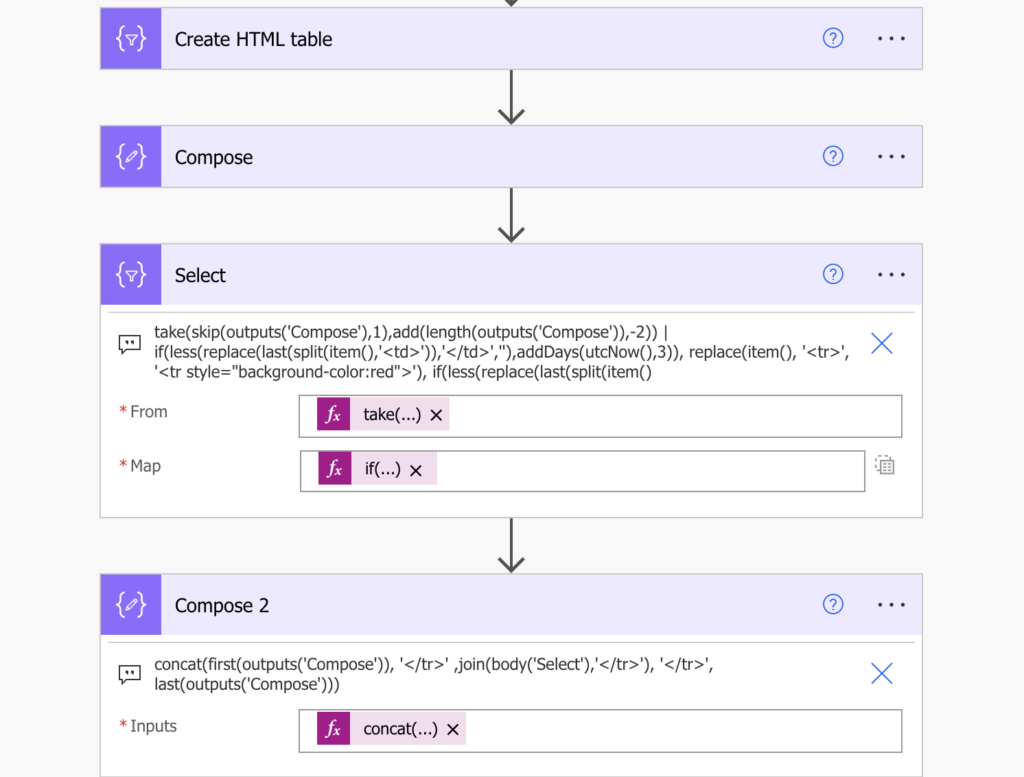
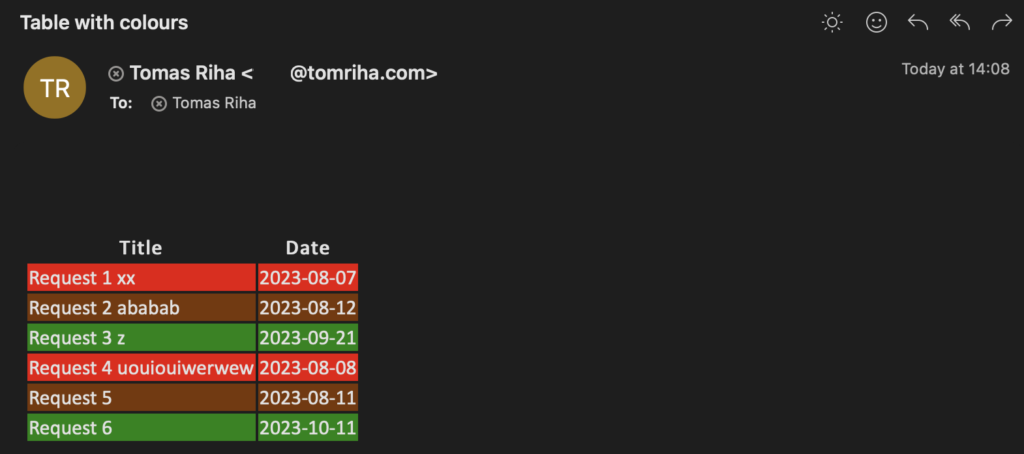
Restore the HTML tags with the last expression and send the email.
replace(replace(replace(outputs('Compose_2'),'<','<'),'>','>'),'"','"')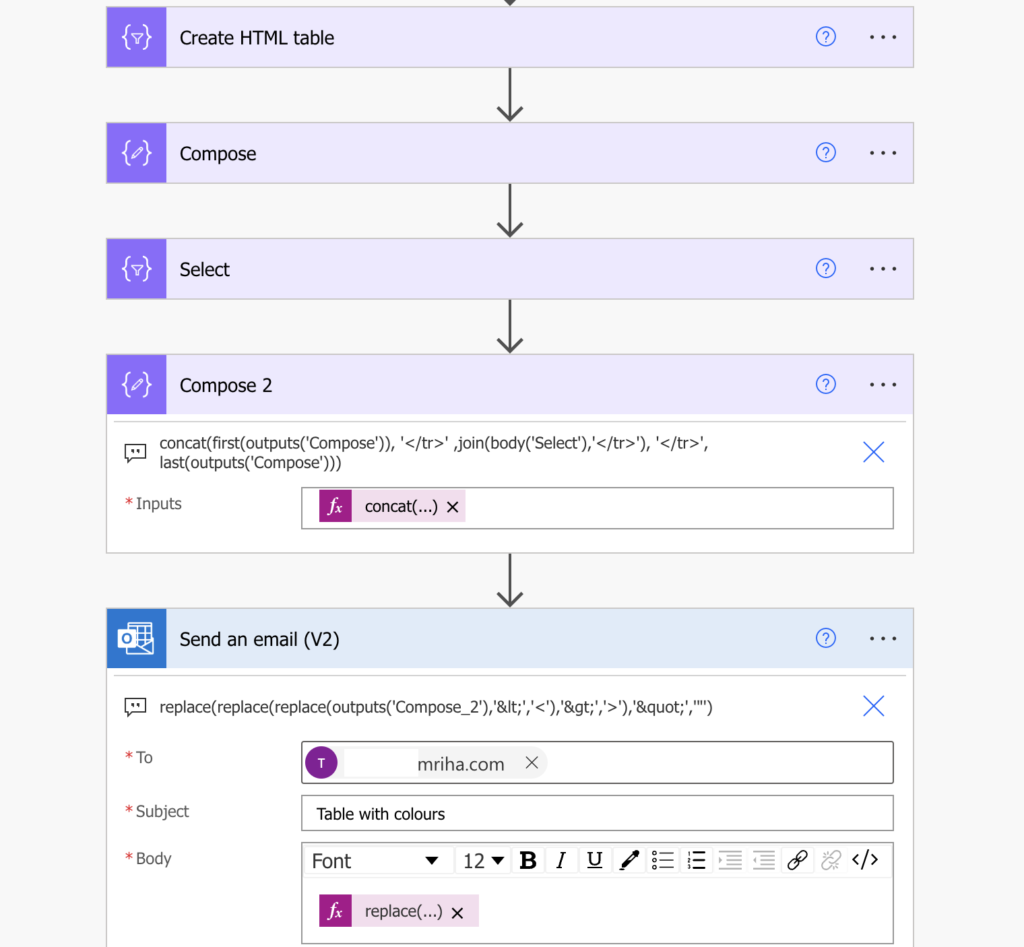
Summary
As you can see, adding a background colour to the whole row in an HTML table created by Power Automate flow is a bit more complicated than adding colour just to a single value. The reason is that you can’t apply it on the value directly, you must go higher in the table tags hierarchy to update the right tag.
Split the table into separate rows, remove the heading and the table closing, and apply a condition to the rest. Extract the specific value from the row, use it in a condition, and apply the formatting on the whole row.