“I’m trying to automate export of SharePoint list into an Excel file, but Power Automate takes ages to finish. How can I make it faster?”
Exporting SharePoint list items into an Excel file can be very time consuming. You must loop through all items and add each of them as a new row into the Excel file. Especially if you have big lists with thousands of items it can take hours. So, is there a faster way?
Create .csv file instead
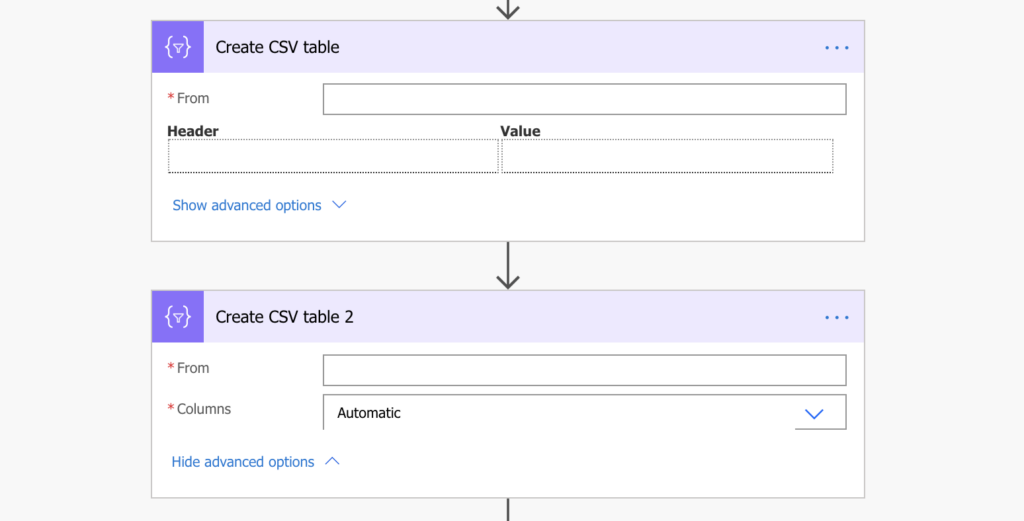
You can create .csv file instead of an Excel file. CSV file has simpler format than an Excel file, but it can be opened in the Excel application in the same way. And due to its simple format the list can be exported much faster than into an Excel file. Power Automate has even a dedicated action to create a .csv file from an array. It’s called ‘Create CSV table’ and the input must be an array. Then you can select if you want to export all columns (Automatic) or only some of them (Custom).
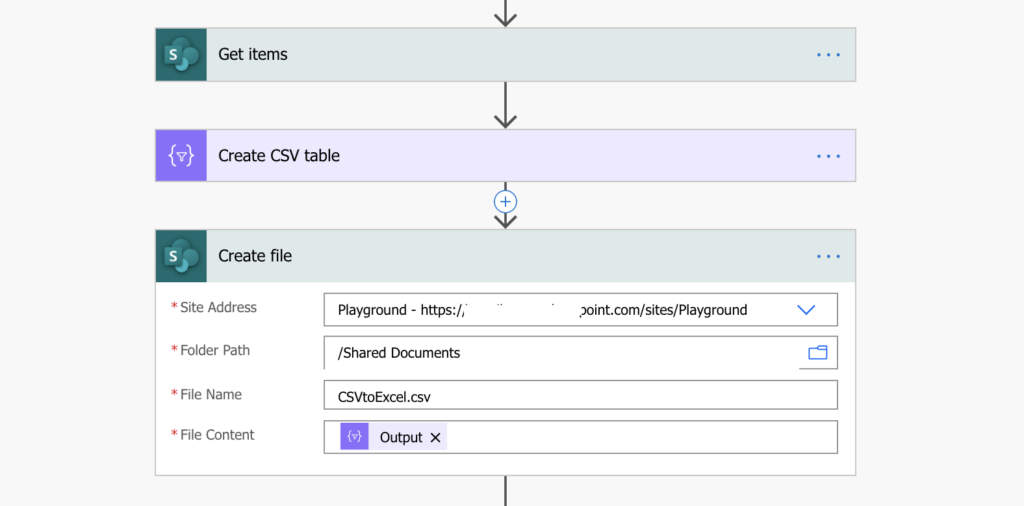
The example below will process all items returned by the ‘Get items’ action and create a .csv file with only 3 columns.
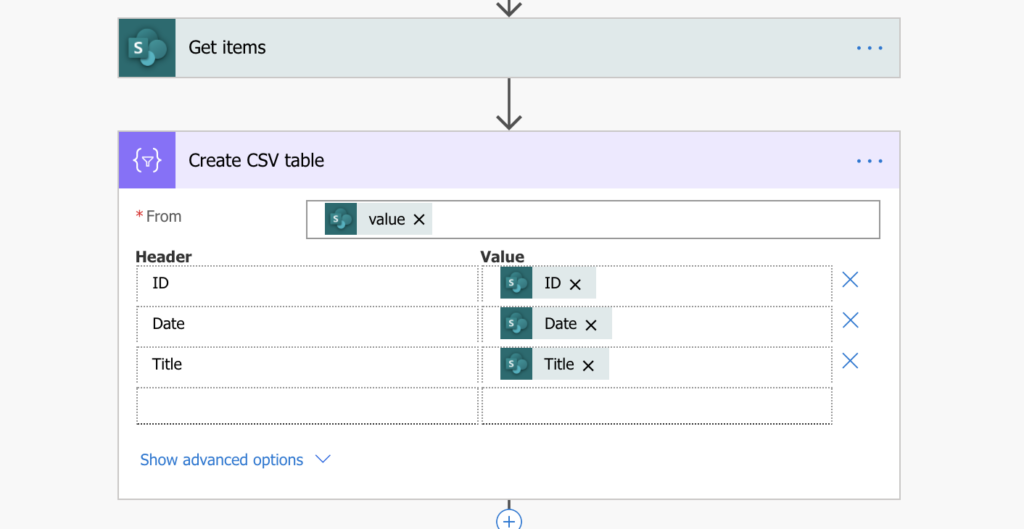
The output from the ‘Create CSV table’ action can be then used as a content for a new .csv file.
Summary
You should ask yourself if you really need an Excel file. It’s much easier, and faster, to create a .csv (comma-separated values) file in Power Automate. Instead of adding rows one by one into an Excel table, you can process the whole array with all items at once.
But if .csv is not an option and you need an Excel file, then there’s no solution to make the export faster. Power Automate can add the rows only one by one and that operation takes some time.
Hi, Thanks for your post.
But is there any step I can replace the csv exported file with new file. I dont want multiple files to be saved . Everyday there should be new exported file with updated data.
Currently my flow gets failed because the csv file with same name already exist.
Please suggest.
Hello Sumit,
take a look on this older article: https://tomriha.com/how-to-update-not-replace-an-existing-file-in-power-automate/. If the creation fails, continue with update of the existing file.
Hi there, great post!
Any idea how I can export the values only for managed metadata fields?
Tx in advance.
Hello Barend,
the managed metadata field value contains the term in format Value|TermID. As such, you’ll need the split(…) expression to remove the TermID part and keep only the Value, e.g.
split(item()?['ManagedMetadataColumnInternalName/Value'],'|')[0]You’re a life saver…. I was struggling with how to put an .xlxs file on sharepoint.. I found many other videos but nothing did what I wanted to do… with your suggestion that we use a .csv file instead, it became so simple.. Thank you.
I have followed the above instruction but I keep getting an error while testing the flow: “The ‘from’ property value in the ‘table’ action inputs is of type ‘String’. The value must be of type ‘Array’.”
Any ideas how this can be fixed? I just cannot simply change it as the data I am trying to save onto csv file is retrieved from FORMS outcome.
Hello Kamil,
the solution is intended to export a whole SharePoint list into .csv file. If you’re trying to save Forms responses into an Excel file you can use the ‘Add a row’ Excel action.
Hi Tom,
Thanks for your sharing.
My problem is that I can’t find the “DisplayName” for the person field value in the Dynamic Content, so the csv file returned with whole “@odata.type” content. How can I get the correct DisplayName returned in the person column?
Thanks a lot in advance.
Hello Wayne,
if there’s no DisplayName then I guess it’s a multiple people picker column – you’ll have to use the solution described here: https://tomriha.com/export-multiple-person-or-group-column-into-csv-table-in-power-automate/
Also if anyone really needs the output to be in an Excel format, this template can convert most CSVs to an Excel file in under 15 seconds…
https://powerusers.microsoft.com/t5/Power-Automate-Cookbook/CSV-To-Excel-Table/m-p/1826096#M964
Above Flow by default, 100 items gets created in a CSV file. How if the SharePoint List item has more than 5000(eg 40000) items?and wants all records in CSV
Hello raks,
I never did that, maybe just enabling paging will help, maybe it’ll need multiple ‘Get items’ and then converting the outputs in a single .csv.
In the “Get Items” action, expand the advanced settings and set the “Top Count” to a number great than the number you need to return (5000 is the max).