“Some of my tasks can’t be finished in a month, is there some workaround to process Power Automate approval task after 30 days?”
I’ve been building a lot of approval flows lately, dealing with various situations. A restartable (and much easier to debug) approval flows, handling expired tasks, restarting the whole expiring flows, and many more features you must implement by yourself in the process. One of the solutions I proposed in the past was to remove tasks after the flow expires and create them again, but after a bit of thinking I thought of another solution – keep the original task as long as necessary.
Table of Contents
How the approval tasks work
The Approvals functionality is a standalone feature connected to Power Automate. You might notice that when you use the approvals on a new Power Platform environment for the first time, it’ll tell you to wait until it creates the related Dataverse tables. The Approvals actions in the flow then interact with these tables. When you create a new task in a flow, it’ll create a new entry in the tables. Once users complete the task, it’ll update the row in the tables.
That’s the reason why tasks still exist even after the flow expires. And that’s also why you can process tasks even after the original flow expires.
How to get the task response
The only reason why the old tasks don’t do anything is because there’s no flow waiting for them. If you use the ‘Start and wait for an approval’ action, the task must be finished during the flow run. It creates the tasks, waits for it to finish, and if it’s not finished in time nothing happens – nobody is waiting anymore.
The solution is to make a second, “waiting” flow. One flow to create the approval task, another one to wait for the response. And since it’s two flows, you can’t use the ‘Start and wait for an approval’ action.
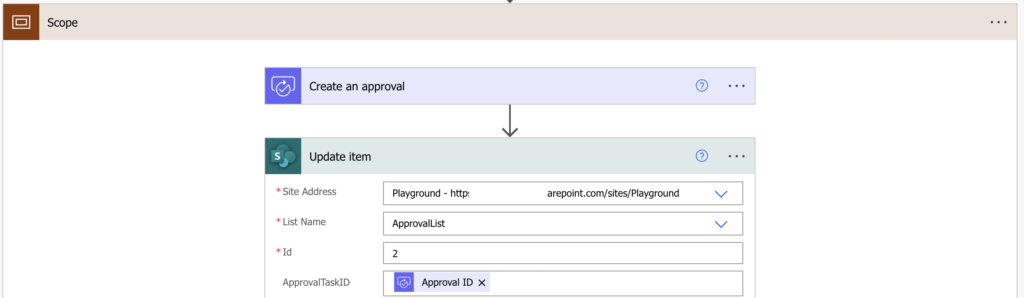
Old solution: using SharePoint list in the middle
In the first flow ‘Create an approval’ with all the necessary preparations and store the ‘Approval ID’ somewhere, e.g. in a SharePoint list.
Once the column has a value, you can start the second flow, the one waiting for the response. Get the approval ID and use it in the ‘Wait for an approval’ action.
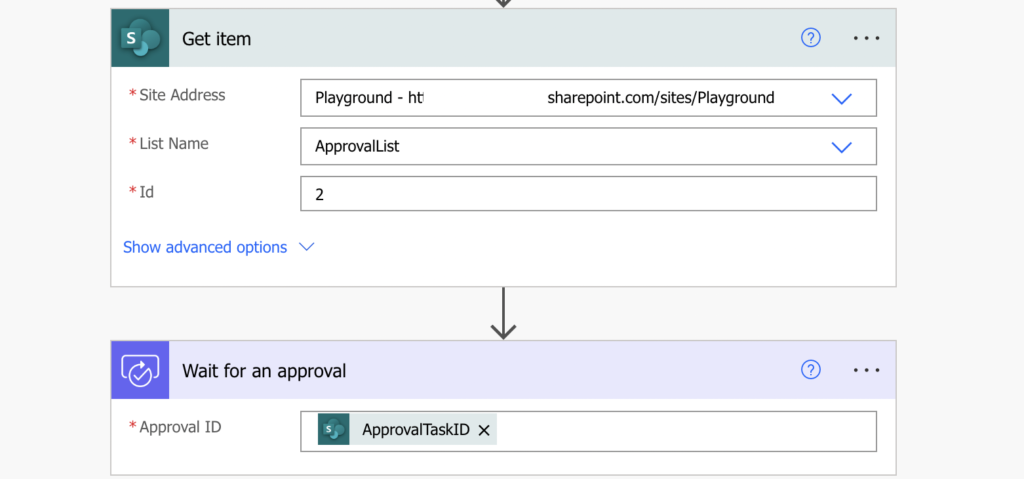
Set the timeout on the ‘Wait…’ action to 29 days, and if it’s not completed by then, resubmit the flow. This way there’ll always be a flow waiting for the task completion, no matter how long it’ll take. The task processing must be then obviously in this second flow.
New solution: using a child flow
As recently suggested by Tomasz Poszytek, you don’t necessarily need the middle step. The whole point of the SharePoint list was to store the Approval task ID somewhere outside the flow, somewhere accessible by the other flows, but that’s not necessary if you use child flows.
If you move the whole evaluation of the approval task into a child flow, you can pass the approval id as its parameter.
NOTE: to make this work the flow must be built as a state machine!
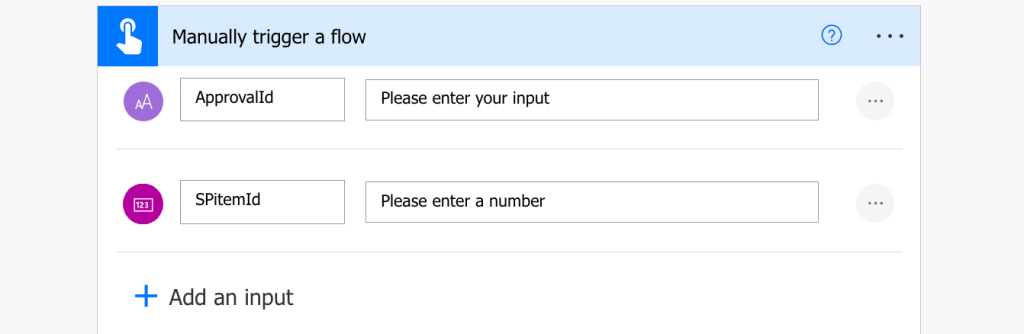
The prerequisite for a child flow is having a Solution – if you didn’t use them yet, this is a good moment to start. Once you have the current approval flow in a solution, create another one, manually started to process the task outcome.

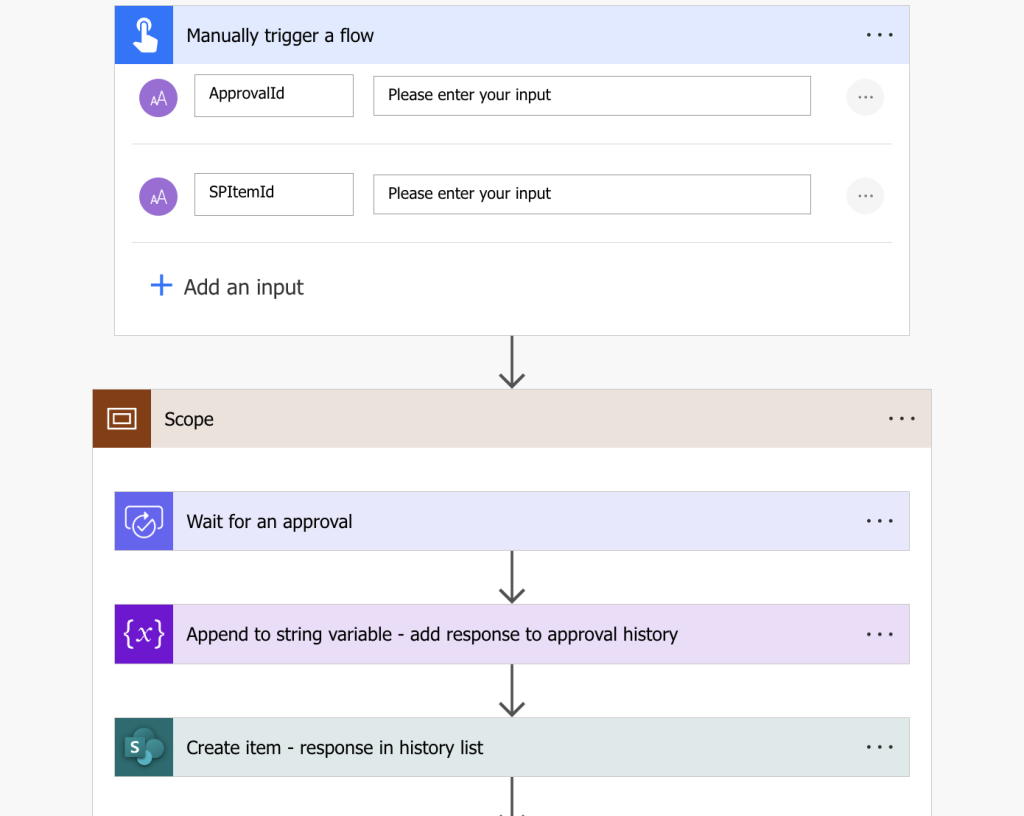
Add two input parameters in the trigger: ApprovalId (text) and the item Id (number), that’s how you tell it which approval task it should track…
…and move the whole evaluation of the response into this new flow – that means everything after the ‘Wait for an approval’ action, including that action.
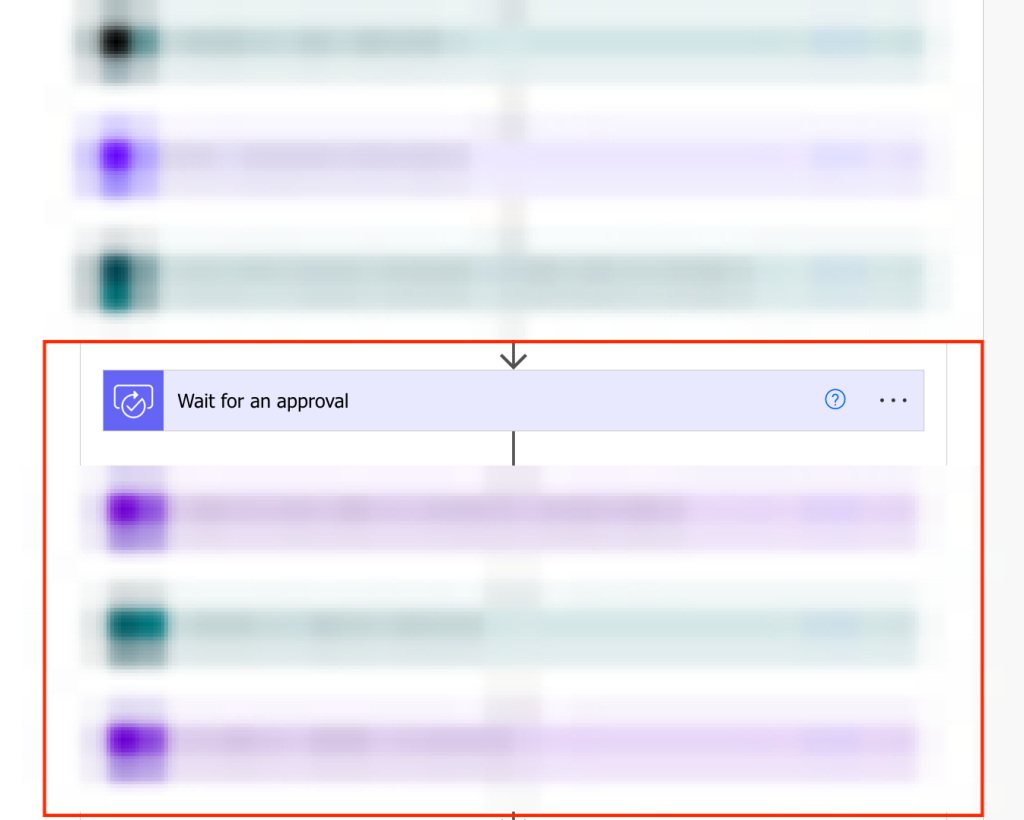
All the logic, everything that must be done after the approval step should be in this flow.
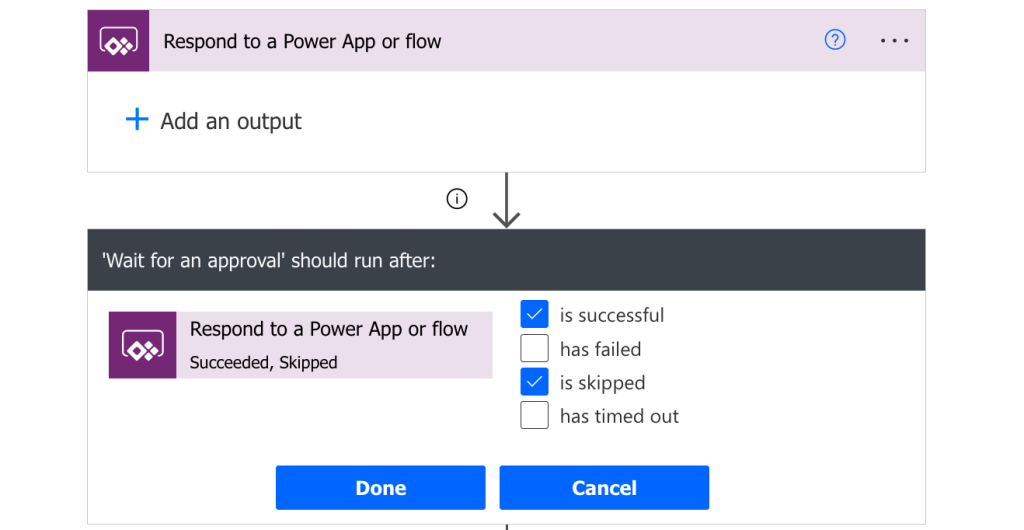
There’re two more actions to add into the flow to make it work. Firstly, it must respond back to the main flow, the one that created the task. No need for any parameters.
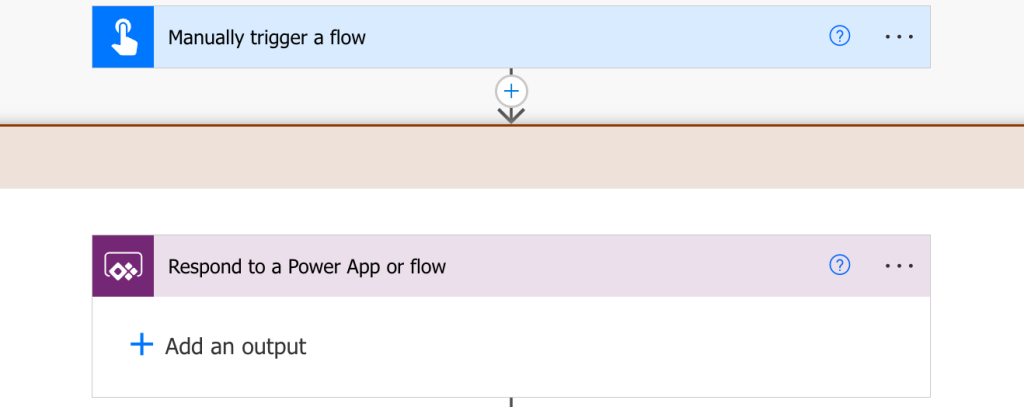
Configure the action after to run if the ‘Respond…’ action is successful or if it is skipped. Either it’s the first run and there’s a main flow waiting for a response, or it’s a resubmit, nothing is waiting, and the action will be skipped.
Secondly, add the timeout on the ‘Wait for an approval’ action and add a parallel branch that’ll run if it times out. This is the part that will move you over the 29 days.
Set the timeout for 29 days and if it expires, resubmit the flow.

Triggering the child flow
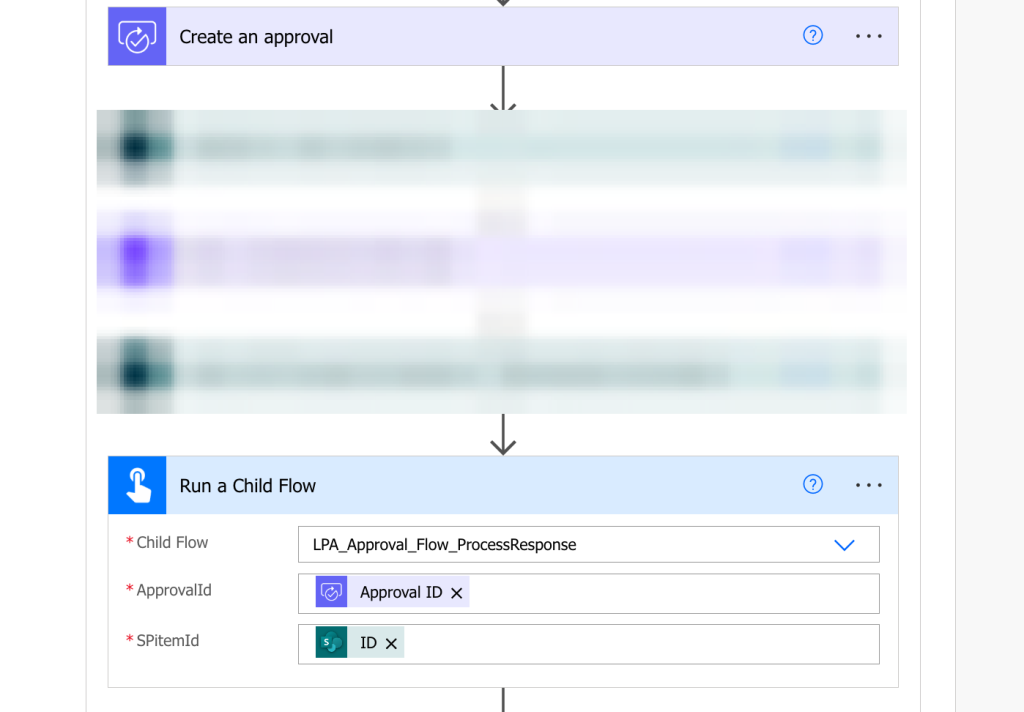
Now, when the child flow is ready, you can trigger it from the main flow. Replace the whole evaluation of the task, the part you moved into the child flow, with the ‘Run a Child Flow’ action.
NOTE: to run a Child flow you must configure fixed connections that’ll be used. Since it’s started by another flow and not by a user there’re no connections it could reuse.
And that’s it, now users can take as long as they want for an approval task. Instead of creating a new task every 29 days you keep the original one while reminding users from time to time that the task still exists and wait for their response.
Summary
If you expect that the approval task can take more than 30 days, you’ll have to prepare your Power Automate flow for this alternative. One option is to delete the old task, restart the flow, and create a new task. Another one could be to split your flow into two as explained in this article, with the second flow being restarted over and over again, until the task is completed.