“Is there a way to pause my Power Automate flow and let it continue only after a specific SharePoint column has a value?”
When you build multiple step processes on SharePoint lists, you might need also some input from users. Not only an approval task, but an actual update of the SharePoint item. It can be selection of the next approver, a date for the next action, or a business unit that should take over… But how can you tell the flow to pause and continue only after user provides the input?
‘Do until’ action
Since Power Automate doesn’t have an action to wait for a column update, you must use a workaround. It’s a similar workaround with the ‘Do until’ action as used in the parallel approval task reminder.
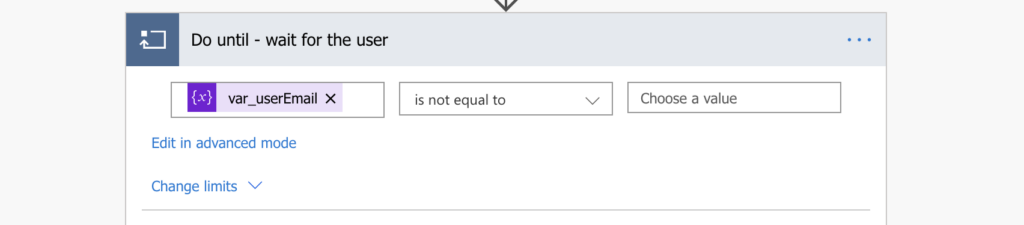
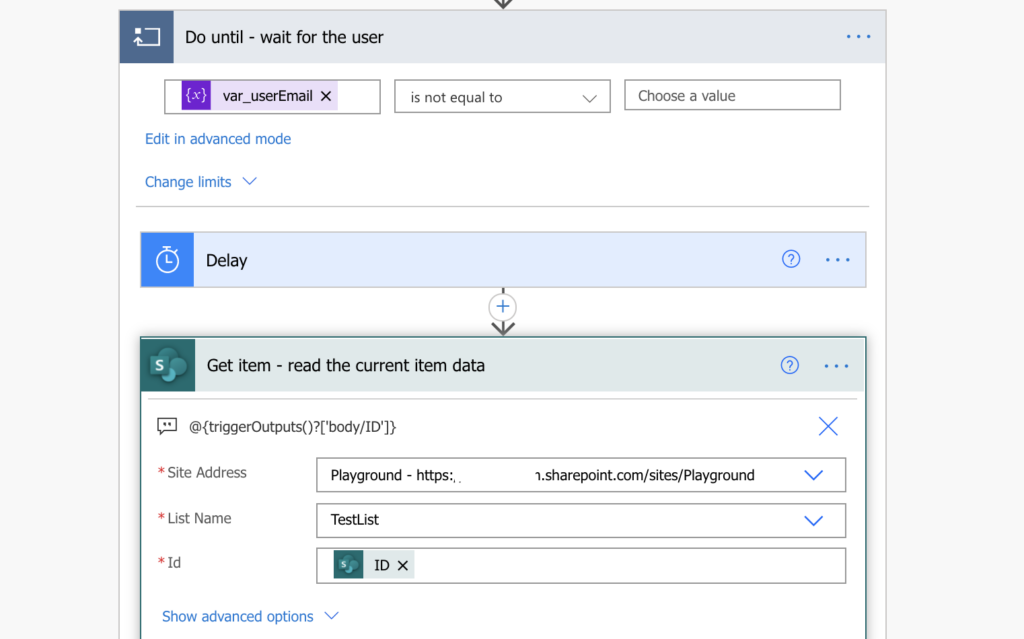
‘Do until’ action will repeat the actions inside until the condition is true, or until it reaches the loop limits. That means that the condition is the ‘end‘ condition, not the ‘keep running’ condition. For example, the ‘Do until’ action below will stop looping once the variable has a value (is not equal to <empty value>).
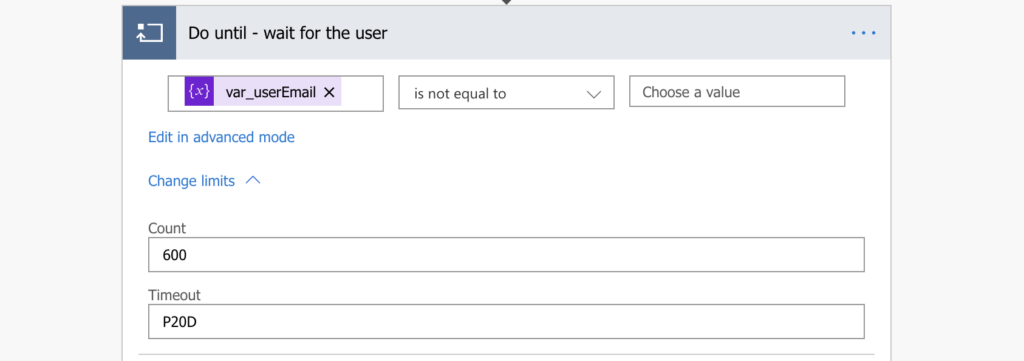
The loop limits are hidden under the ‘Change limits’ button. You can define either number of runs or a timeout period, and it’ll stop once it reaches one of them. The ‘Count’ is a simple count of the loops, 5000 being the maximum, the ‘Timeout’ is a time period in the ISO 8601 duration format. On the screenshot below you can see a configuration that will move out of the ‘Do until’ after 600 loops or 20 days, whichever comes first.
The flow
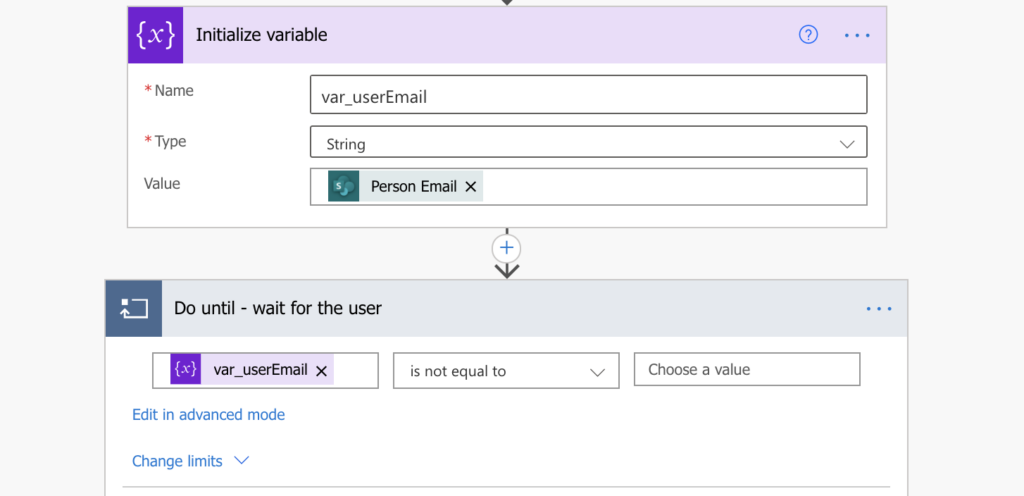
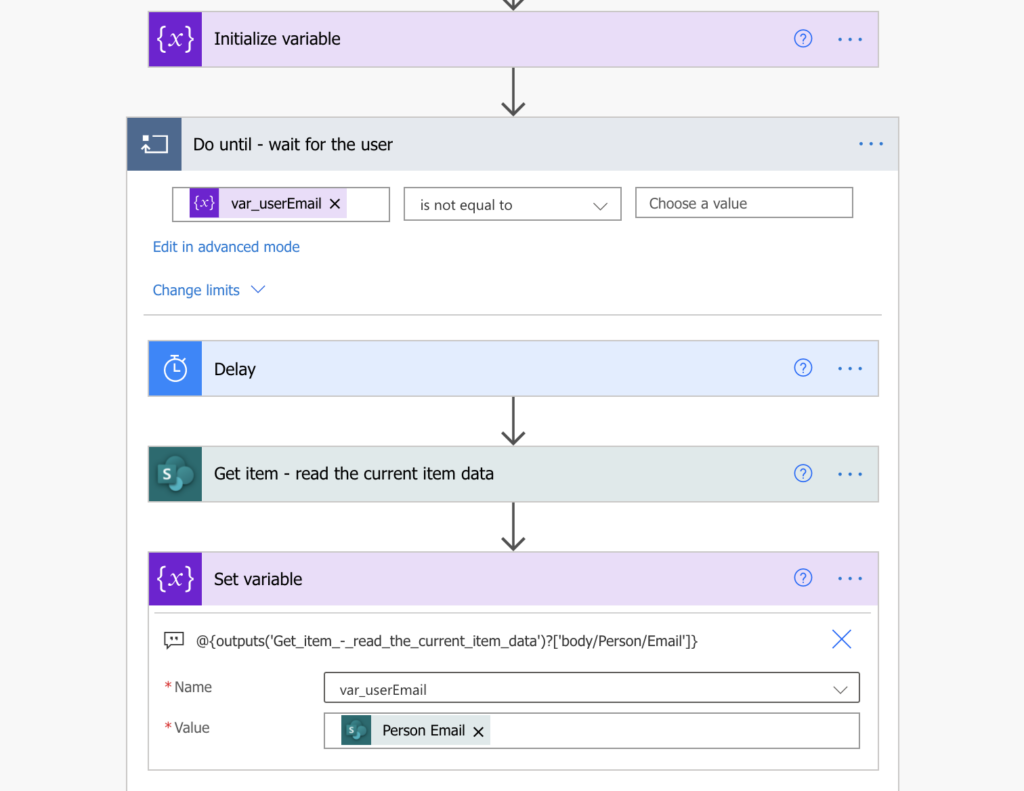
Initialize a variable to store the column value
Now, for the actual flow, you’ll need a variable to store the value from the SharePoint column, e.g. user email. It’s needed because you can’t use the dynamic content directly. If you used a dynamic content, it would always have the same, original value. Variable will allow you to work with the latest value. It’s the variable you’ll use in the ‘Do until’ condition.
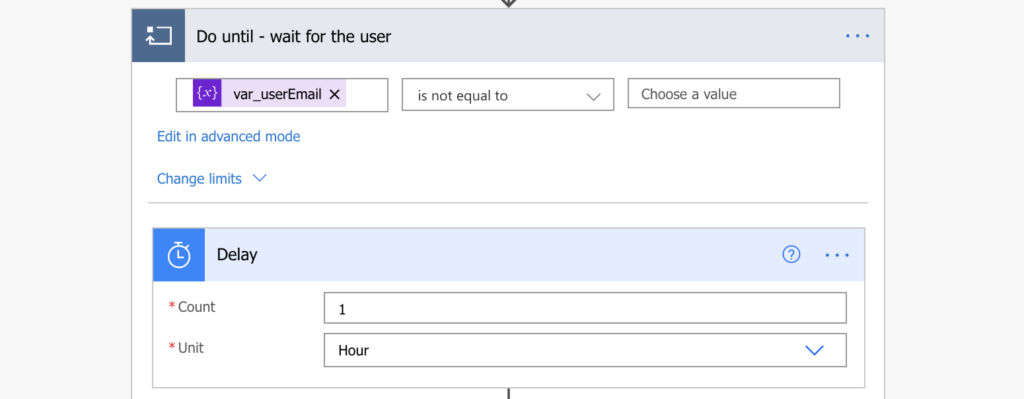
Delay the loop for a while
Since you don’t want to consume all the loops in the limit at once, you should ‘Delay’ the loop for a moment. It’s the pause that will give users some time to update the item, until you check it again, e.g. in 1 hour.
Get the updated item
After the ‘Delay’, get the item again with the ‘Get item’ action. With this action you’ll always get the latest version of the item, with all the current values.
Update the ‘condition variable’ with the new value
The last step in the ‘Do until’ action is to update the variable with the new value. This ‘Set variable’ action will be the last step in the loop, and the flow will go back to the beginning. It’ll check again if the variable has a value, and if not, it’ll repeat the steps inside ‘Do until’.
Summary
With the ‘Do until’ from above you can pause your Power Automate flow until column has a value. It’s a workaround, it has a few limitations, but if the whole process is fast and not too urgent, it’s a fine solution.
One limitation is that you can’t check the item real time. If you need to process the update item in real time, you’ll need separate flows with trigger conditions for each step. The solution above will check the item only once per the ‘Delay’ period.
You must also consider the limitation of 30 days for a flow run. You can’t wait in the ‘Do until’ actions for more than 30 days, the flow will stop itself. The limits for all ‘Do until’ actions in your flow shouldn’t go over 30 days (loop count * delay).
And the last one is that the ‘Do until’ will always run at least once. If it’s possible that the column will already have a value, you should add a ‘Condition’ before the ‘Do until’ and skip it if it’s not needed.
Thanks for the article. Will this have any limitations against API calls to the SharePoint list? Say you have the delay run every hour, will that count 24 times per day in API calls? Per user plan sounds like you have 40k a day, so less likely we will hit the limit, but just something to consider if maybe the delay is 5 minutes and user has several workflows, right?
Hello Jonathan,
yes, it’ll consume API call with each run of the loop. I’d use this only for flows that are not time critical, where check once per hour is enough.
If it’s a time critical flow it might make more sense to split it in more flows and trigger them once the column has a value, as I wrote about here: https://tomriha.com/how-to-run-a-power-automate-flow-only-once-after-sp-column-has-a-value/
This is one of the most straight forward ways to achieve the goal. Sheer brilliance.
Sadly this solutions seems to be “fixed” and can’t be used anymore
I just tried these steps, and it worked for me. I switched to the old designer to set it up because it wasn’t clicking for me what to select in the new designer, but after creating it and switching back to the new designer, it seems pretty straightforward. My flow is: Item created > Initial email send > Initialize Variable > Do Until with the delay, get item, and set variable steps > send email. Hope this helps in some way.