“What’s the best way to define user roles in PowerApps? How can I recognise if user has this or that role?”
If you’re building more complex PowerApps applications, you probably use multiple roles in them. There might be “read-only” users, users from various departments in different roles, administrators, and so on. Each of them has a different role in the application, and the application should recognise by itself what the current user can do.
But how do you implement that in PowerApps? What options do you have?
Always use M365 groups
Whenever you use role differentiation in an app, you should use M365 groups. A single place where you can manage the members and extend their permissions automatically – share the application once with the group and every new member will get access, including the specific role. Anything else can bring you only complications in the future. If you define the users and roles anywhere else, e.g. in a SharePoint list, it’ll be another place to manage them – easy to forget in the long run, hardly ever up to date.
Always create M365 groups for each of the roles. It doesn’t matter if you’re using SharePoint or Dataverse, free or premium PowerApps, M365 group is always the answer.
Check if user is member of a group
Once you have the groups, you can check if the user is a member of one of the groups with the solutions below.
Implement the logic in the PowerApps app
One way is to implement this logic directly in the app. Once the application starts, let it be on the OnStart property or on some loading screen, list all members of the related group(s) using the Office365Groups connector. For this you’ll need the group id.

Office365Groups.ListGroupMembers("172a1a94-1565-4e2d-8a68-c9260b527903").valueIdeally this ID shouldn’t be hardcoded in the application but in an environment variable – even if you’re not using premium licences.
Once you have the group members, select only their email addresses. You can either create a collection and select only the ‘mail’ column, or build a string from the emails as in the example below.
Concat(Office365Groups.ListGroupMembers("172a1a94-1565-4e2d-8a68-c9260b527903").value, mail, ";")Check if the current user’s email is among them. If he is, set the related role, if not, set the other role, or continue with the evaluation for another group by extending the condition.

If(
    Office365Users.MyProfileV2().mail in Concat(Office365Groups.ListGroupMembers("<groupId>").value,mail,";"),
    Set(varRole,"<belongsToGroup>"),
    Set(varRole,"<isNotInGroup>")
)
Note: here I’m using the Office365Users connector for the user email as the reference User().Email doesn’t always correspond to the email address in Entra ID.
Implement the logic in Power Automate flow
Another approach is to implement the logic in Power Automate flow. When the application starts, trigger a flow to get the user’s groups. Select their name, convert them into a string, and send them back to the app.
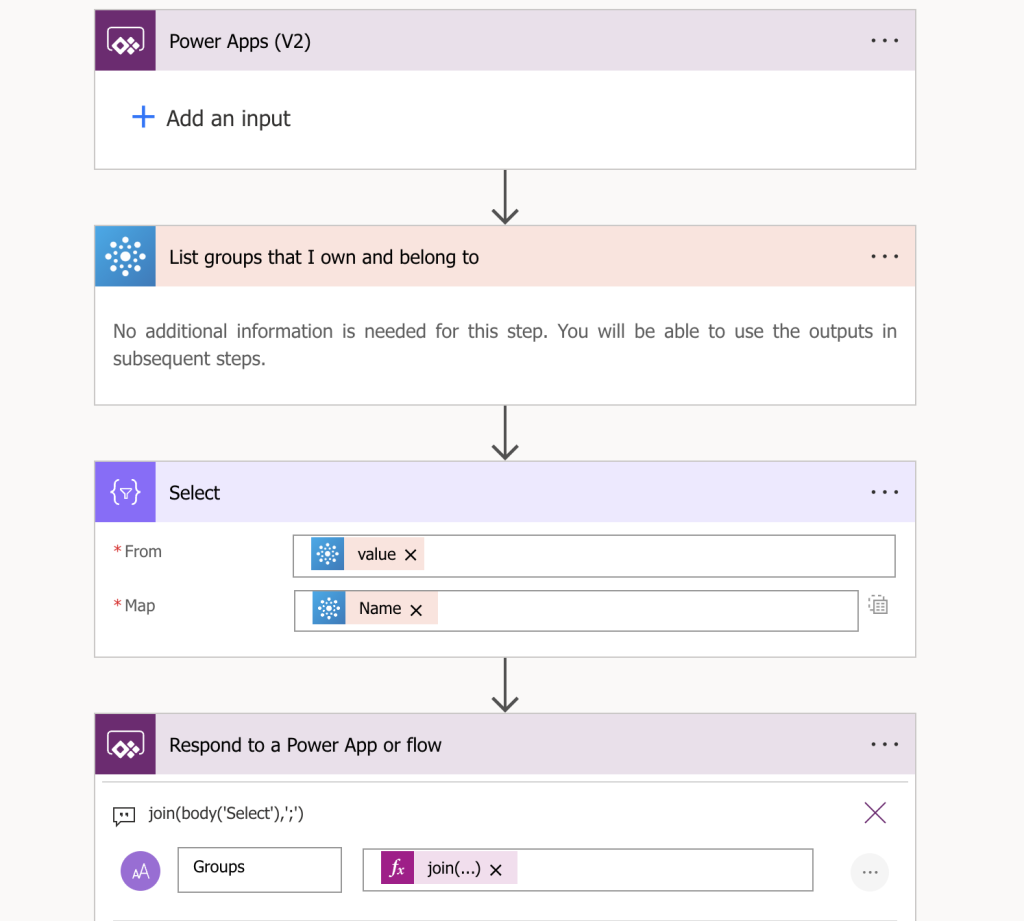
Here it’s up to you how much logic you move into the flow. You can get only the list of all the groups back, as on the example above, and check the groups in the app…

…or you can add the whole evaluation logic into the flow and return the role directly.
The benefit of the flow solution is that you don’t need to know the Group Id, the display name is enough.
Check if user has a specific role on the environment
While the solutions above will cover many situations, they still have a downside. If you’re using multiple environments for the development, e.g. DEV, TEST and PROD environments, the groups will change. Each environment will have its own groups, with different IDs and different names. That’s when the third option comes into play – checking the environment role.
Once you start building more complex solutions on Dataverse, you’ll start creating also custom roles with permissions on custom tables. These roles can be then used in the application too!
You can get the roles of the current user via a lookup to the Users table…
ClearCollect(colUserRoles, LookUp(Users,domainname = User().Email).'Security Roles (systemuserroles_association)')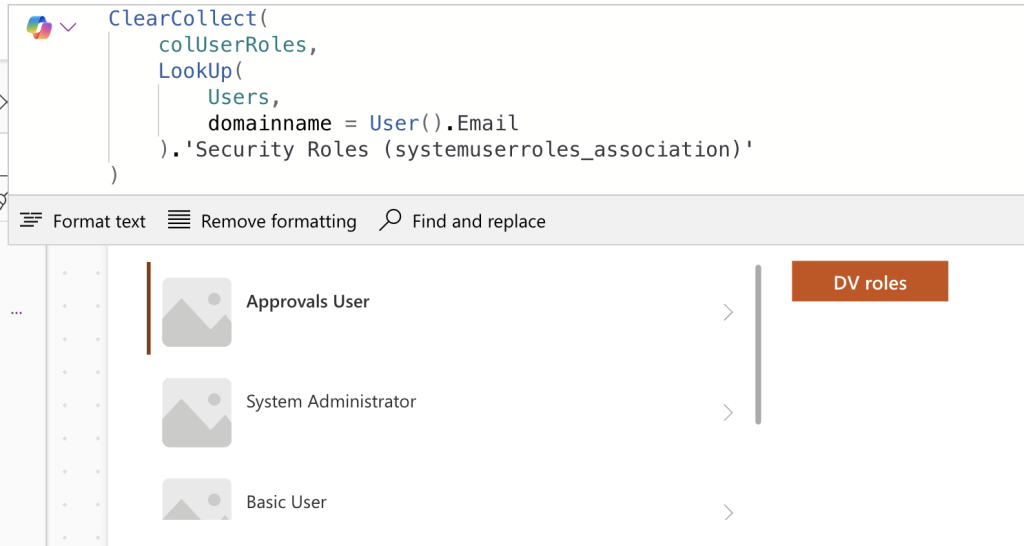
…or get the Teams he’s a member of. It’s not the Teams team here, but a Team on the Power Platform environment representing a specific M365 group.
ClearCollect(colUserTeams, LookUp(Users,domainname = User().Email).'Teams (teammembership_association)')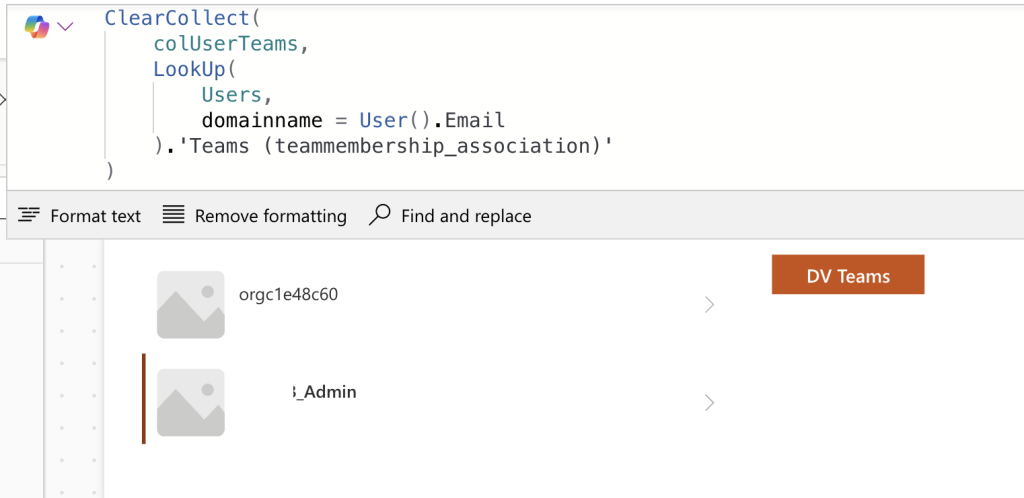
Check if he belongs to one of the teams / has a specific security role you’re looking for and adjust the role he gets in the PowerApp.
Summary
As you can see, there’re multiple ways to implement multiple user roles in PowerApps. Yet all of them have the same starting point – M365 groups. Create groups for each user role in the application, fill them with the users, and every time they start the application check to which group the user belongs. You can do so in the app, in a flow, or via the Power Platform security roles / teams, just pick one that’ll work for you.