“Do I still have to create all the documents manually, isn’t there some automated option, e.g. to create documents in Power Automate flow?”
One of the motivations to digitalise is to get rid of papers, to reduce the amount of documents the organisation needs for doing the business. But reducing the number doesn’t mean that there’ll be no documents. And even if you don’t print them out, there’ll still be many .pdf files running around – various proposals, confirmations, contracts, invoices and many more. What will change though is that you don’t have to create all the documents manually anymore!
How do you create documents in Power Automate flow? What options do you have?
NOTE: you need Word for Windows for these solutions, they’re not available in Office on MacOS.
The “free” approach
If you have only the basic Power Automate license and your documents are very simple, just replacing a few placeholders here and there, you can take the “free” path. A solution using the document properties and the possibility to show them in the file content.
Add the placeholders as columns to SP document library
To display the document properties, you must first add the properties to the file. Start from a document library and create columns for every placeholder you want to use. For example, if I want to add the employee name, manager, and a date to a file, I’ll create these 3 columns. All of them will be text columns only, no choice, no lookup, no people pickers… Just the text as it’ll be shown in the file.

Prepare a Word template
The next thing is the document template. You can’t create a document from scratch, it must always start from some template. A Word file with all the fixed content, leaving some space for the dynamic parts, the placeholders that’ll be replaced (highlighted by yellow below).

Upload the Word file in the library and download it again
Once you have the library and the template, upload the file into the document library. That’s how you’ll add the new properties into the file. Download it again and open in Word application.
Add the placeholders into the document
With the properties now available, add their placeholders into the file. Select the place for the placeholder and go to Insert -> Quick Parts -> Document Property -> <propertyName>.

Do the same for all the placeholders.

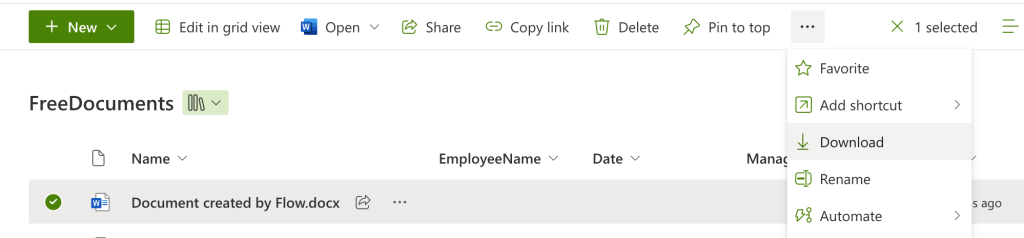
Upload the file back into the library
Take the updated file and upload it back into the library. That’s the template you’ll use for the documents in the Power Automate flow.
Create the file
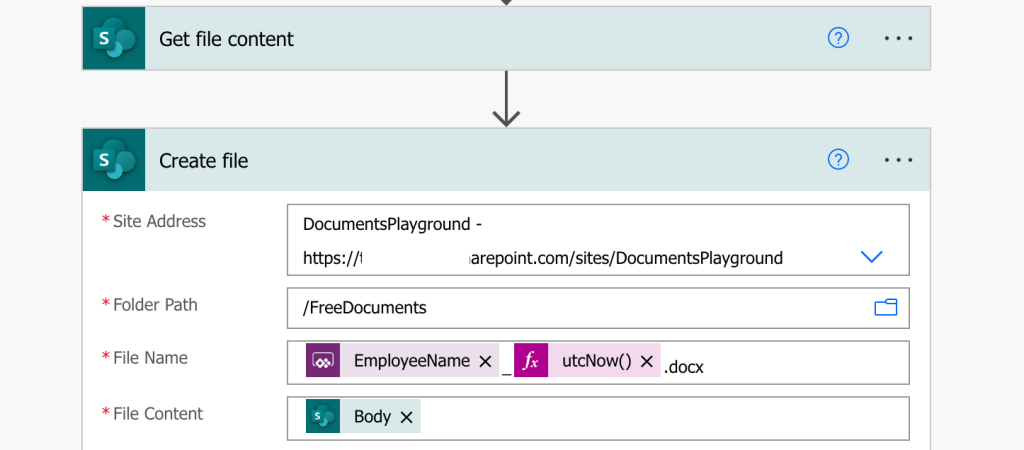
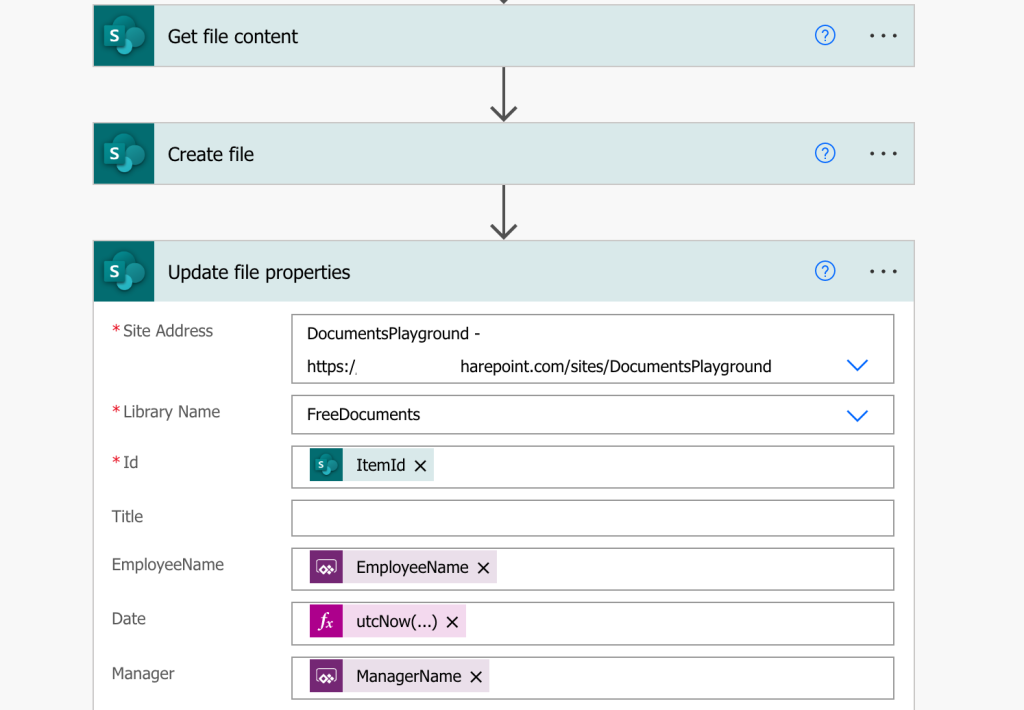
Now it’s time to finally start building the flow – get the content of the template, create a new file using the template and update its properties. Since there’re placeholders mapped to these properties, the placeholders will be replaced with their values.
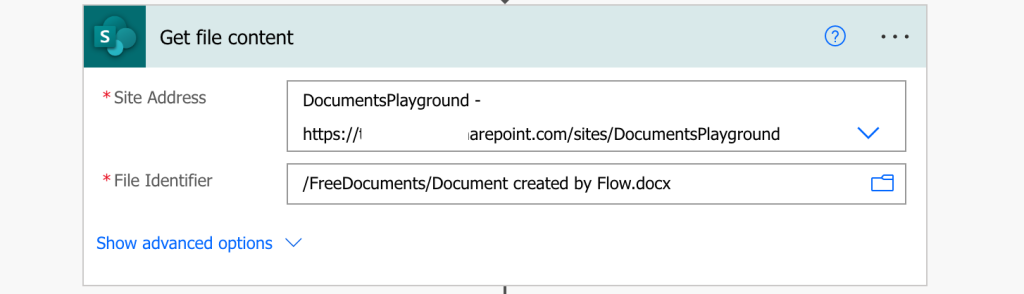
Get the content of the file, either select it directly or search for it in the library.
Create a new file using the template content – don’t replace the template!
Update the file properties using the values to show in the file.
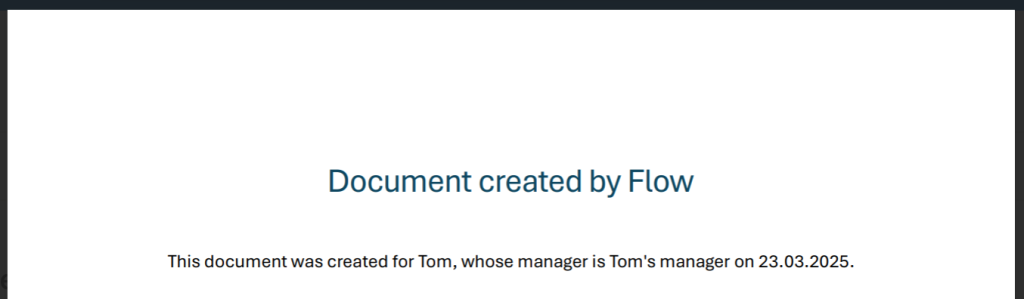
The result will be a Word document with your data, which you can convert into PDF through the OneDrive actions.
The “premium” approach
If all the steps above seem a bit too complicated, there’s another solution, but you’ll need the premium Power Automate license. No need for special columns in the document library and all the properties, here you start from the Word template.
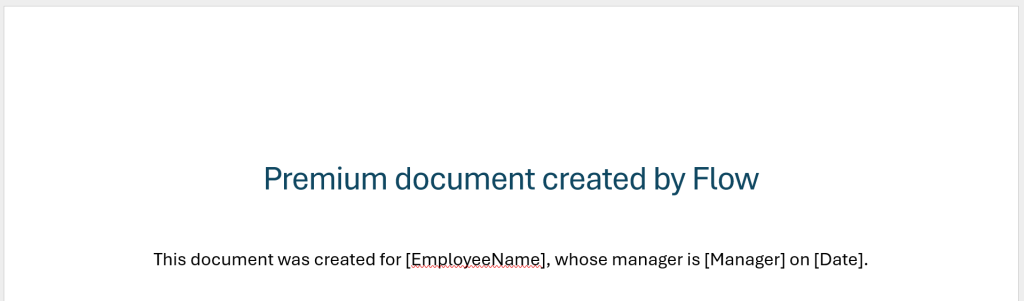
Add the placeholders into the Word file
Create a Word file that’ll serve as a template with all the placeholders you’ll need. This time go into the Developer tab – if you don’t see it, add it by right click on the ribbon -> Customize the Ribbon.
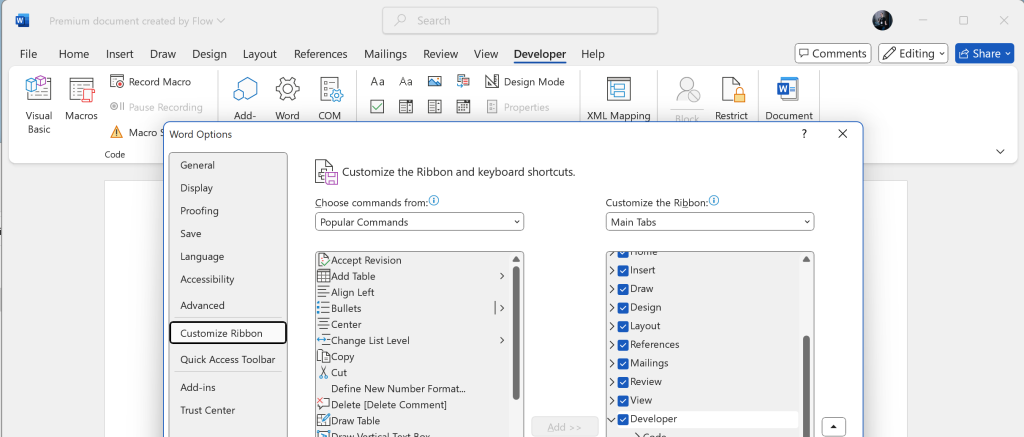
Type in the placeholder name, I prefer to keep it inside […] to make it easily recognisable and add the ‘Plain Text Content Control’.
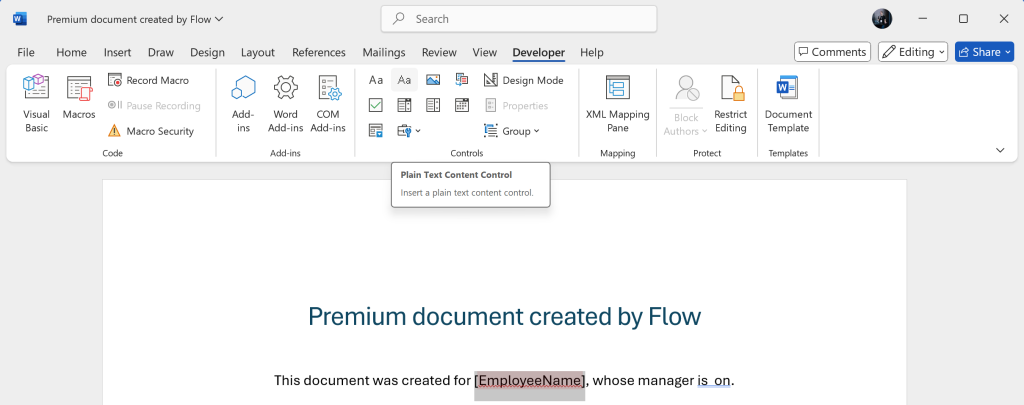
From all the available controls you’ll probably need only the ‘Plain Text’ and ‘Repeating Section’ (bottom left).
Add a content control for each placeholder. Each control has also some configuration, e.g. to support carriage characters that’ll allow you to display whole paragraphs of text.

Once finished, upload the file into a document library.
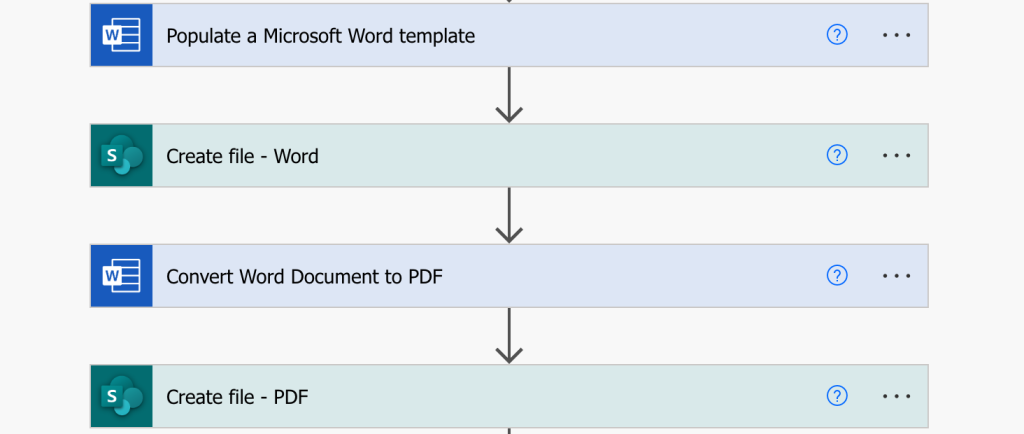
Create the file in a flow
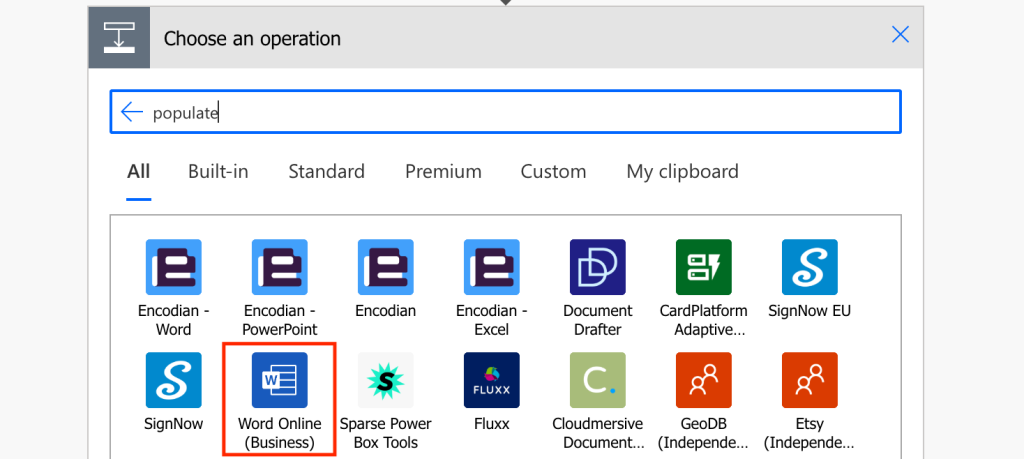
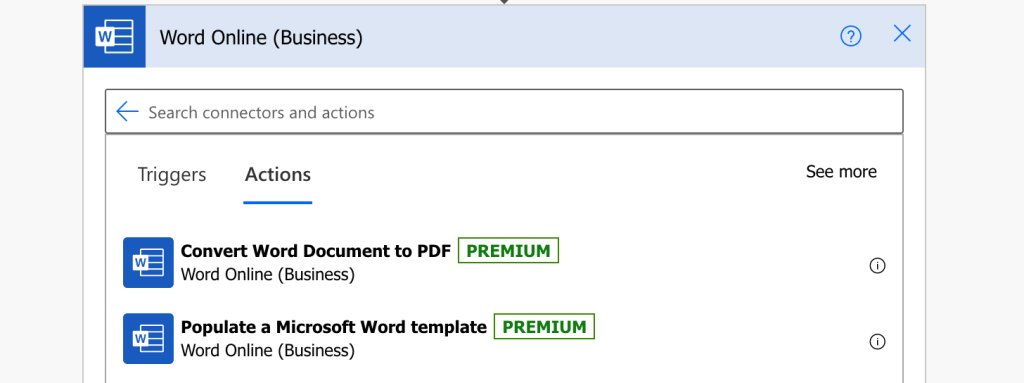
The flow itself is then quite straighforward. Search for the “Populate” action, it’ll probably show some Encodian stuff first but ignore it, you want the ‘Word Online (Business)’ actions.
There’ll be only two – populate a Word template and convert Word to PDF.
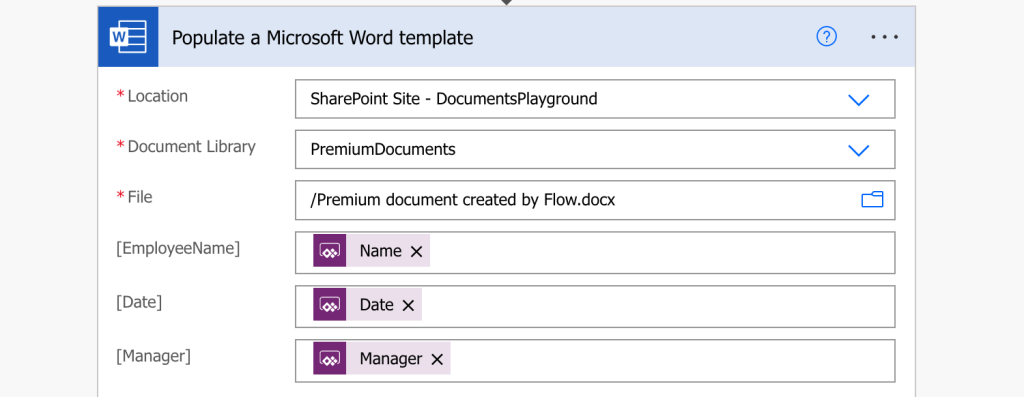
Select the ‘Populate…’ one and configure it to use your template. If you’re using environment variables to reference the template, you’ll need the source and drive id.
This action will provide you the file content to create the new file.
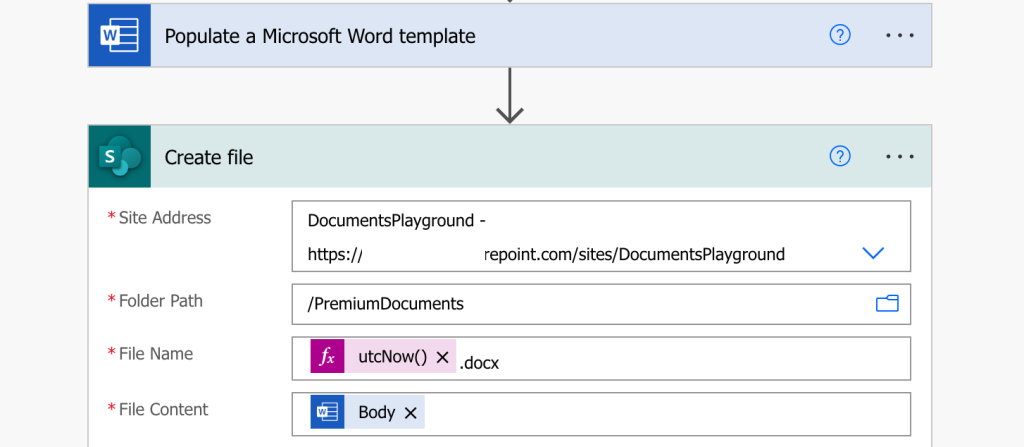
And if you want a PDF, add the ‘Convert Word document to PDF’ in the flow.
Benefits and limitations of the premium approach
The premium approach is much easier to implement as you don’t need a SP column for each property, and it allows you to add repeating sections into the document (add a table -> place ‘Repeating section’ on the table, add ‘Plain text’ content in the cells). The flow is also much simpler, especially if the outcome should be a PDF file.
There’re a few limitations though for both the solutions:
- you can’t transfer Rich text to the files, it’ll use the formatting of the placeholder
- to combine normal / bold / italic in text blocks you’ll need multiple placeholders, each with its own formatting
- even if the placeholder is empty, it’ll still take its space in the document
- the controls ignore spaces at the beginning and at the end – if you’re using multiple placeholders you must add the spaces between the placeholders
- special characters like e.g. checkboxes must be transferred as characters
Summary
This article described two ways to create documents in Power Automate flows, a free solution and a premium one. The free solution is useful if you don’t have a premium license and you’re building simple documents – just a few placeholders here and there. It’s more work to prepare the template and more work to prepare the flow, but it’s free.
The premium path is a lot easier, however you need the premium Power Automate license. But for this small fee you don’t have to bother with SharePoint columns, you can have a ton of placeholders in the document and you can add whole blocks of text, even repeating sections with dynamic number of items. It’s also much easier to convert the file in PDF at the end as you don’t have to do it via OneDrive. All in all, if you’re serious about creating documents in Power Automate, I think the premium license is worth it.
Tom thanks for this blog post. I’m wondering if my use case can be done as well. I have a scope template document, that I created each deliverable as its own paragraph and saved them as building blocks. I want the user to complete a form with checkboxes for which scope items need to be included in the document then the flow will add those “building block” text paragraphs into the placeholder content controls I have set up where needed. Is this possible? Later in the document I would take the checked scope items and build a table of deliverables with deliverable dates, But I think I can do this by passing an array with repeating content.
Hello Ryan,
it’s doable, you’d just have to dynamically assign texts into the placeholders. As I wrote in the article, if you don’t use a placeholder it’ll still take the space, meaning if users skip 2 checkboxes and check the 3rd one the test would begin on the position of the 3rd placeholder – you must collect the texts first and then distribute them dynamically across the placeholders.
Hi Tom,
I tried to use this flow but I have a problem with the conversion to PDF. It seems that Power Automate cannot find the correct file.
I always get an error saying: Action “Convert_Document_Word_to_PDF” failed: The selected file does not exist, please select a valid file and drive.
In my flow I should create a pdf file for each form submitted (with the information being filled in). I have created the template and the word file creates it but I cannot point to the correct file to convert to pdf.
Hello Giulia,
for the ‘File’ in the ‘Convert Document Word to PDF’ action use the file name starting with /, e.g. /File.docx.