“With the holiday season nearby I’d like some possibility to delegate Power Automate approval task (s), is there a way to do it for other users?”
In the past, if you used other workflow engines, e.g. Nintex, there was a possibility to set delegation. You knew you were going on a holiday, so you set up automated delegation. All tasks received at that time were sent to another user. Now, Power Automate doesn’t give you that option.
I already proposed a solution you can include in an approval process, but it works only for the new tasks. What about the existing tasks? A central solution that you don’t have to include in every flow? How can you take any existing task and reassign it to another user?
The solution is now available as a Power Apps app too!
Since the solution is quite complicated and there’re many things to take care of additionally to the reassignment – permissions to the task, permissions to the related item, user role, etc. I developed a Power Apps application that’ll do exactly this – delegate any task to another user.
Get the application, deploy it on your environment, and delegate any existing task in minutes!

…or follow the steps below.
You must do it directly in Dataverse
As already explained in previous articles on various number of approvers and real time approval tracking, the tasks are stored in Dataverse tables. It’s multiple tables and it might be a bit confusing before you understand all the relationships, but once you do you can manage the tasks.
The table you’re most interested in is the Approval Request as that’s where all the tasks are. Each row in this table is a separate approval task, assigned to a specific user. Meaning if you want to delegate a task, you must know it’s id to find it. It’s important to note here that it’s not the Approval ID you get from the ‘Create approval task’ action, that’s id in the Approval table (you can use it to find the corresponding task, but that’s not the topic of this article).
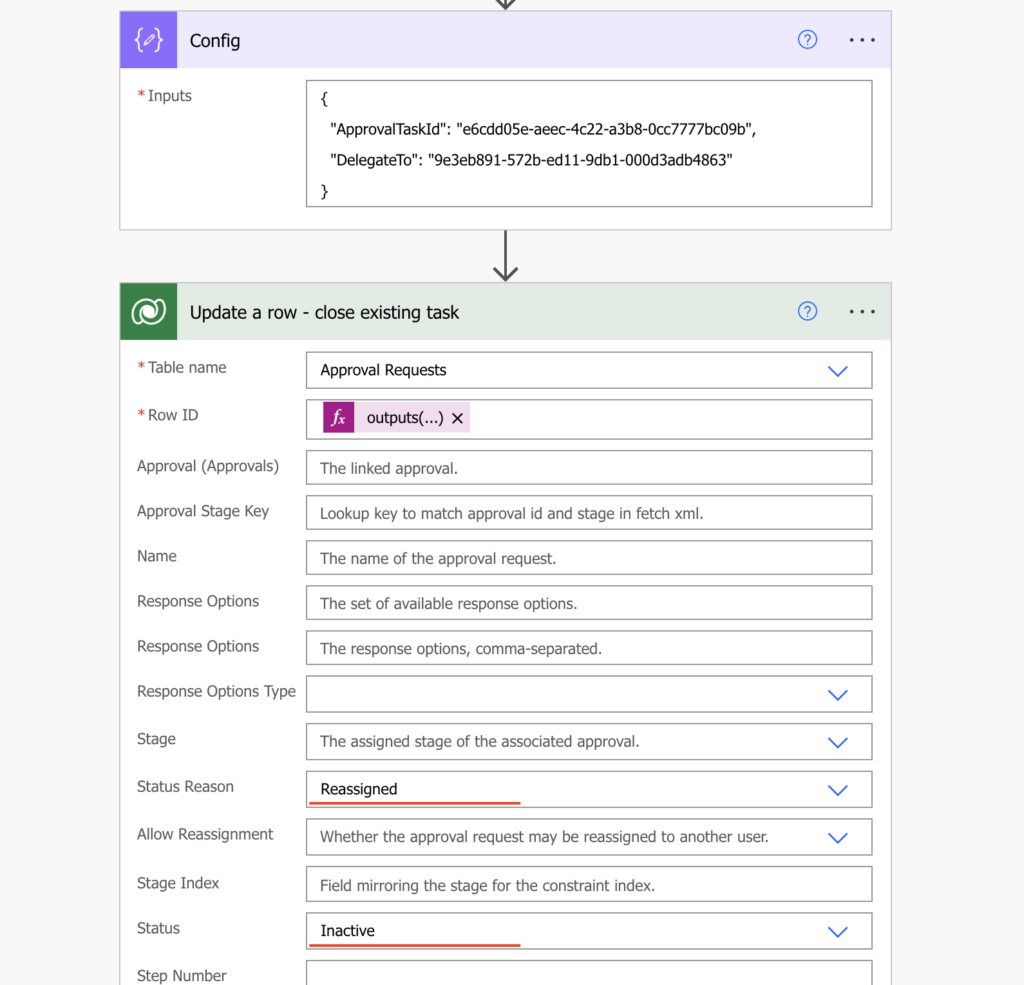
To delegate a task you need two ids – id of the approval request in the Approval Request table and id of the new assignee from the User table. I’m using fixed ids in this example but you can get them dynamically in your flow or PowerApp.

Set the original task to Reassigned
Knowing the two ids, the first step is to close the current task assigned to the original approver. Add the ‘Update a row’ action, find the task using id and set its Status Reason to ‘Reassigned’ and Status to ‘Inactive’.

This will disable the original task, it can’t be completed anymore. The next step is to create the new task.
Create a new approval task for the new approver
Following the logic that tasks are in the Approval Request table, create a new task by adding a new row. Add the ‘Add a new row’ action to the flow and recreate the task.
Use the output from ‘Update a row’ to fill all the fields except the Owner and Status. Be careful about the lookup fields to add the schema name of the target tables.
/msdyn_flow_approvals(<ApprovalId>)

/systemusers(<UserId>)

/msdyn_flow_approvalrequests(<OriginalTaskId>)
As you can see, there’re a few columns that have a different value than the original task, which is now inactive. It’s the Status and Status Reason, which make sense as this task is active. The Reassigned columns have value this time as it’s referencing the original task. And most importantly, the Owner columns – that’s the assigned user for this task!
The Owner fields are where you enter the new approver. But as you can see, it’s referencing another Dataverse table – User. That’s where you must use the User table id of this user as it’s different from the user profile id!
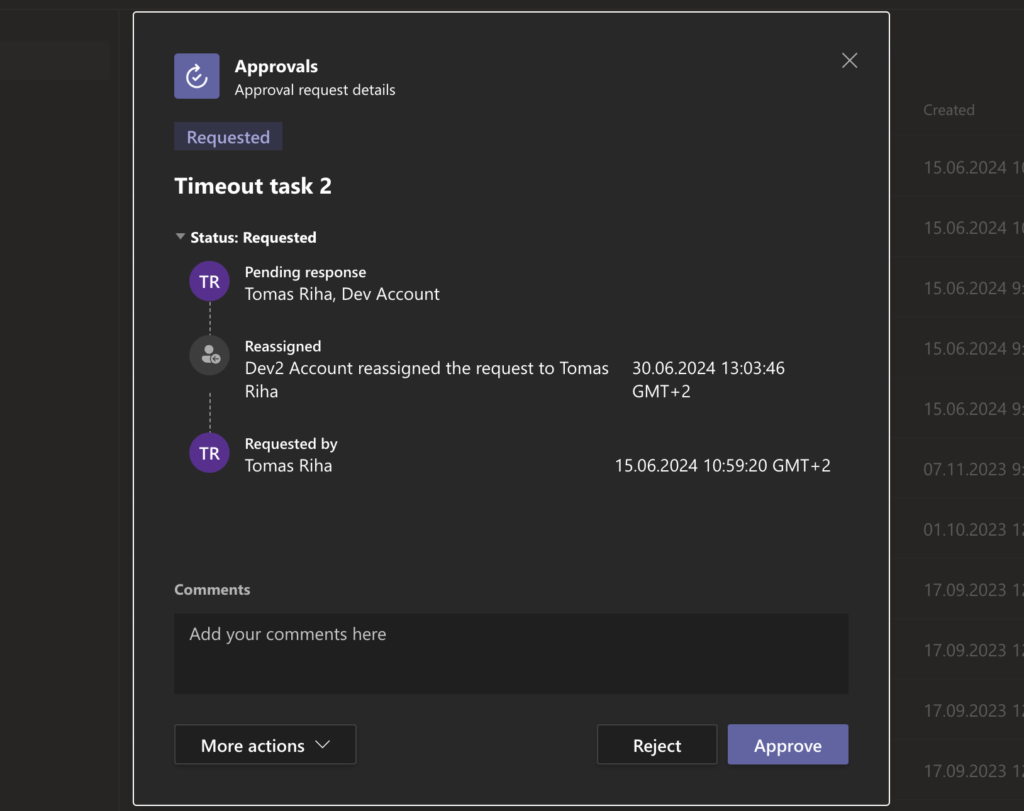
Once you define all the fields and run the flow, it’ll reassign the task to the other user.

Unfortunately, it won’t trigger any notification so it’s still up to you to send an email or a Teams follow up.
Summary
As you can see in this article, it’s possible to delegate Power Automate approval task to another user, although it’s not the most straightforward approach. There’s no http request you can call nor an action you could use, you must do it on the database level. Get into the right Dataverse table, close the existing approval request, and create a new one for the other user. If you set all the fields, especially the statuses and lookups right, the user interface will understand what happened.
Hi Dear,
I would appreciate your support in providing me with the steps for the Owner (Owners) and Owner User Index – it is not clear to me with Output.
Many thanks for considering my request.
Bilal
For I used the users ID. I access this information from users table.
My example:
first(outputs(‘OwnersUserID’)?[‘body/value’])?[‘systemuserid’]
Hi Tomas Riha,
This method works perfectly. Some users received this error message “The requested approval is not accessible to the caller”
Do you have any idea about this specific error?
Thanks
Hello Volkan,
I don’t remember if I saw this specific error, but my guess would be that the user doesn’t have access to the row in the Approvals table so I’d try this: https://tomriha.com/how-to-share-dataverse-row-with-a-user-using-power-automate/