“I’d like to give users a possibility to simply click on a link in SharePoint view and be redirected to logs list pre-filtered for given item.”
When building any flow in Power Automate, I always recommend creating your own list with logs. Not only to keep approval history forever, as in my approval template, but to keep any important information. Anything you might need after the 30 days when Power Automate automatically removes the flow run history.
But it’s one thing to have the information and another to access it. Once you start logging it’ll create a lot of entries, a lot of items in the SharePoint list. And the more items you have, the harder it might be to find what you’re looking for. That’s why I like to add some easy filtering options.
Add it directly to the item
The easiest way is to add a link directly to the item. A dedicated column where users can click and it’ll redirect them to the logs list, pre-filtered for the selected item.
It’s a combination of two solutions I already explained – a JSON formatting to add a hyperlink and a link to pre-filtered SharePoint list.
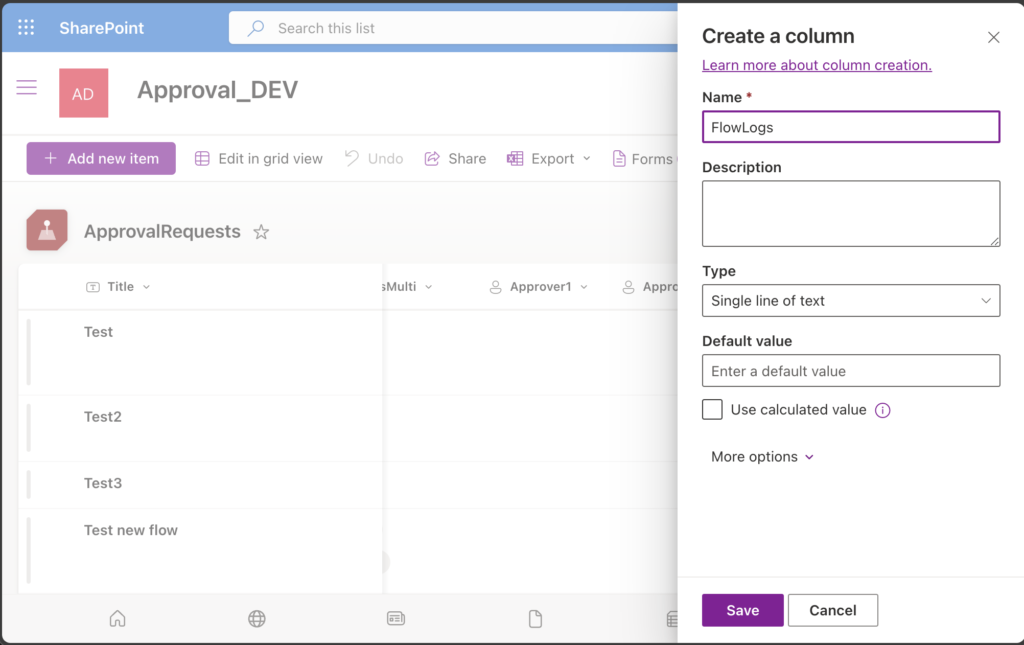
As with the JSON formatting, you must add another column. It doesn’t matter what type of column as its value will be overwritten by the JSON so let’s keep it Single line of text.
Get the link
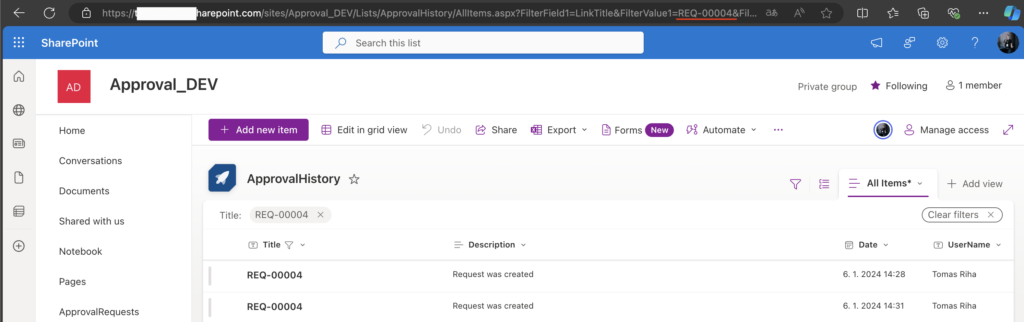
The next step is to prepare the link using the unique identifier of the request, let it by the SharePoint ID or a custom column. Go to the list with logs and apply a random filter on the unique value column. Copy the url and search for the ID you selected. On the example below I’m filtering by the REQ-00004 title.
That’s the url you want to use in the JSON column while replacing the specific id with the item value, e.g.
https://xxx.sharepoint.com/sites/Approval_DEV/Lists/ApprovalHistory/AllItems.aspx?FilterField1=LinkTitle&FilterValue1=<UniqueValueFromItem>&FilterType1=ComputedUse it in the item
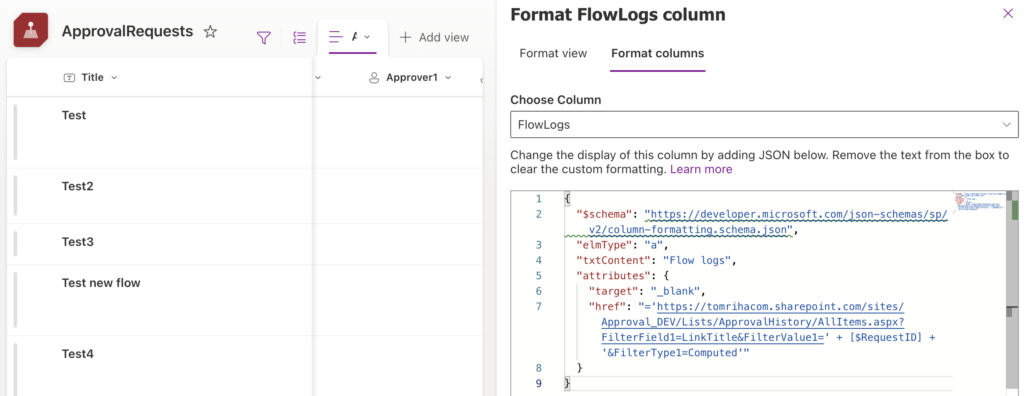
Once you know what link to add you can start with the column JSON formatting. The difference from the previous article will be in the ‘txtContent’ – the text in the column, and the ‘href’ – the actual link.
Since there’s a dynamic part in the link, the one taken from the SharePoint item, you can’t use the link right away. If you did, it’d apply the same filter for all SP items – that’s not the goal.
Take the first part, before the unique id, that one will be the same for all items up until the ‘=’ character. Then comes the dynamic part referencing the column with the unique id by its internal name. The last part is then everything after the unique id, again, a fixed value.
Added to the JSON code it might look as below (my column name is RequestID).
{
  "$schema": "https://developer.microsoft.com/json-schemas/sp/v2/column-formatting.schema.json",
  "elmType": "a",
  "txtContent": "Flow logs",
  "attributes": {
    "target": "_blank",
    "href": "='https://xxx.sharepoint.com/sites/Approval_DEV/Lists/ApprovalHistory/AllItems.aspx?FilterField1=LinkTitle&FilterValue1=' + [$RequestID] + '&FilterType1=Computed'"
  }
}
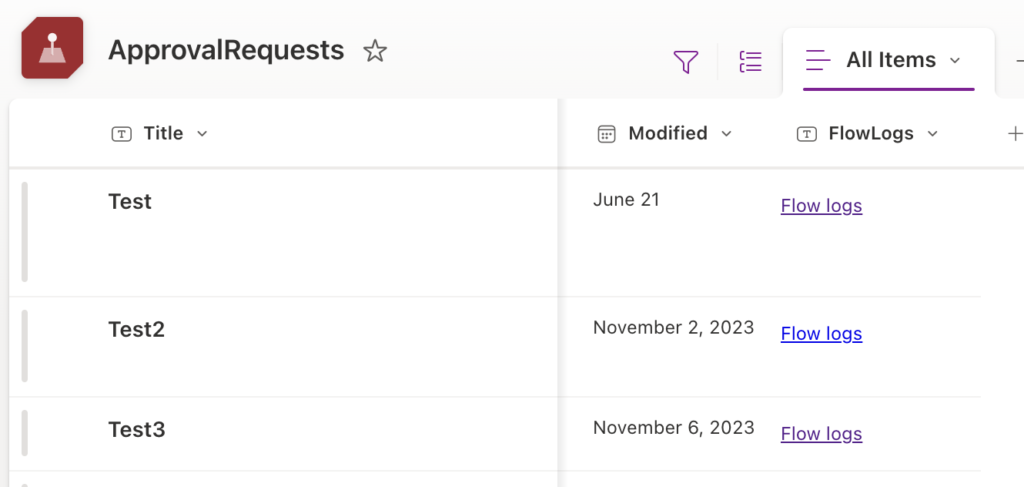
Once you save it it’ll add a clickable link to each item in the list. This link will send users to the logs list while filtering only items for the specific request.
Summary
When you store long term flow logs, you must think also about how to access them. You could just keep them in a single list and always apply the desired filter, or you can optimise it a bit. Add a new column to the main SharePoint list with a link leading to a pre-filtered list view. No need to remember any IDs or mess with the views on the logs list, just a single click to see what you want.