“I’m able to create a new sheet with Power Automate, but how can I then add a row in this new sheet? It keeps adding to the old one.”
Most of the Excel actions in Power Automate work with a table. You tell the flow which table it should access, and what should happen. But when working with Excel in a standard way, you don’t use so many tables. You probably use multiple sheets instead. If there’s another type of information, you would create a new sheet, and store the data in it.
If you follow the same approach with Power Automate, you’ll notice the ‘Create worksheet’ action. It’ll create a sheet in the Excel file, but what’s next? How do you add a row to the new sheet?
Power Automate always needs a table
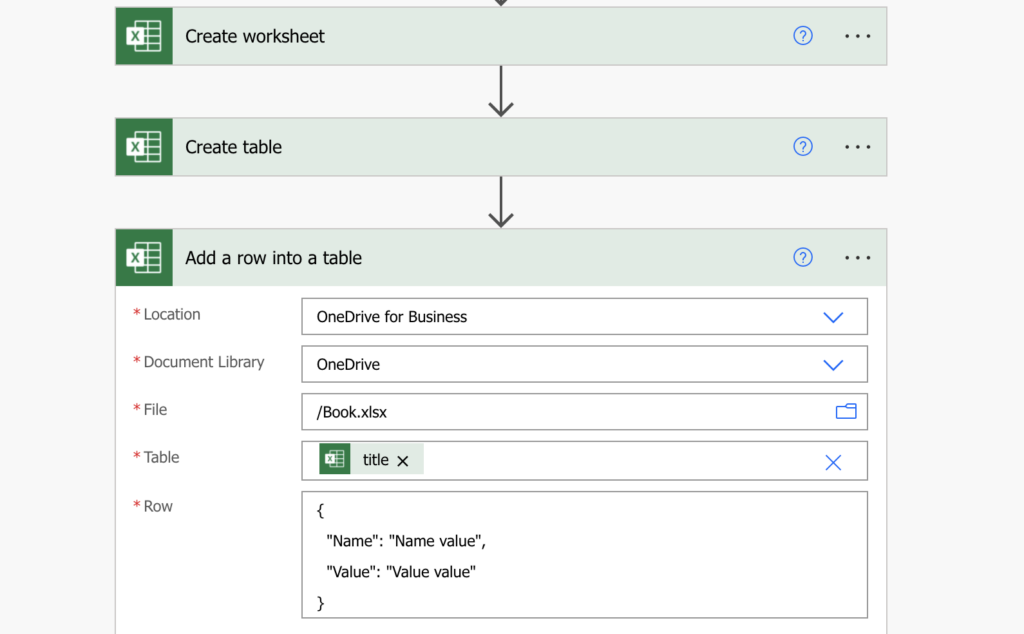
There’s no action you could use to switch sheets. But that’s not a problem, because Power Automate doesn’t work with sheets anyway. It always needs a table. No matter how many sheets you have or create, if they don’t contain a table, flow won’t process the data. That means, to add any rows in a new sheet, you must always include also the ‘Create table’ action.
Let’s create a new sheet called NewSheet.

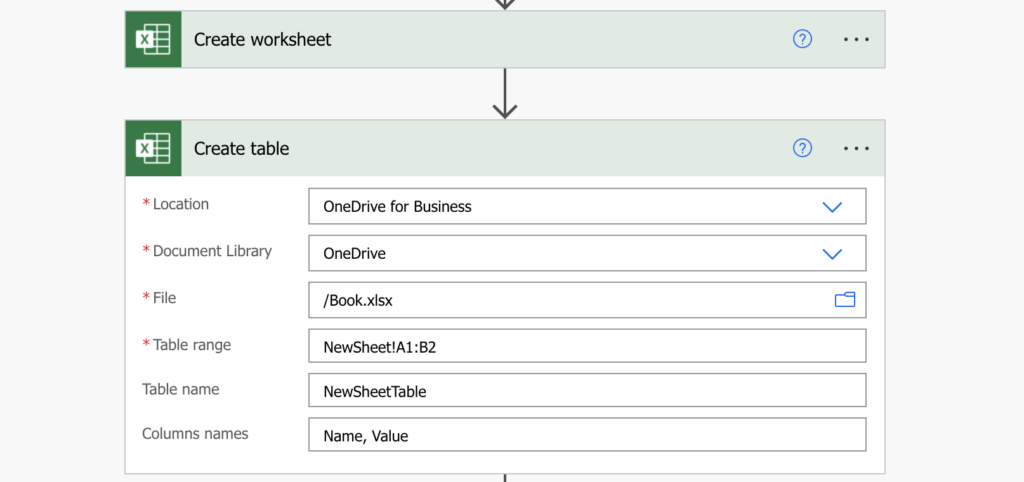
The output is an empty sheet. Before you can add any rows in that sheet, you must create a table on it with the ‘Create table’ action. The important part here is the ‘Table range’. You don’t enter just the start and end cell, that would create the table in the first sheet. You want to include also the name of the new sheet, using the standard Excel sheet reference:
NewSheet!A1:B2
In this example it’ll tell the flow: go to the sheet NewSheet, and create a table from cell A1 to cell B2. Once you have the table, you can start adding rows.

Summary
When working with Excel files in a flow, you must always work with tables. While Power Automate allows you to create a new sheet, it doesn’t allow you to add any new row into it unless you create a table in that sheet. Once it’s created, you can use all the other Excel features on that sheet.